
Set Up Campaign Emails
Configure sender identity, review the campaign email flow, and send yourself a test.
JV Copilot sends partner emails on your behalf at each stage of a campaign — invitations, reminders, kickoff, follow-ups, and thank-yous. Sensible defaults work out of the box; use this walkthrough when you want to control the sender, the wording, or both before launch.
Change Your Sender Identity (Optional)
Sender identity — the name and reply address partners see on every campaign email — is already set from onboarding. Change it if partners should see something different, like a brand name:
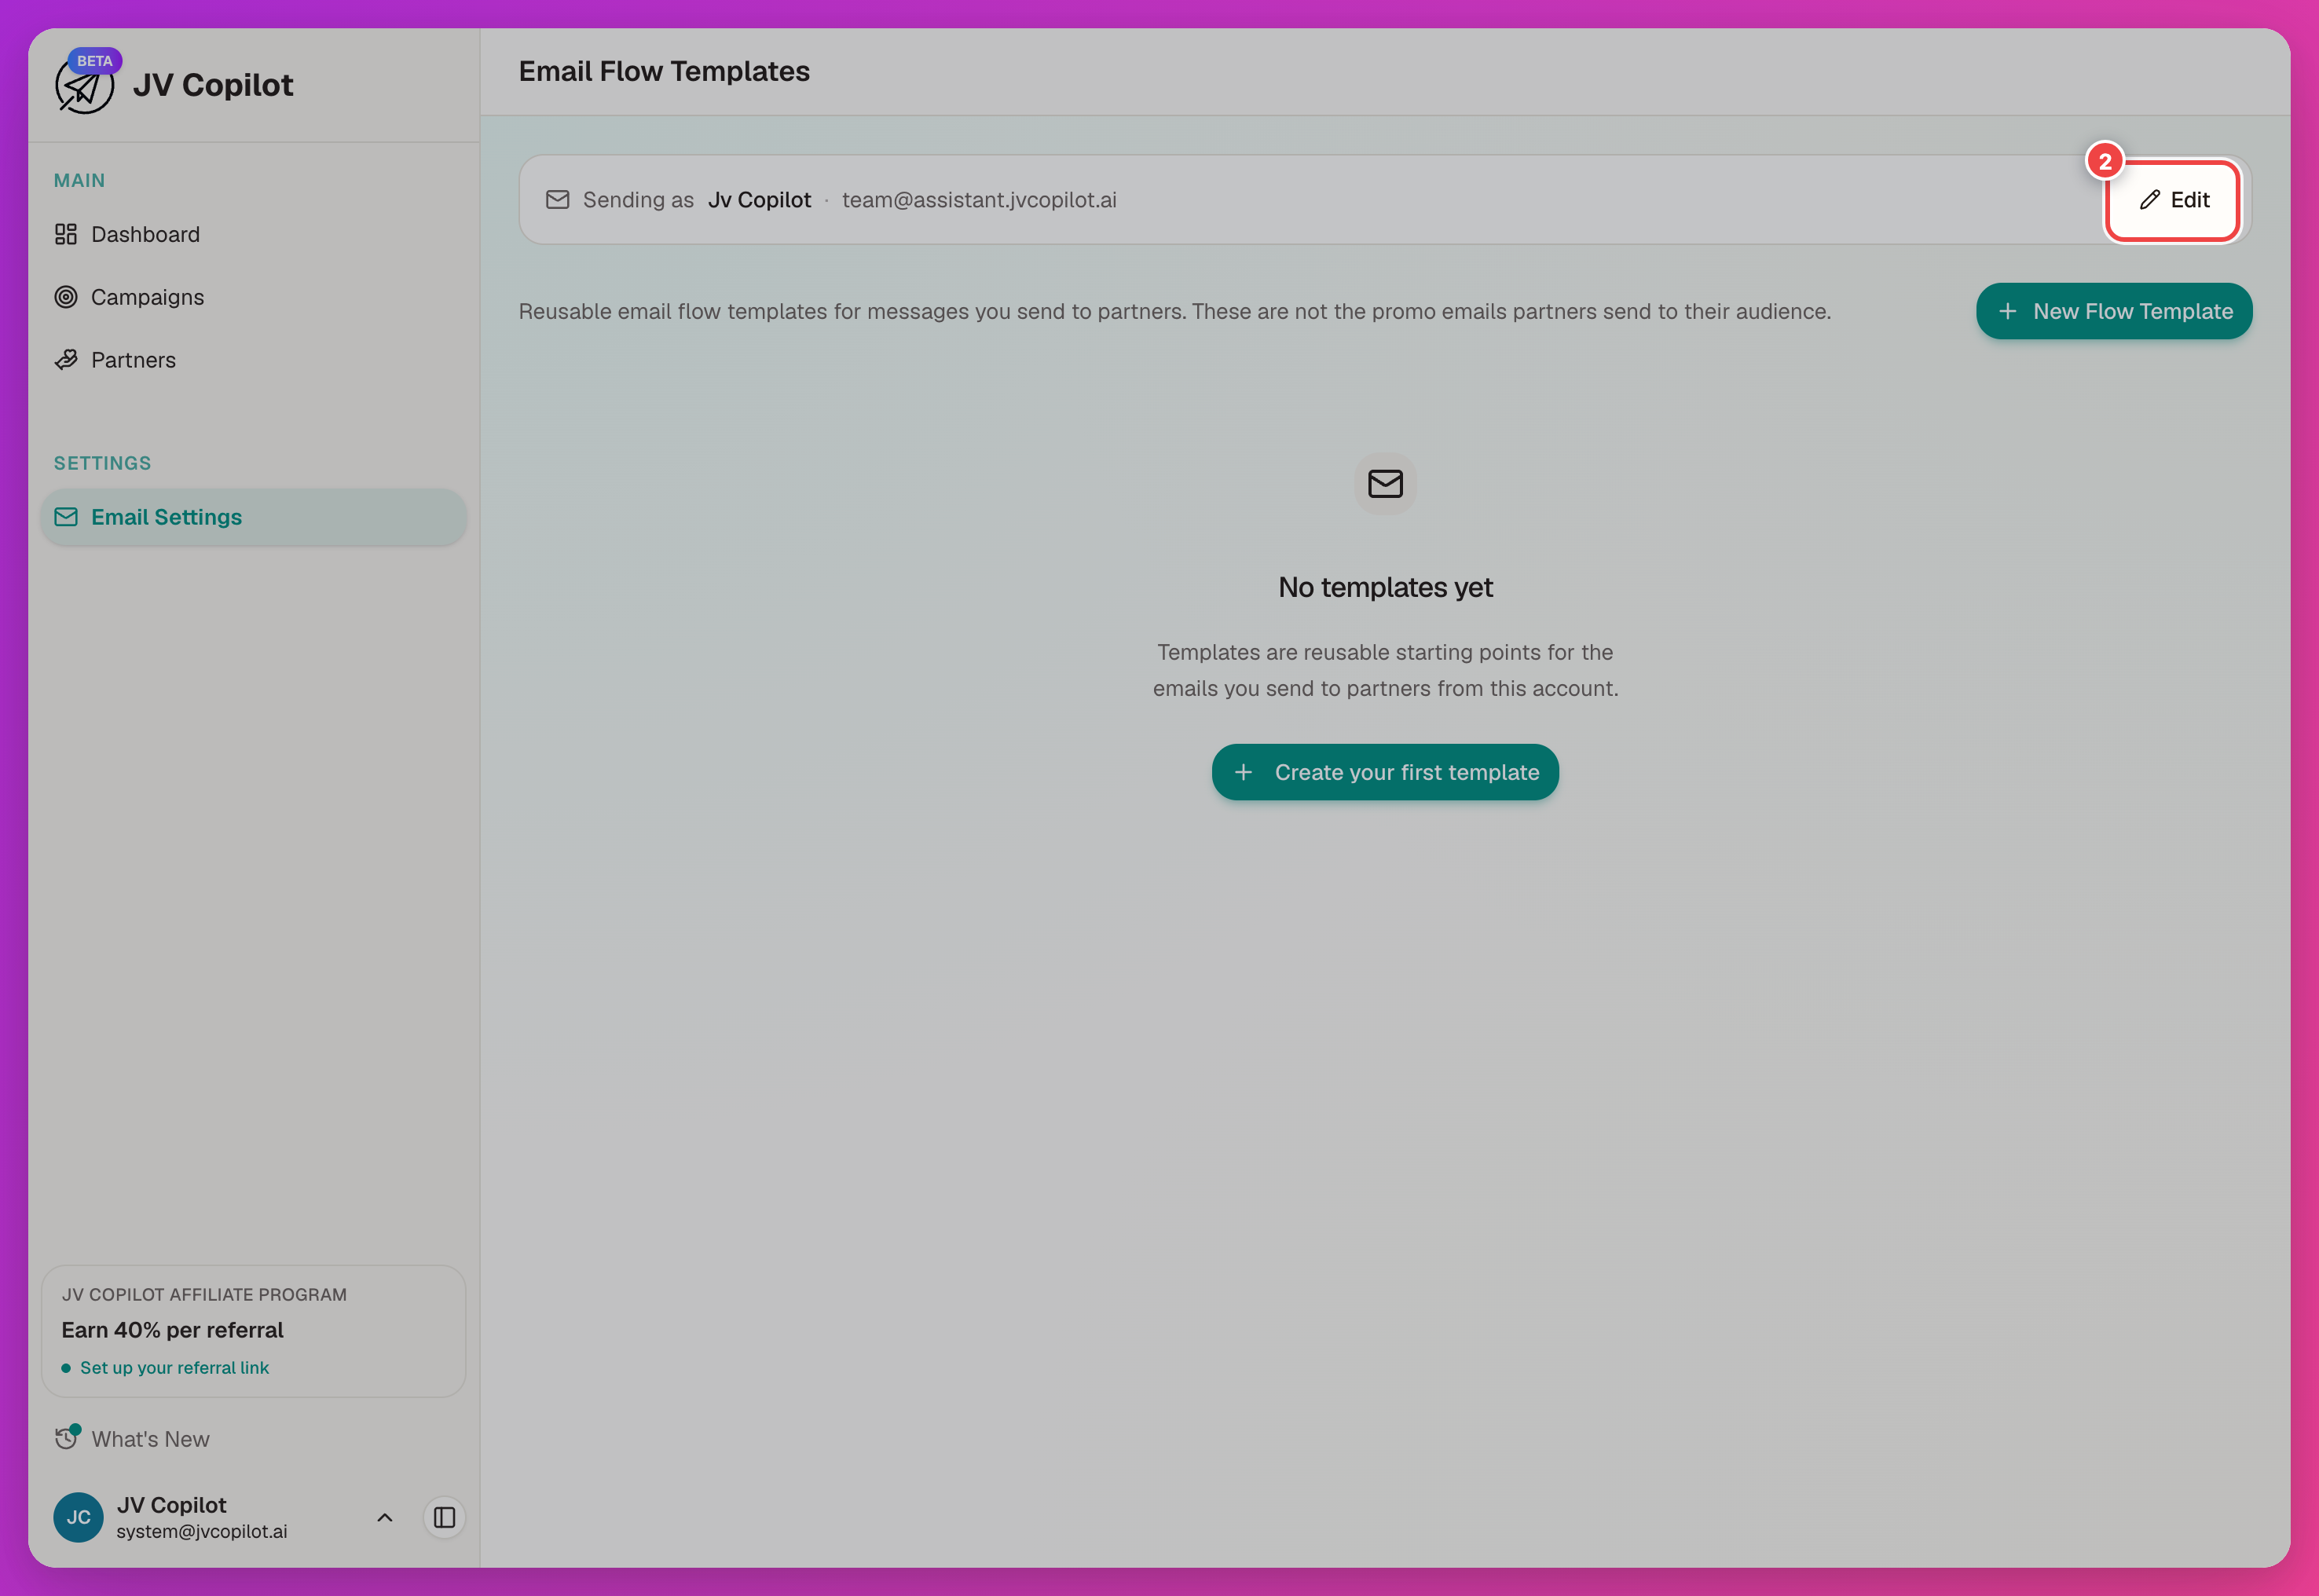
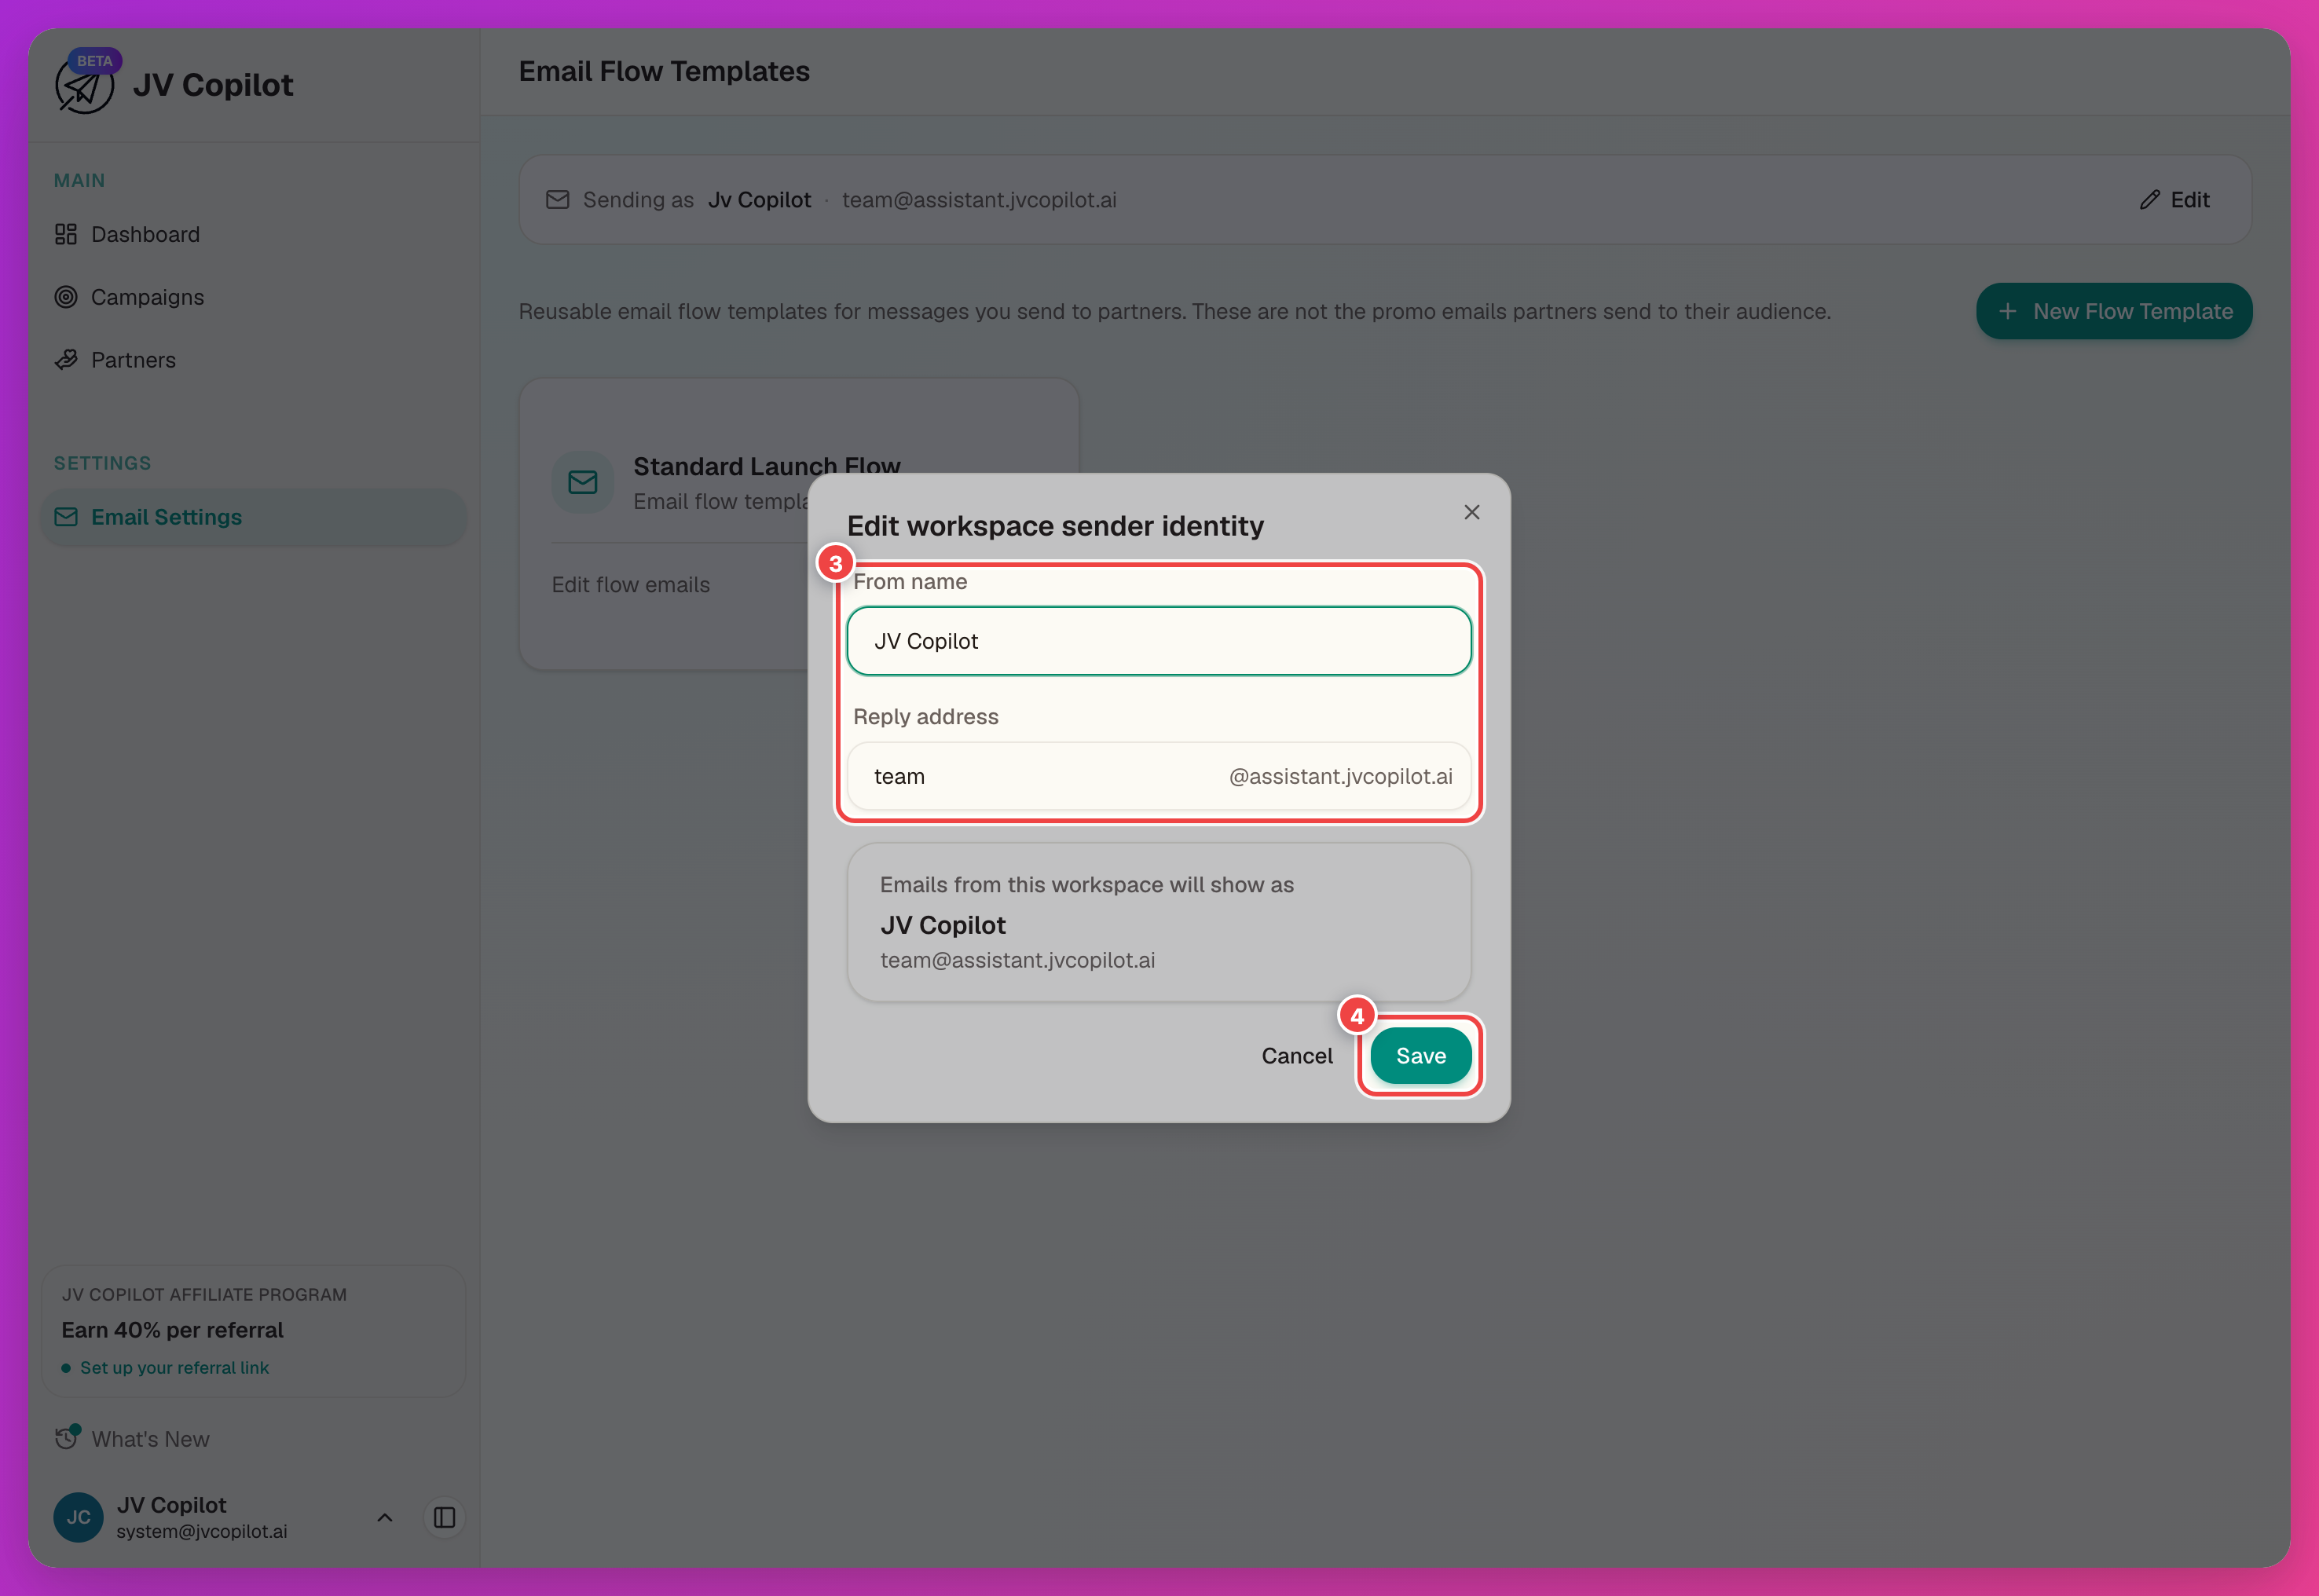
More detail in Sender Identity.
How Email Copy Works
Every campaign comes with the full partner email flow pre-written — Intro through Thank You. To change the wording, there are two levels:
- The campaign's own emails — click Customize Emails on a campaign page. Changes apply to that campaign only. This is the right place for a first campaign, or whenever one launch needs different dates, positioning, or instructions.
- A flow template — click New Flow Template in Email Settings. A template is a reusable version of the whole flow: edit it once, start new campaigns from it. See Email Presets & Templates.
Templates are your defaults; the campaign editor is the override.
Review The Campaign Email Flow
Customize Emails opens the editor. The rail across the top lists every email in the flow, in send order: Intro, Reminder, Form Completion, Kickoff, Send-Day Reminder, Follow-up, and Thank You — see the email types reference for when each one goes out.
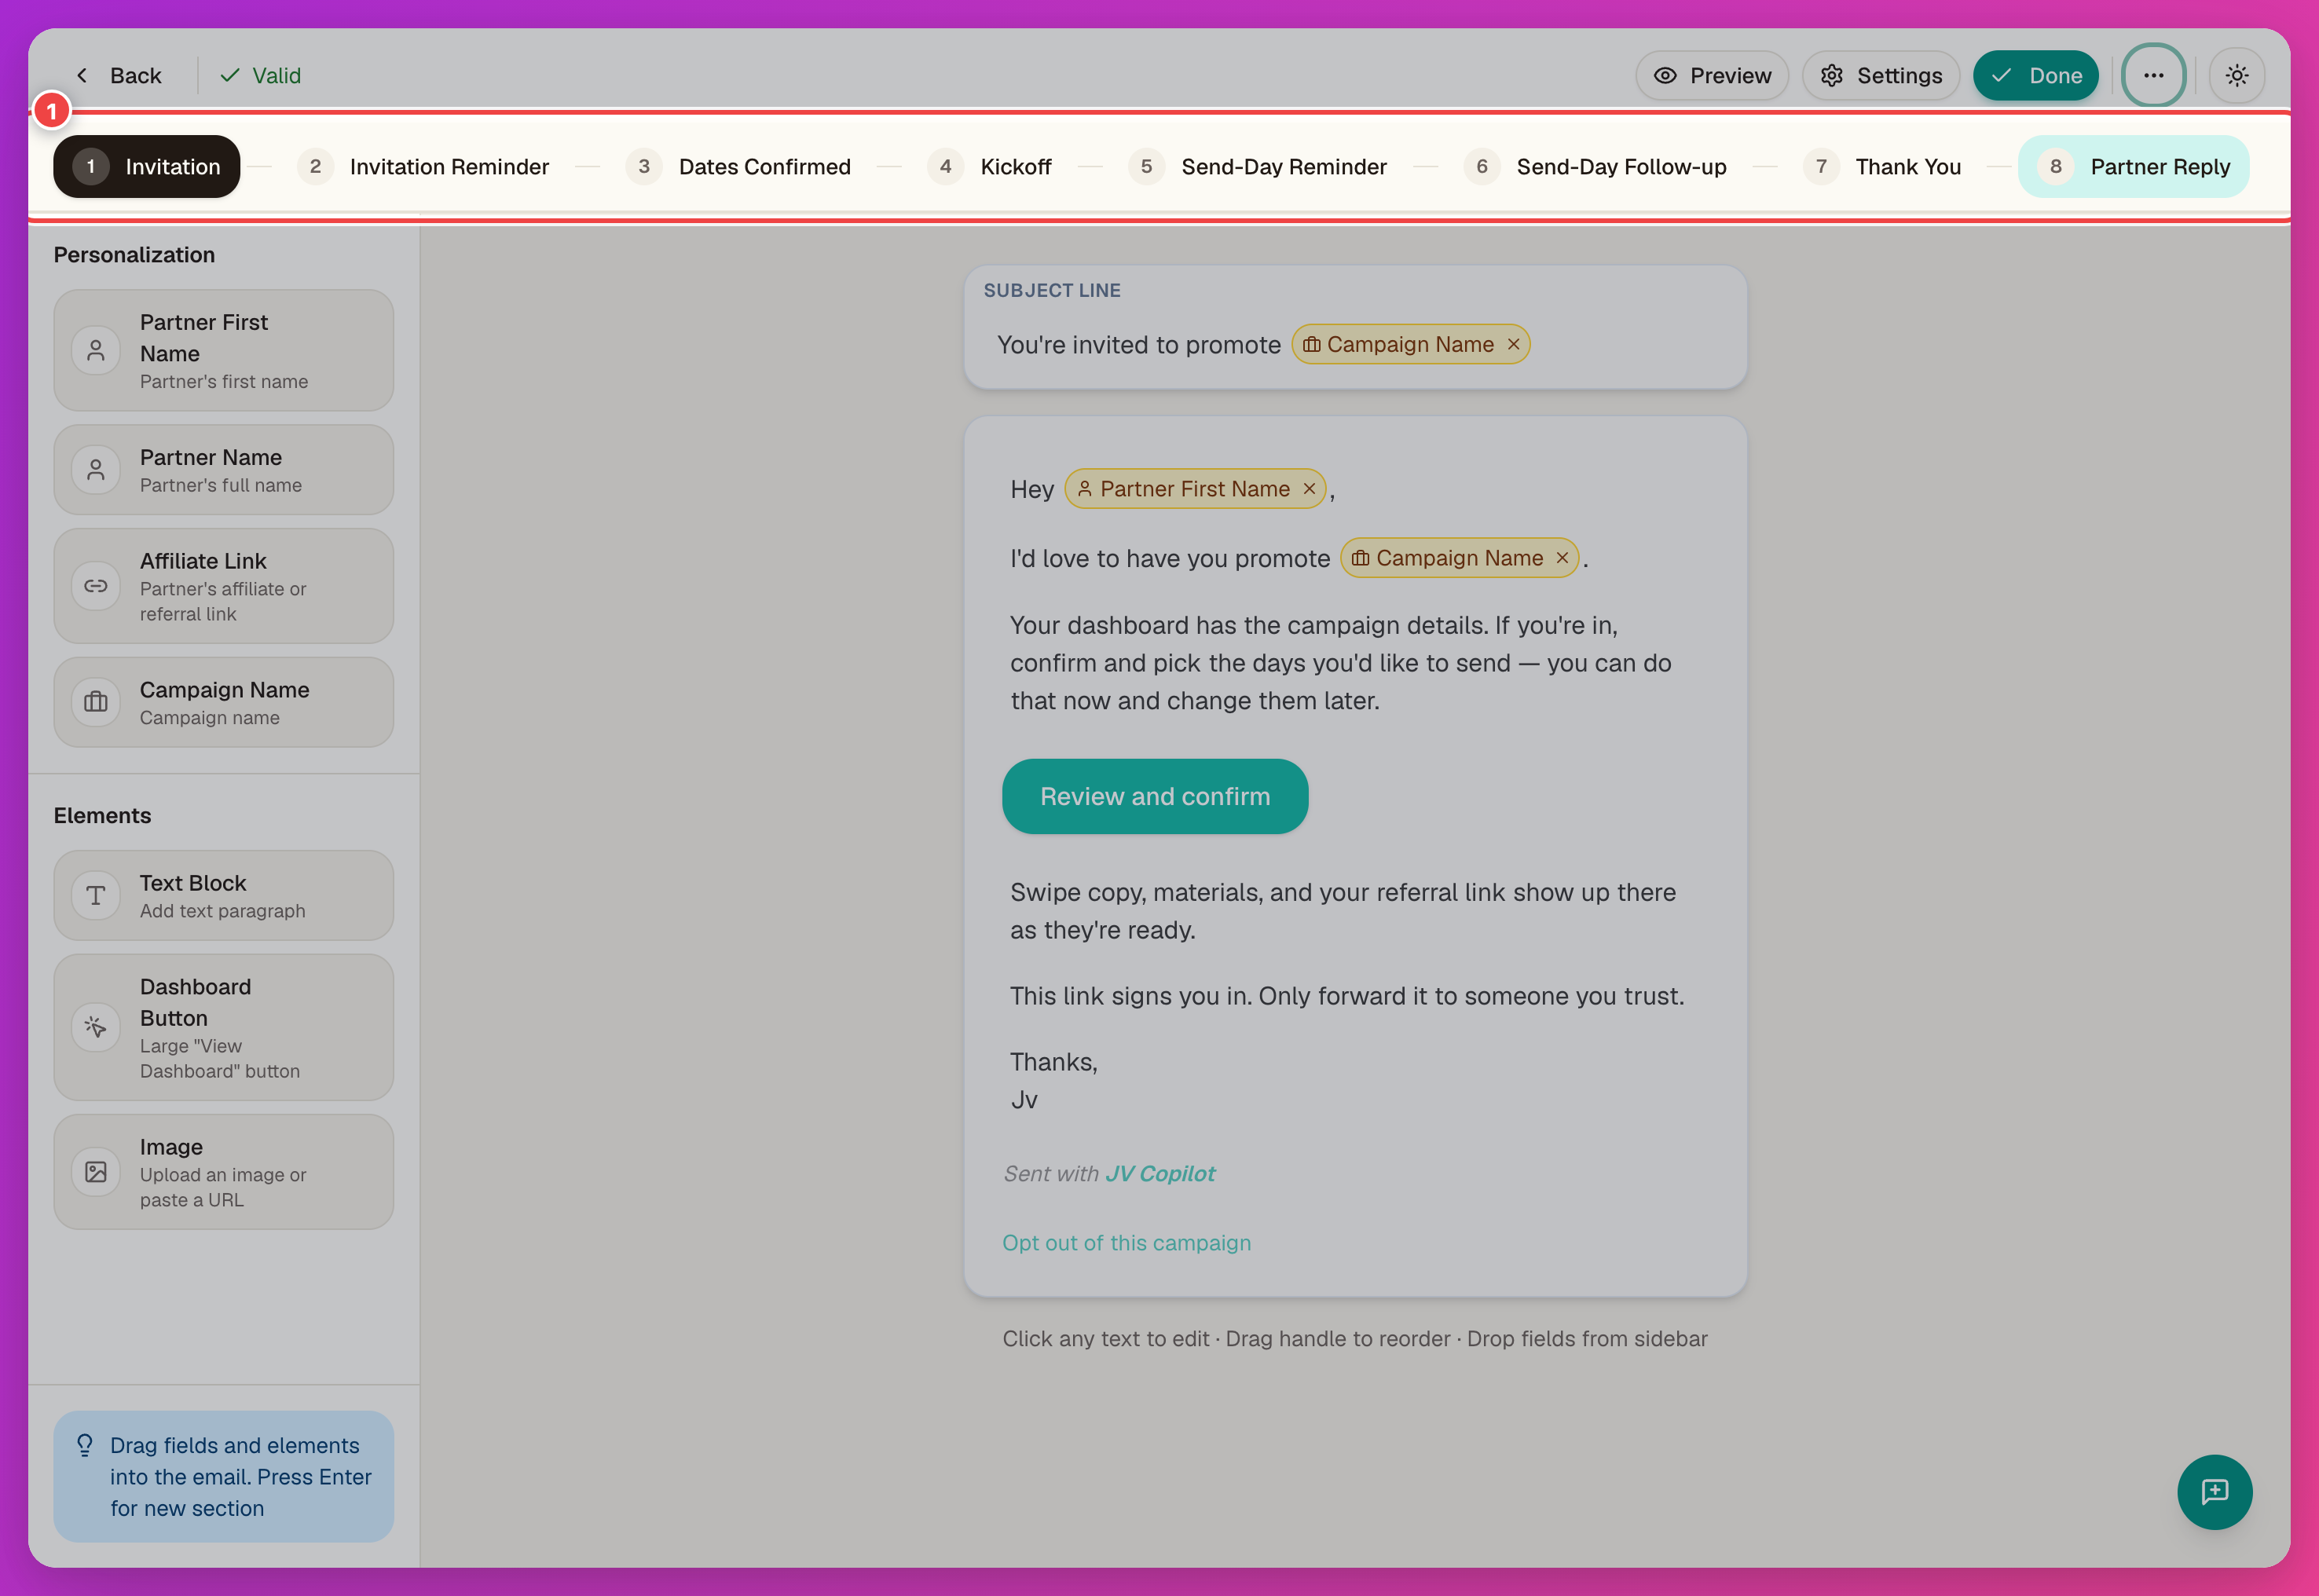
Check each email's campaign names, dates, links, and partner instructions. Personalization tags (partner first name, affiliate link, campaign name) fill in automatically per partner — drag more in from the left sidebar if you need them.
Send A Test Email
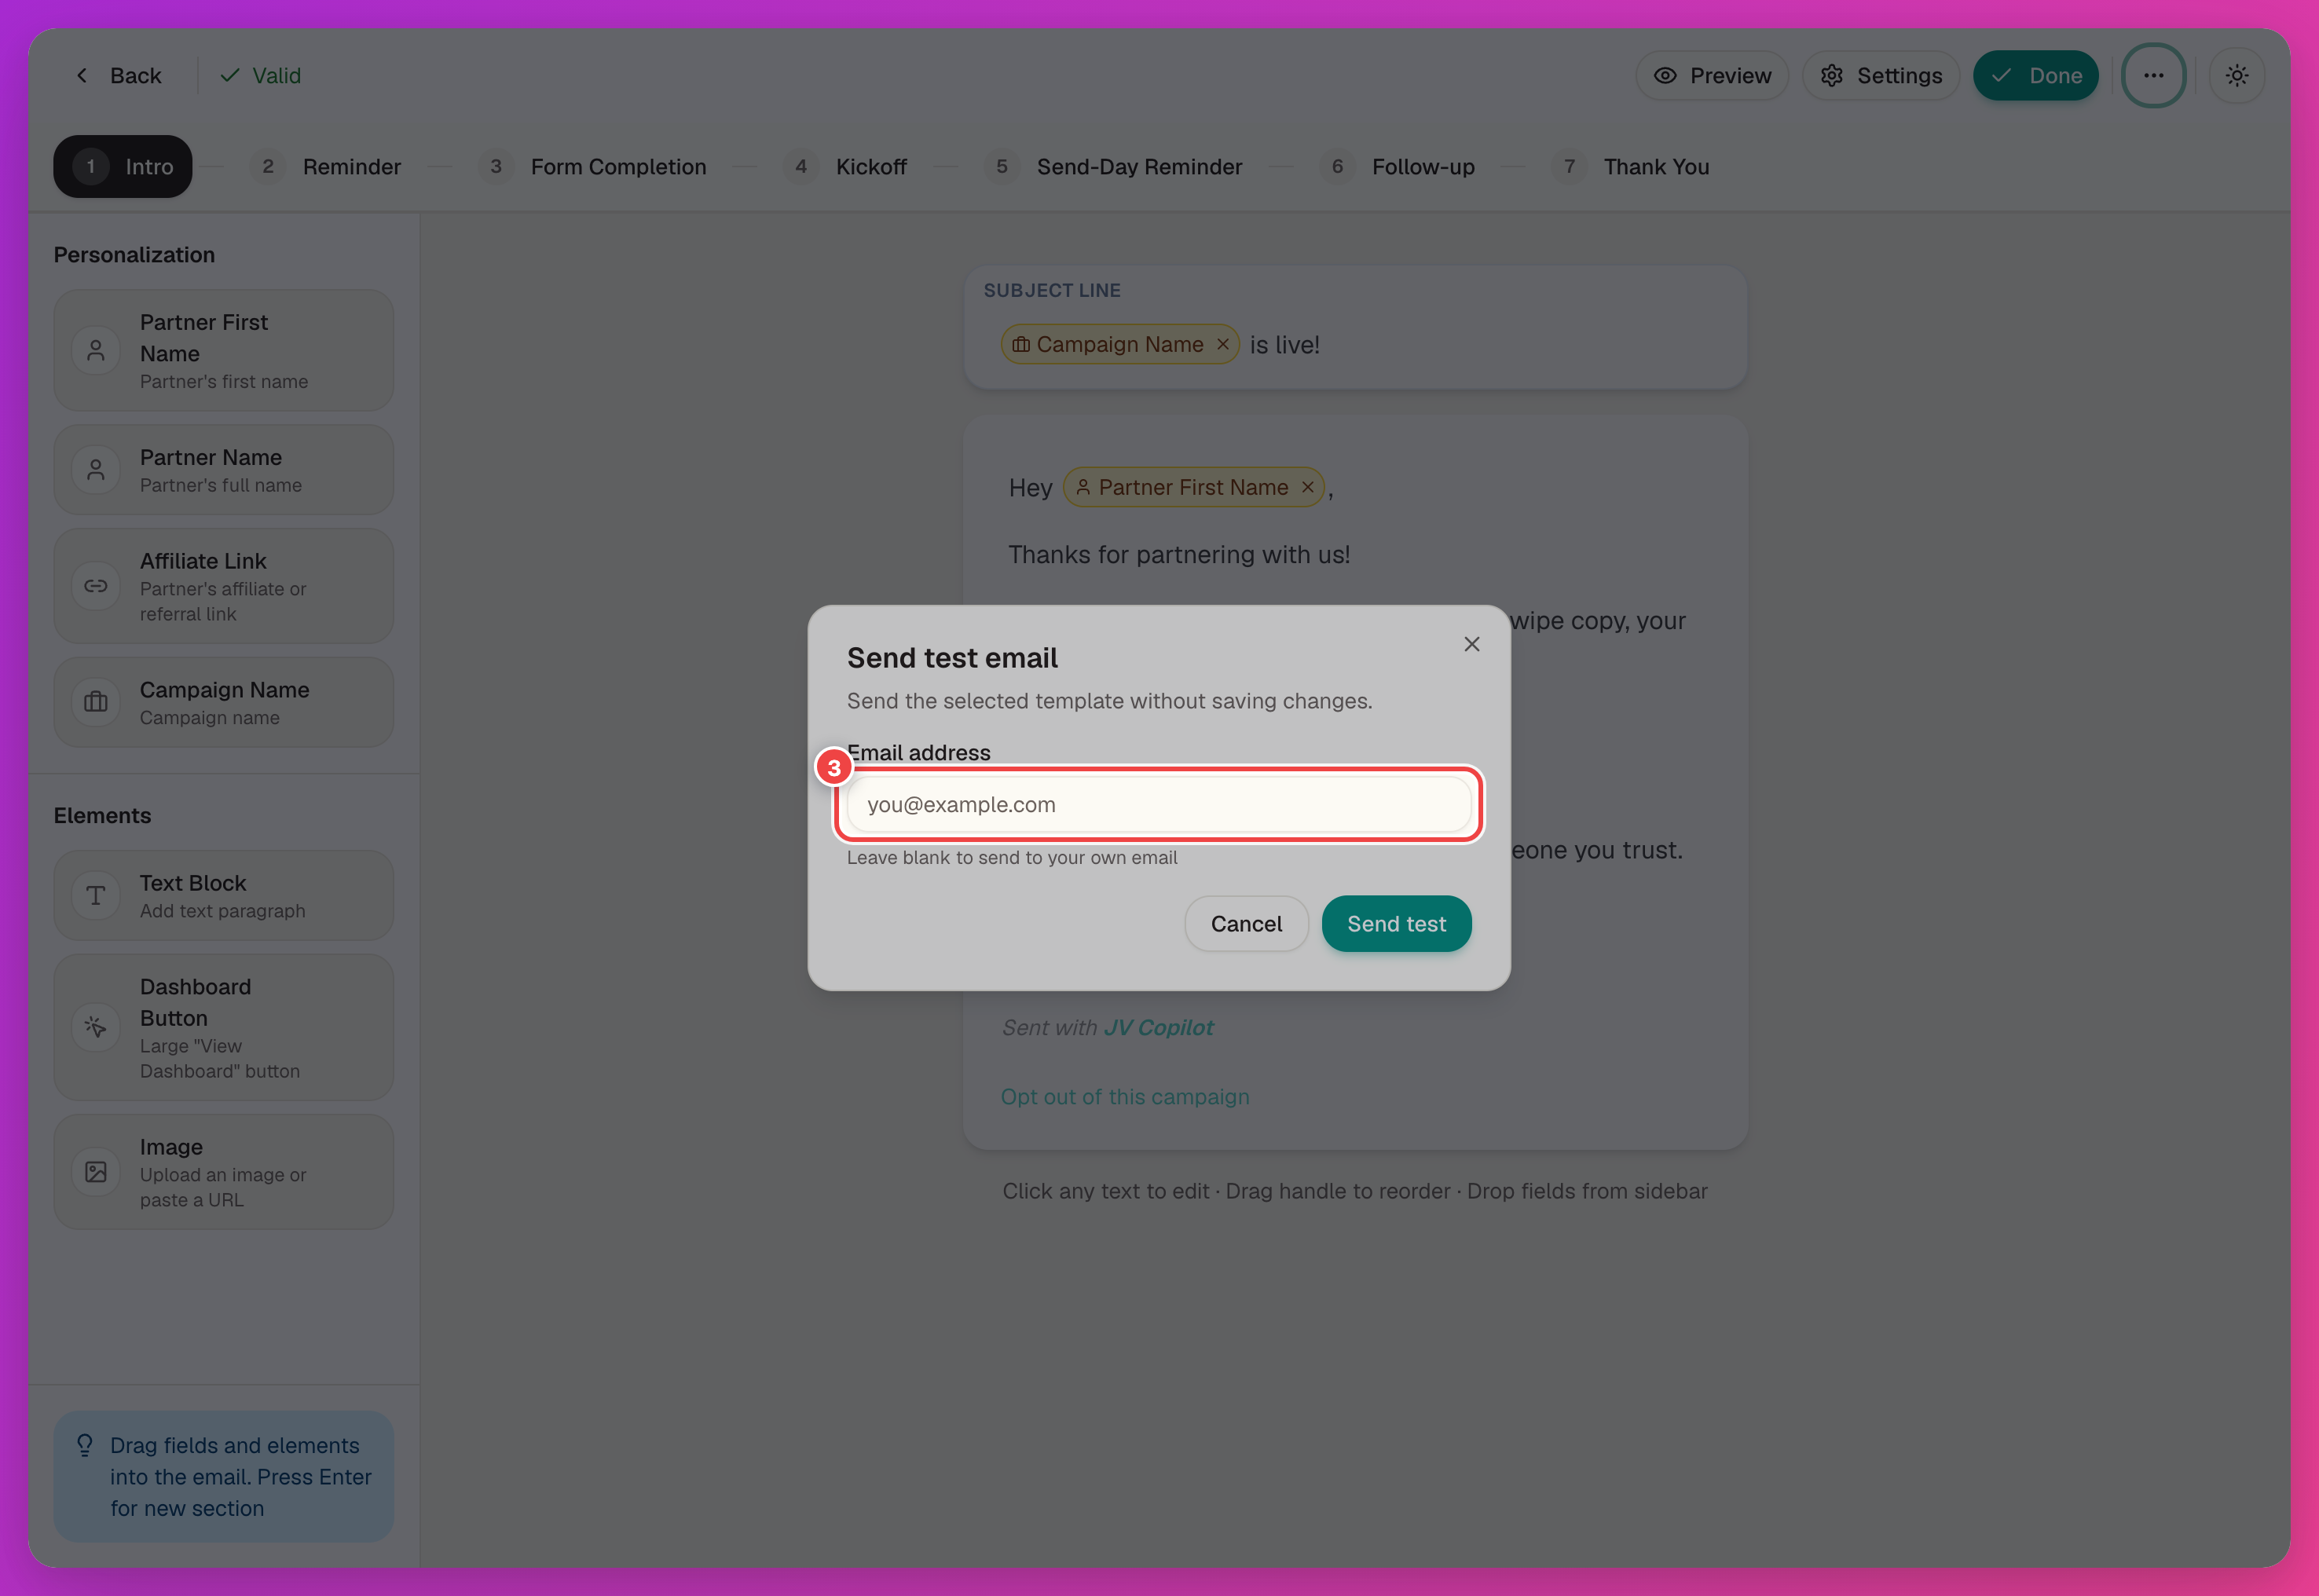
Before launch, send yourself the email a partner would get:
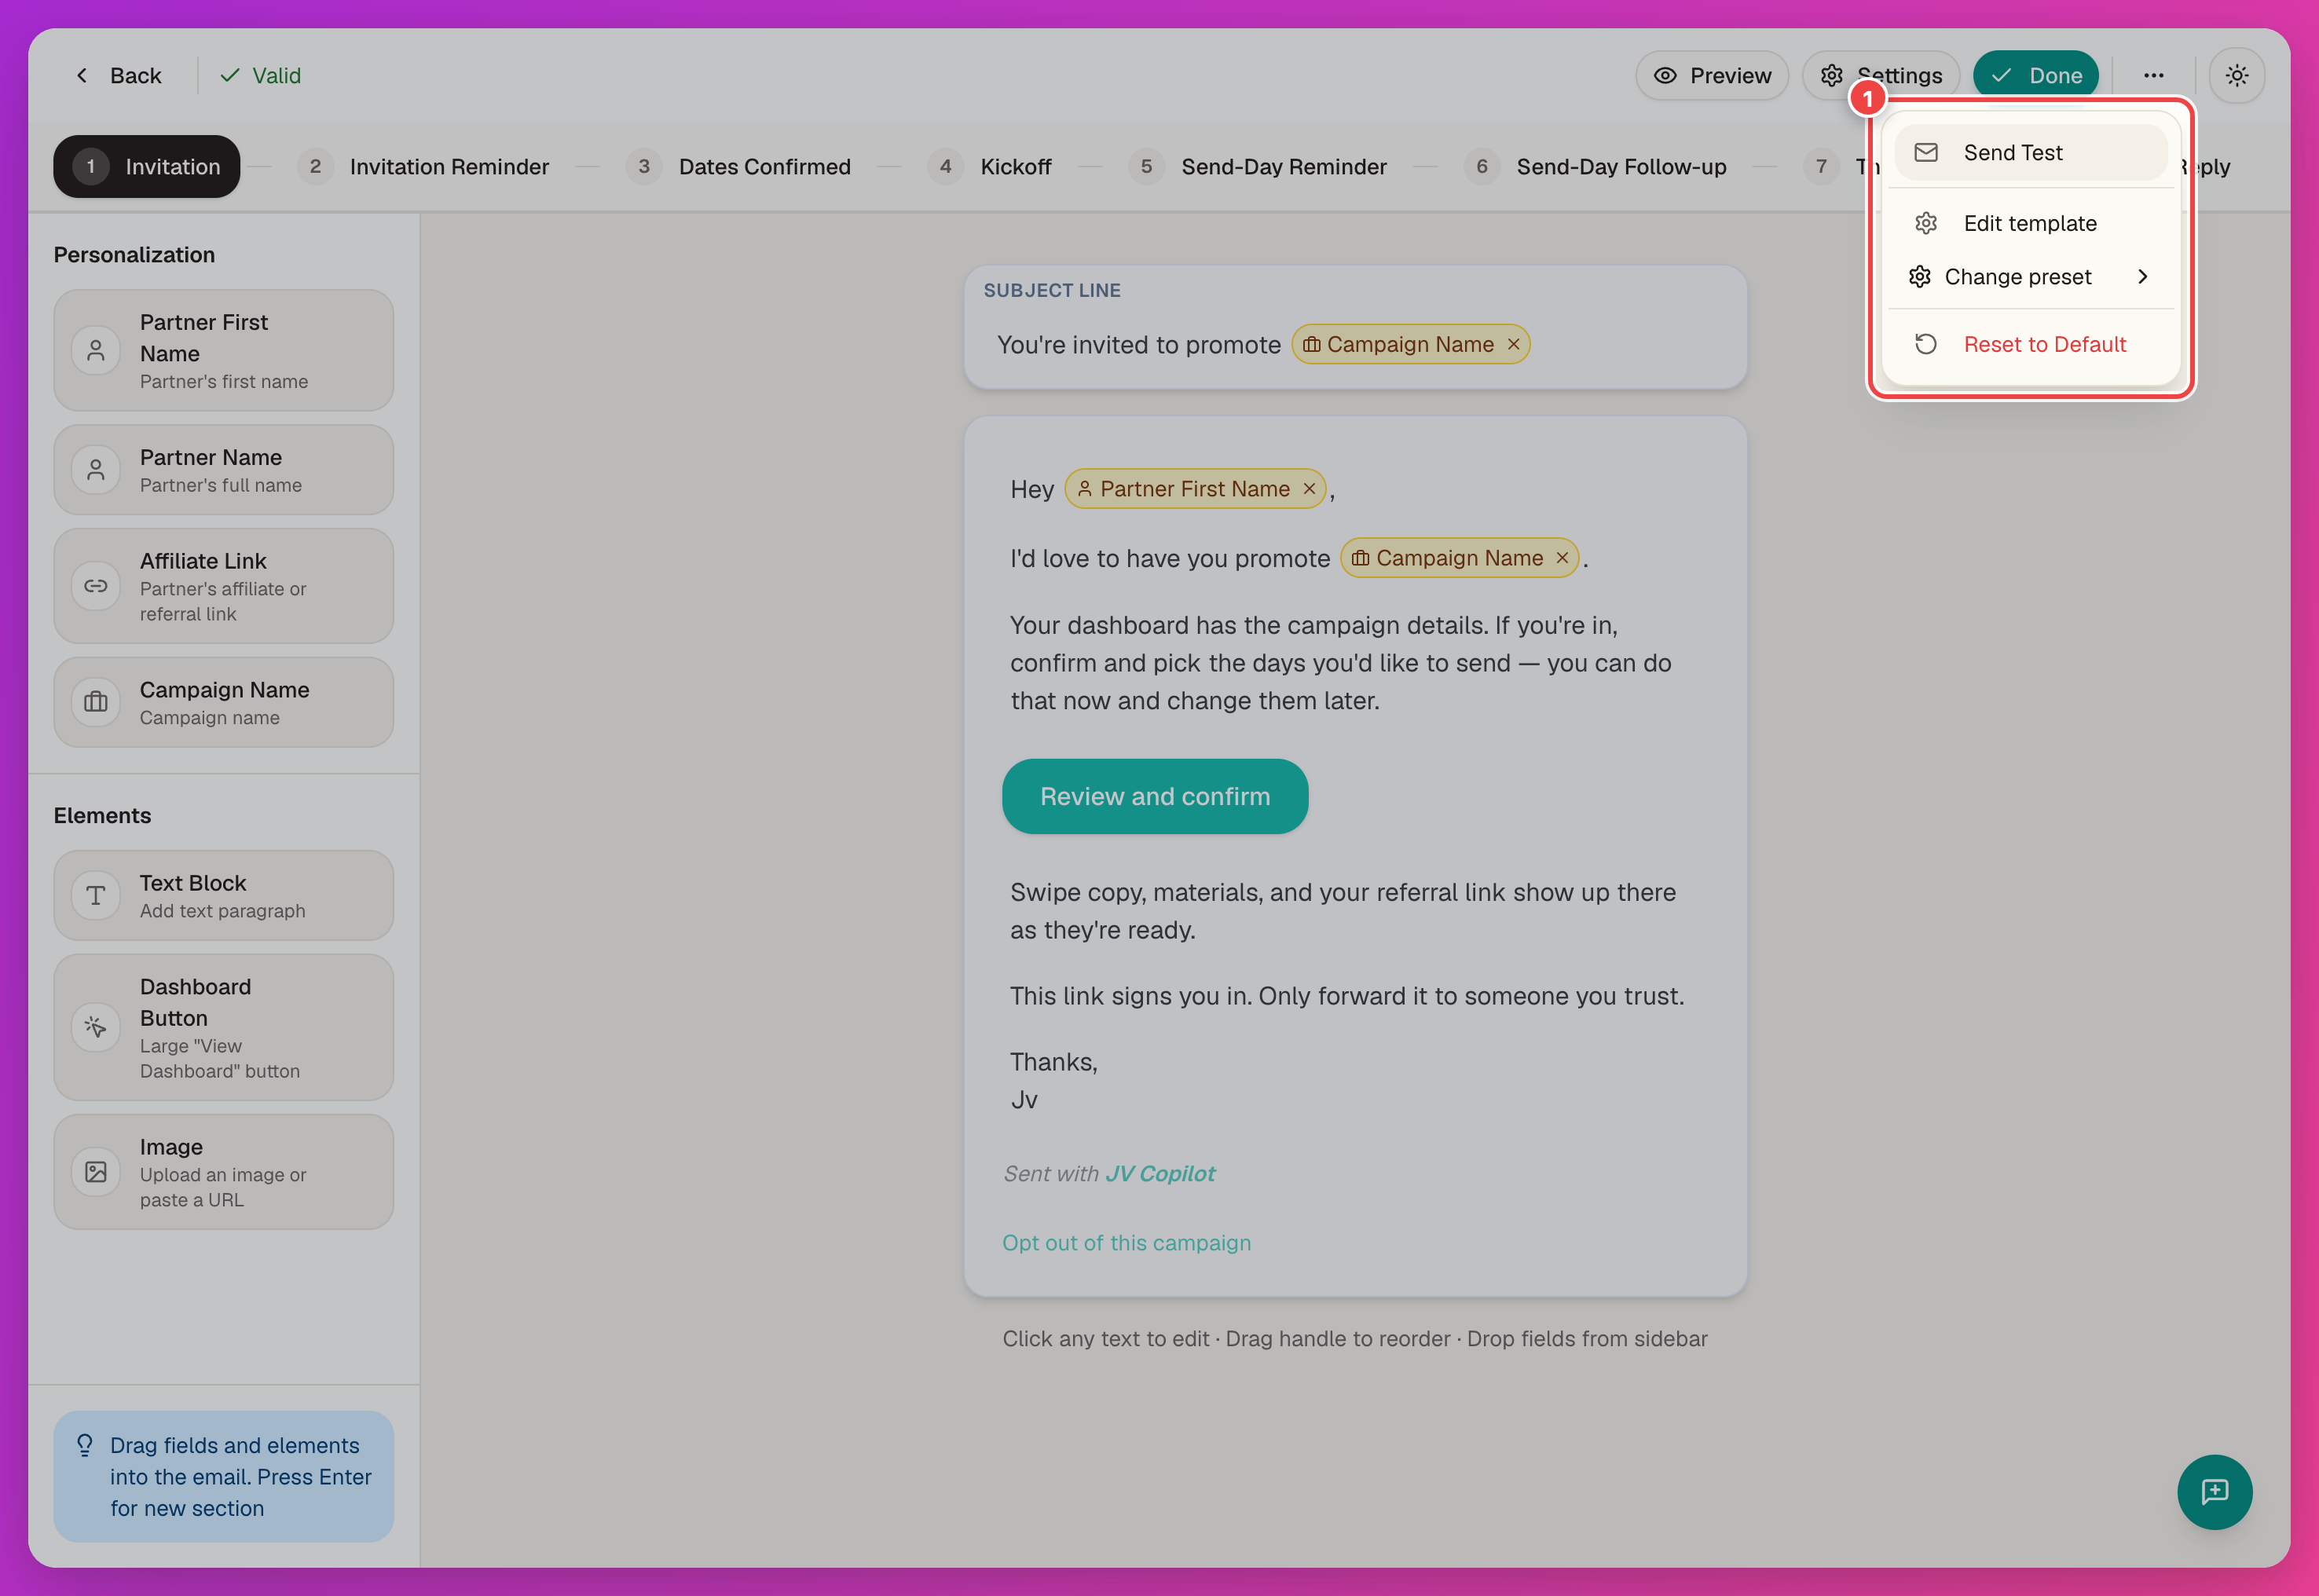
Next Step
With sender identity and copy ready, head back to the campaign page and launch.
Related Feature Guides
Last updated on