
Getting Started
Create your first campaign, add partners, materials, and affiliate links, then launch.
This quickstart takes you from a fresh workspace to a launched campaign. Onboarding already covered your name and role — your sender identity is set up for you automatically, and you can change it any time — so everything here happens on the campaign itself.
1. Create Your Campaign
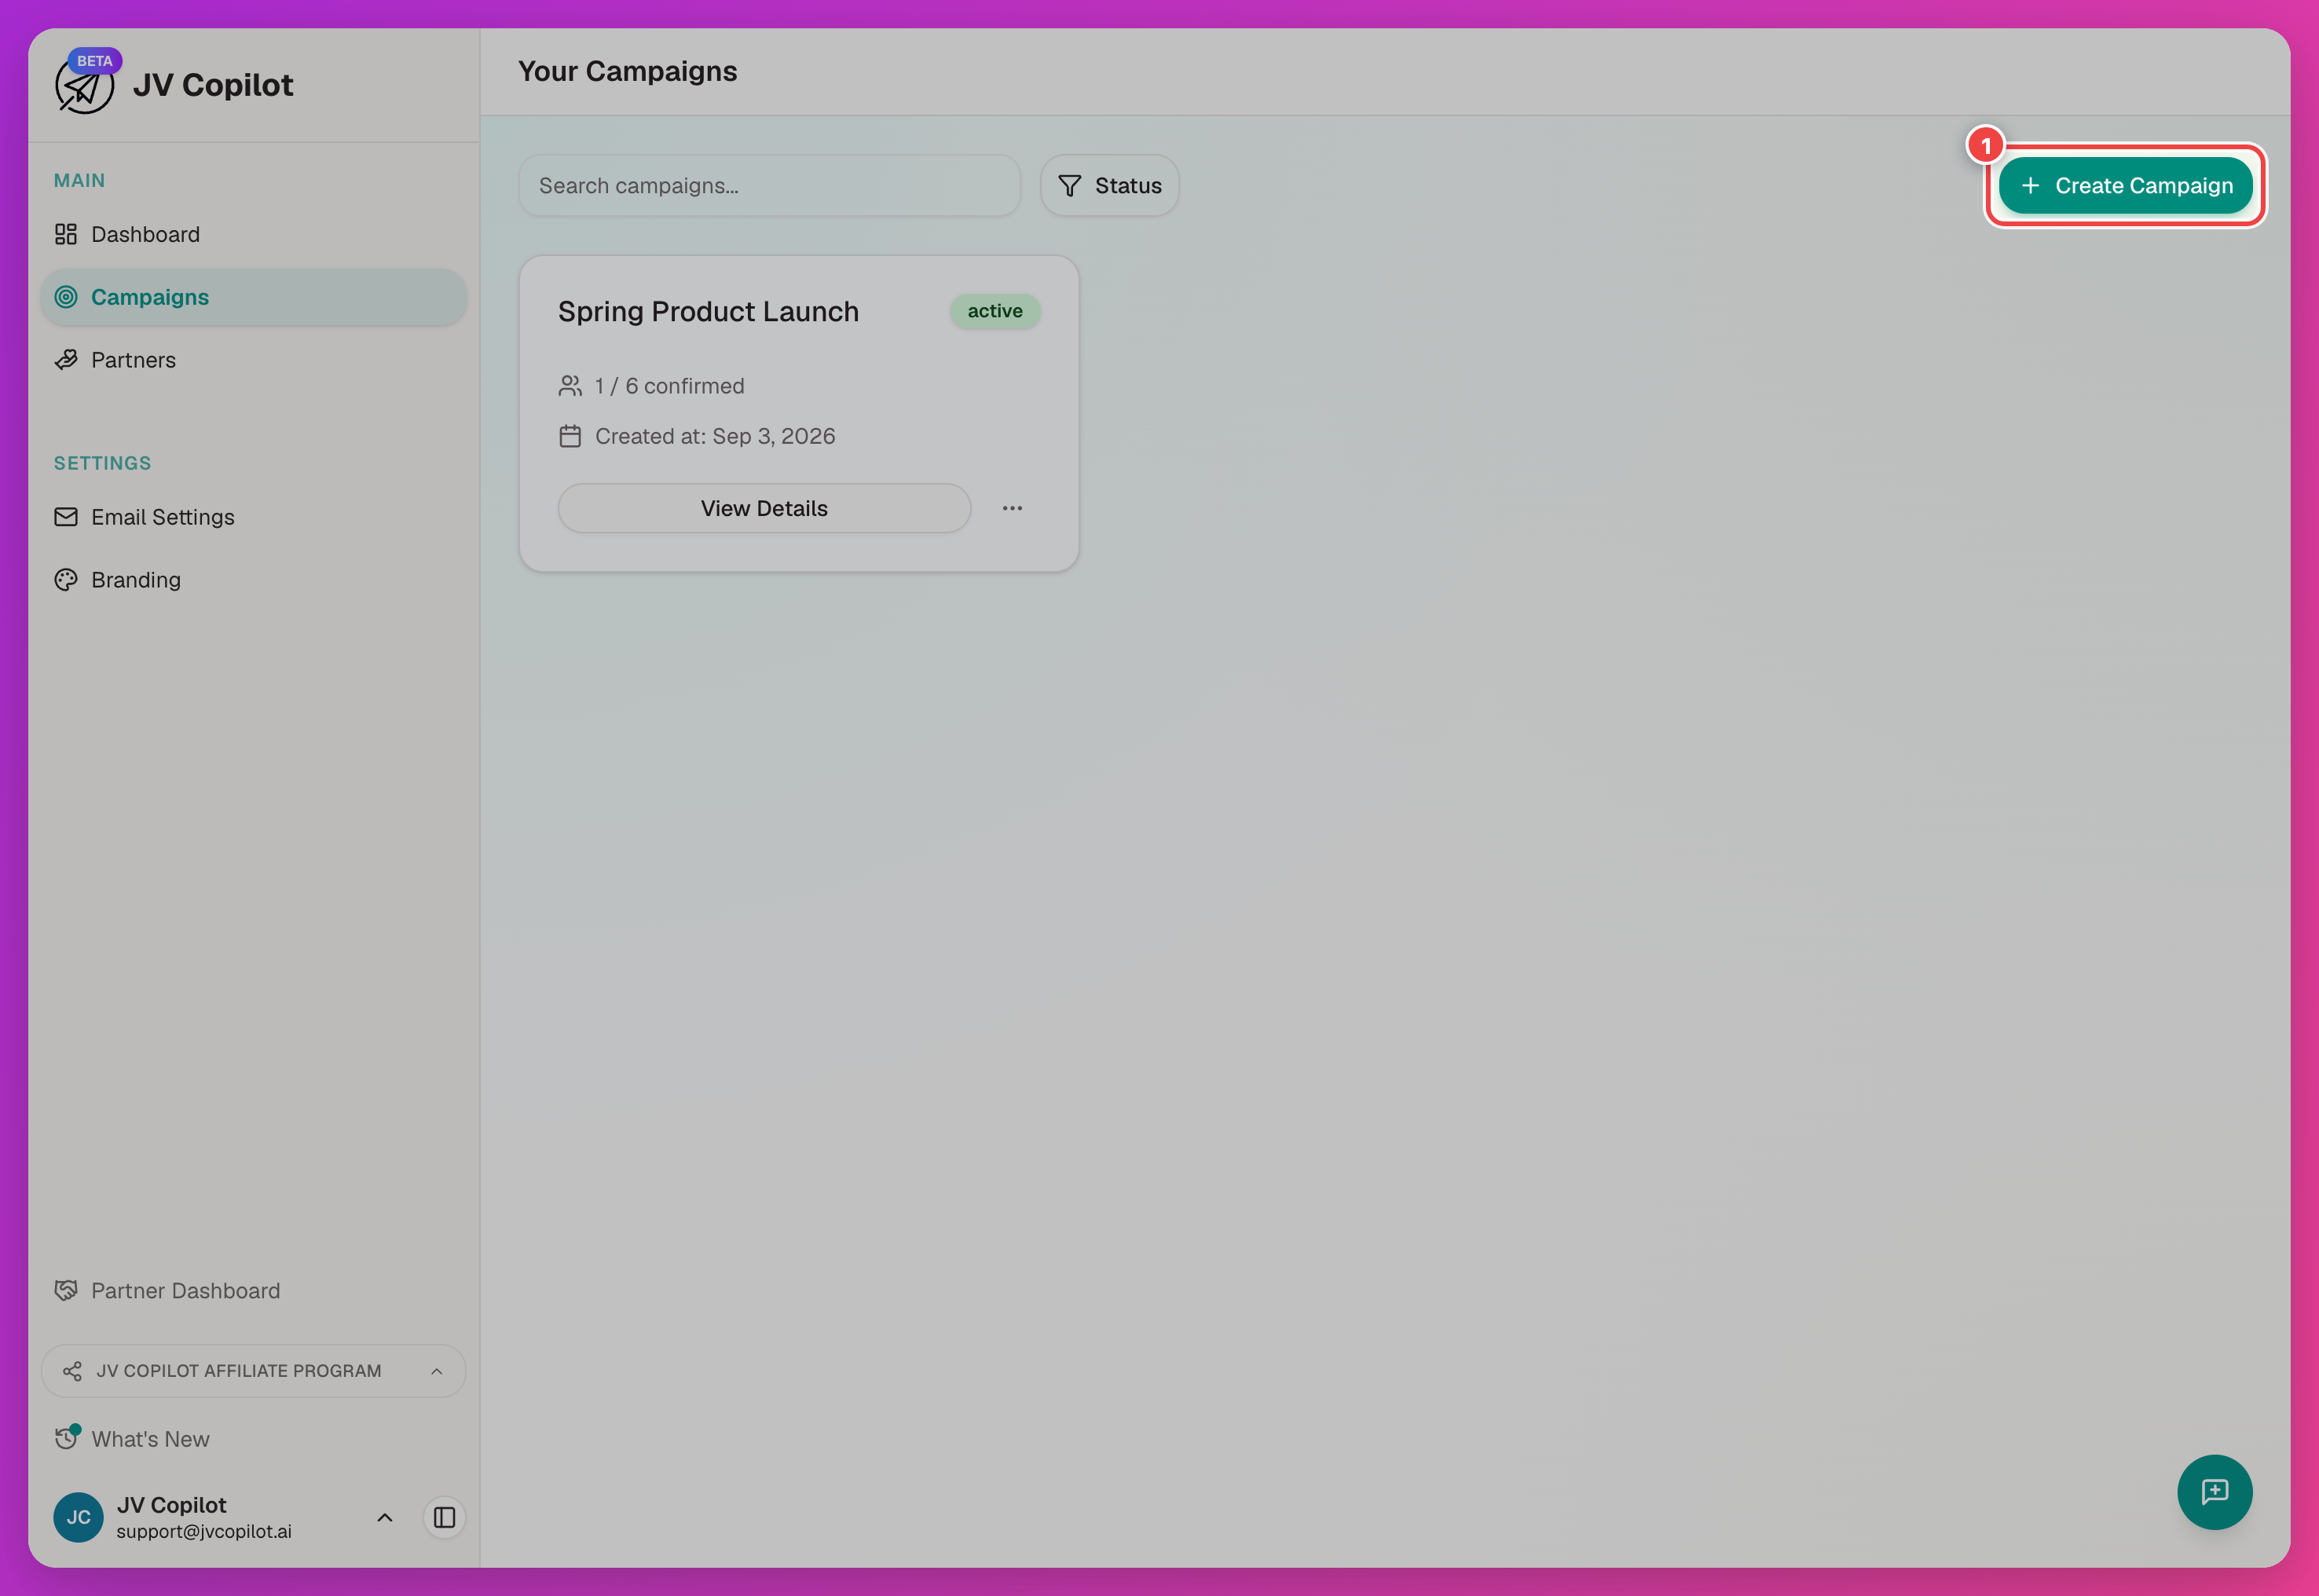
In the Create Campaign modal:
Pick start and end dates, or check No timeline for this campaign if dates are not final.
The campaign type defaults to One-off — right for a single launch or event. Pick Recurring or Hub only if you already know you need them.
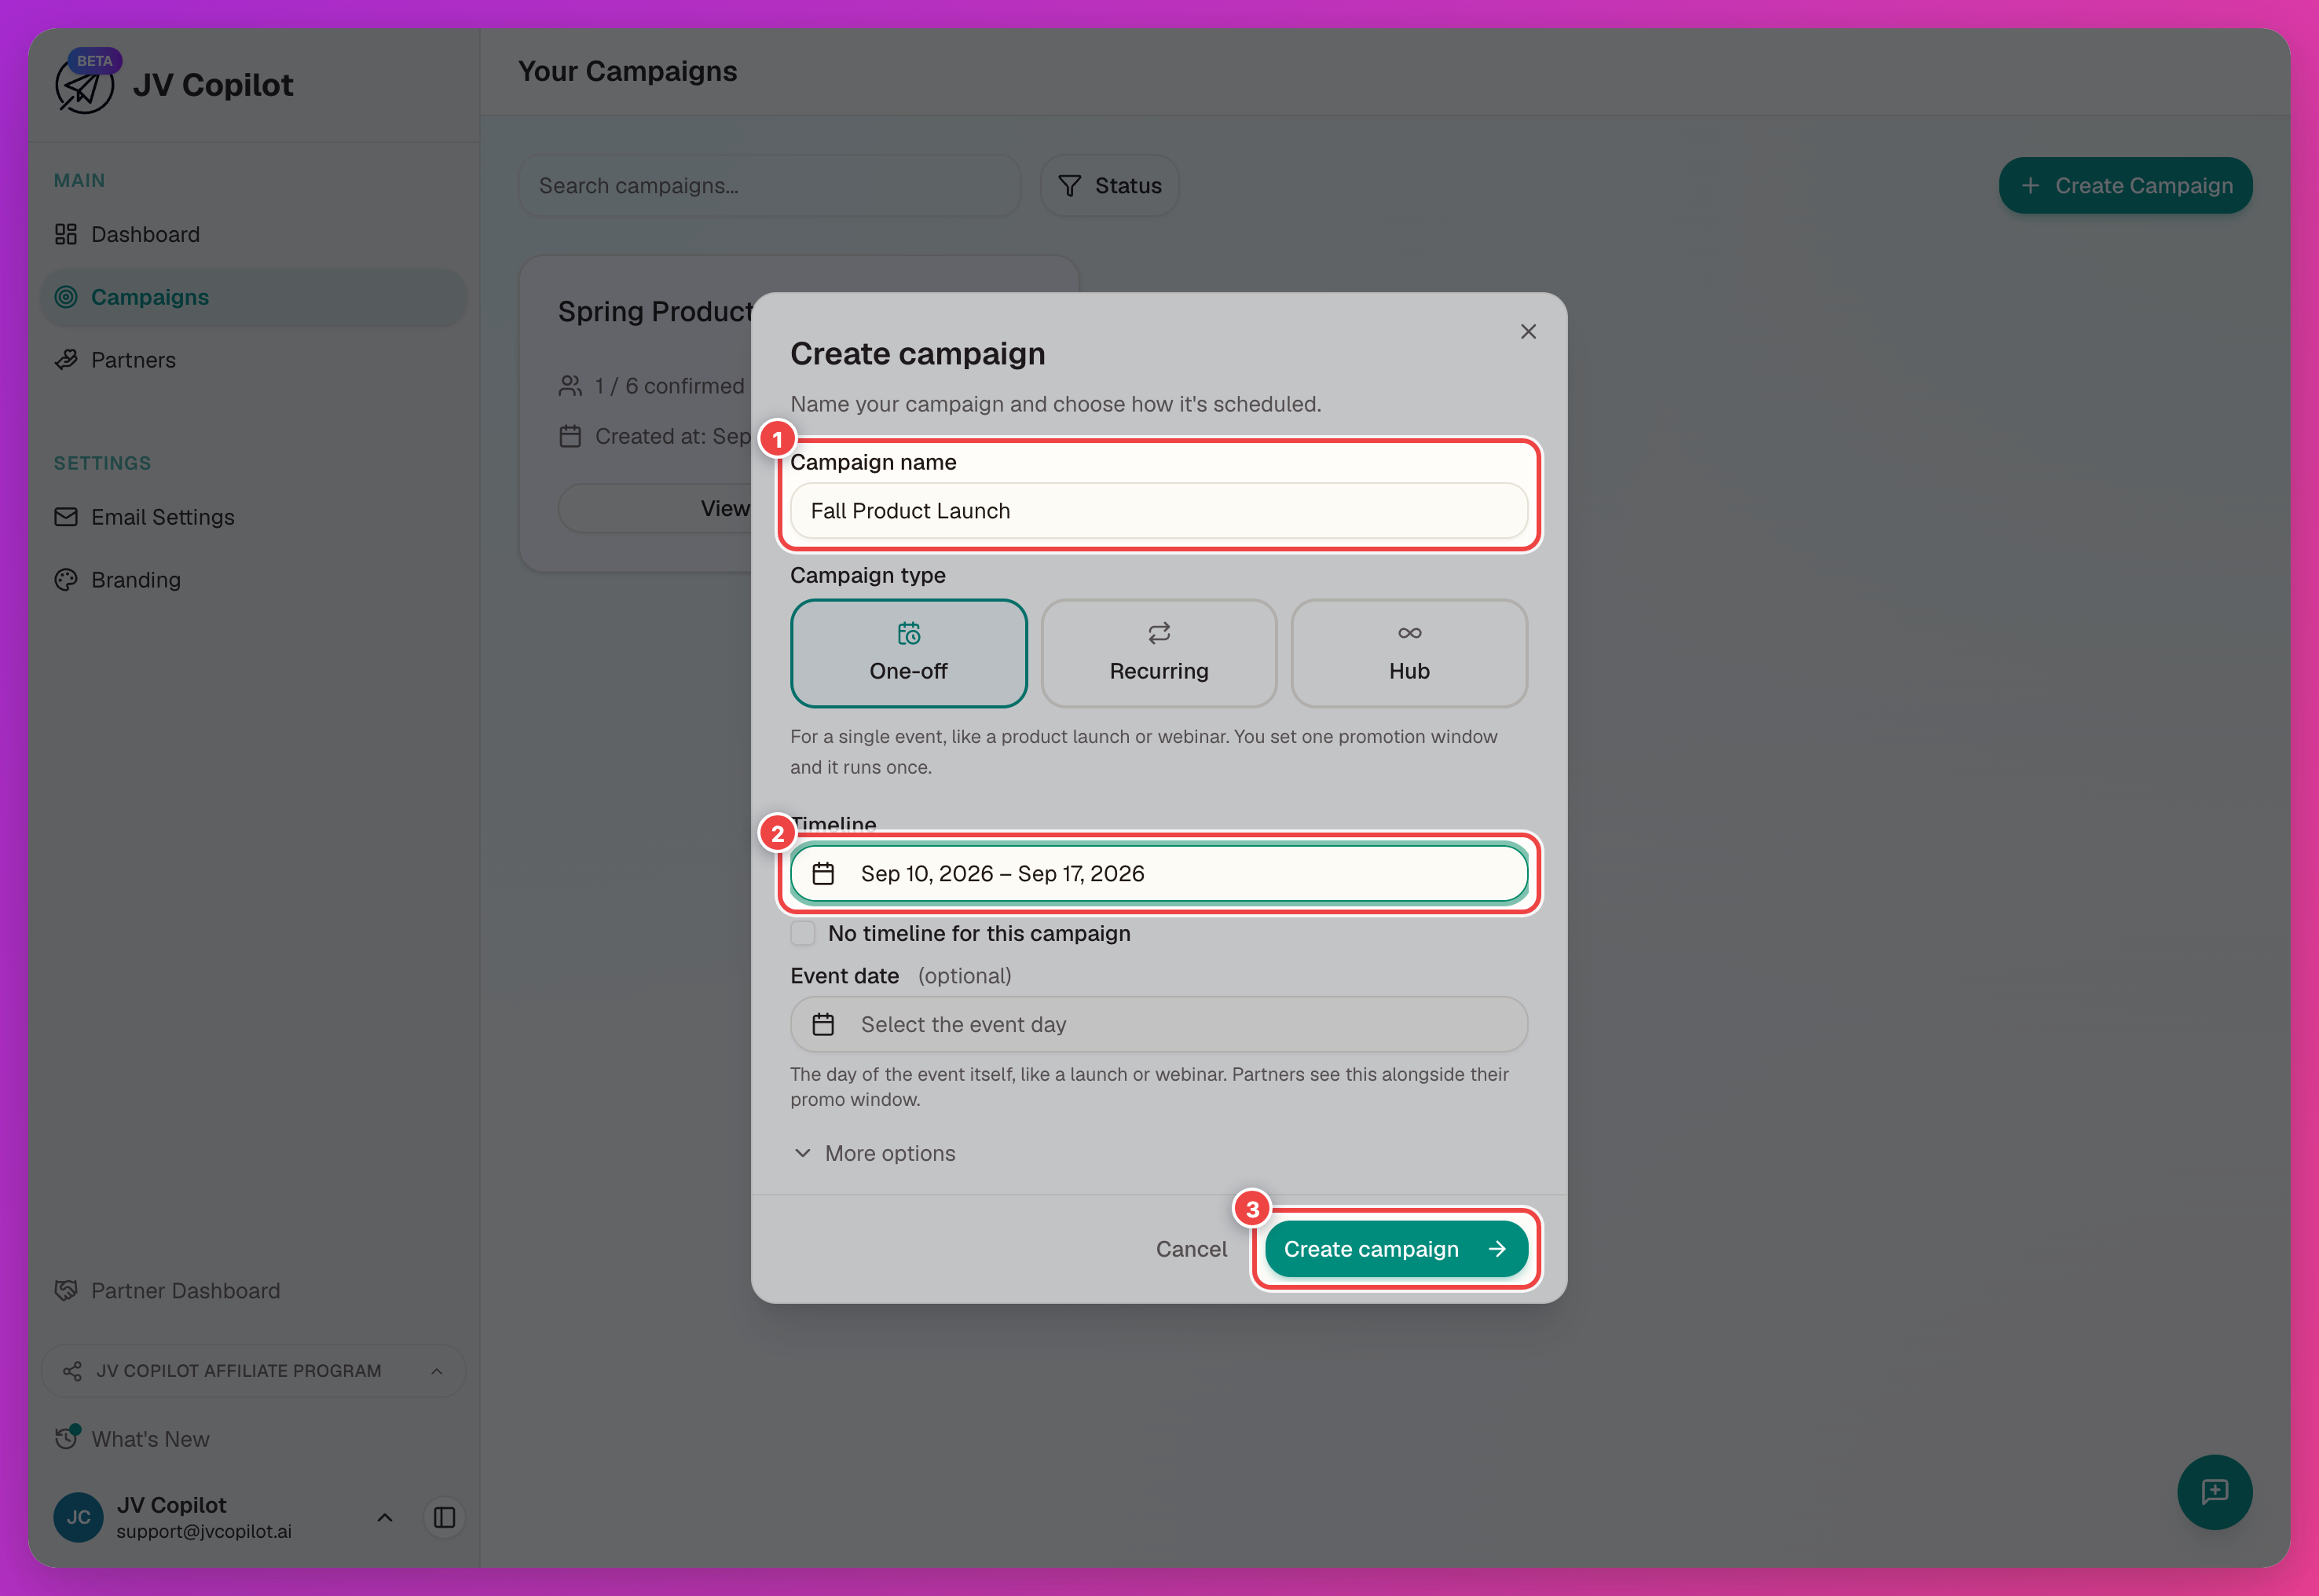
The draft campaign page opens. The rest of the setup happens there.
2. Add Partners
Partners are the people who promote the campaign. The Invite partners panel on the campaign page gives you two ways to add them:
- Copy the join link and send it out — partners sign themselves up, and land on the roster already invited.
- Add manually — pick partners from your partner database.
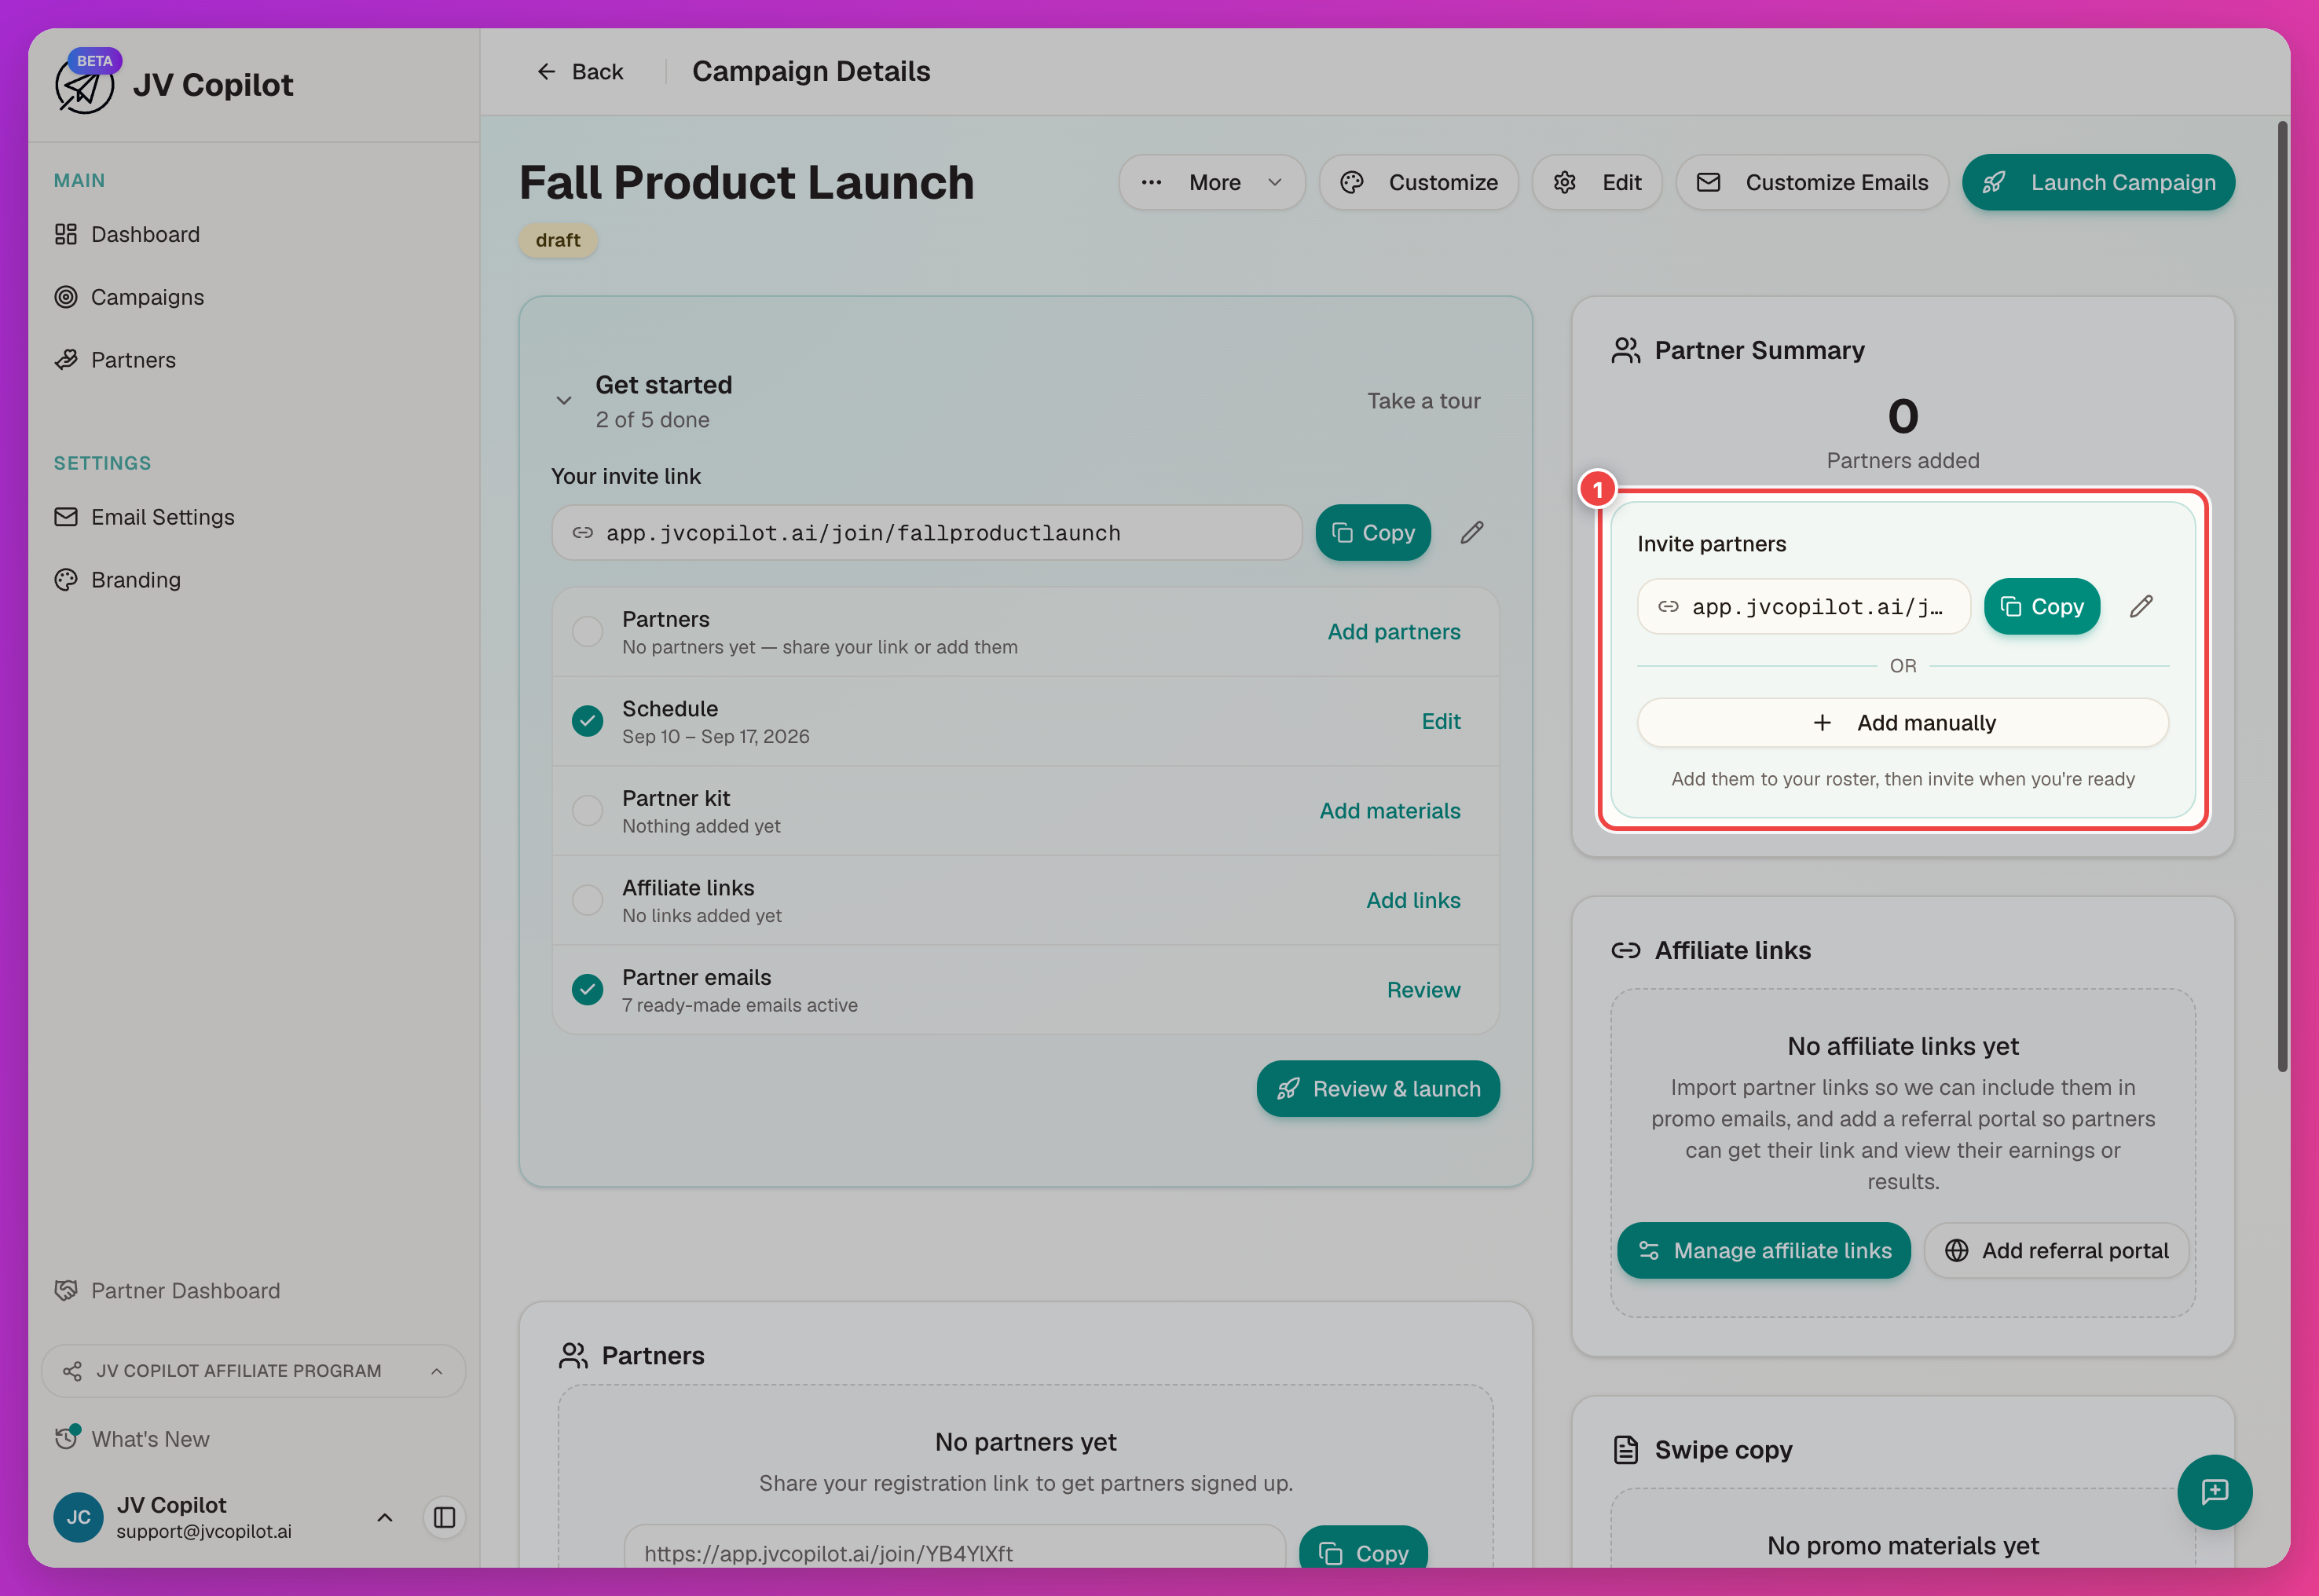
Clicking Add manually opens the Add Partners modal. Select partners individually, or switch to the By Group tab to add a whole partner group at once.
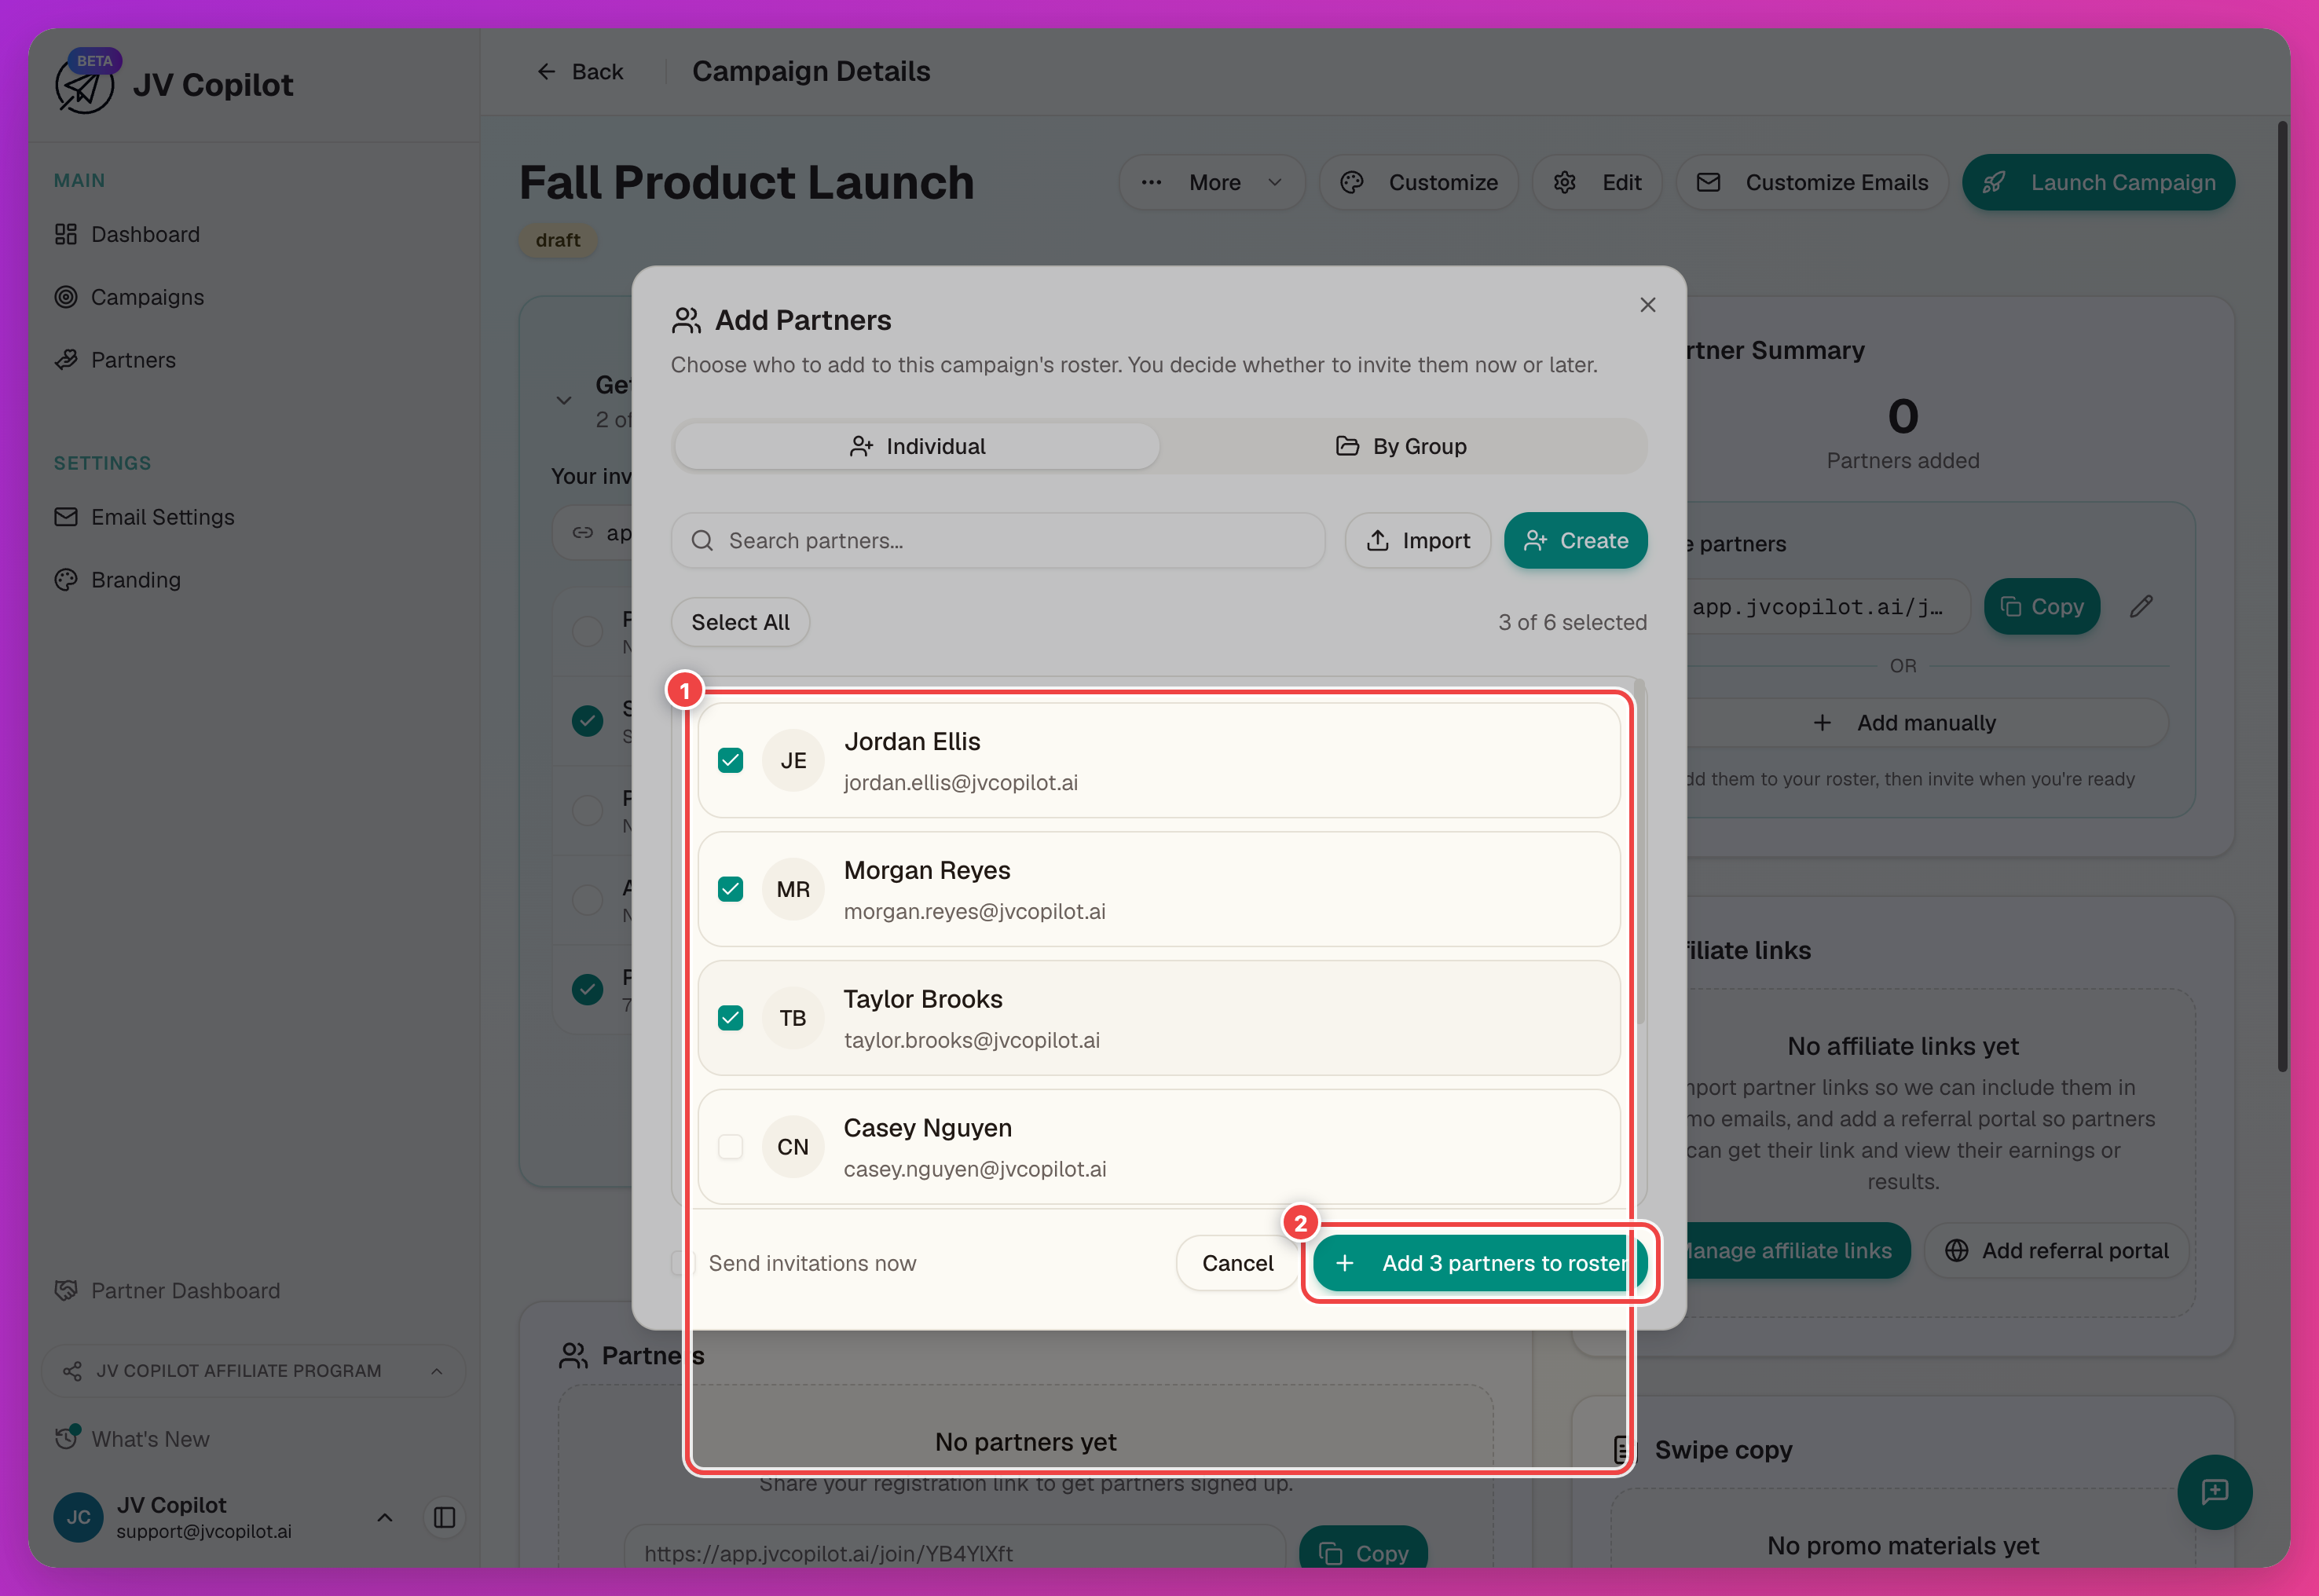
Adding and inviting are separate steps — a Send invitations now checkbox at the bottom of the modal controls whether these partners get emailed right away or just added to the roster for you to invite later. It's unchecked by default here on a draft campaign, so partners you add now won't hear from JV Copilot until you invite them — before or at launch. That also means a partner can confirm and pick their send dates as soon as they're invited, whether or not you've launched yet. See Campaign Partners § Invite Partners for inviting after the fact.
If your partner database is still empty, add people on the Partners page first — one at a time or from a spreadsheet with the CSV import.
3. Add Promo Materials
The Swipe copy card on the campaign page holds everything partners use to promote you. It has two entry points — most campaigns use both:
- Set up swipe copy — turn your existing promo copy into partner-ready emails.
- Add materials — attach links, files, and notes (registration pages, asset folders, product info).
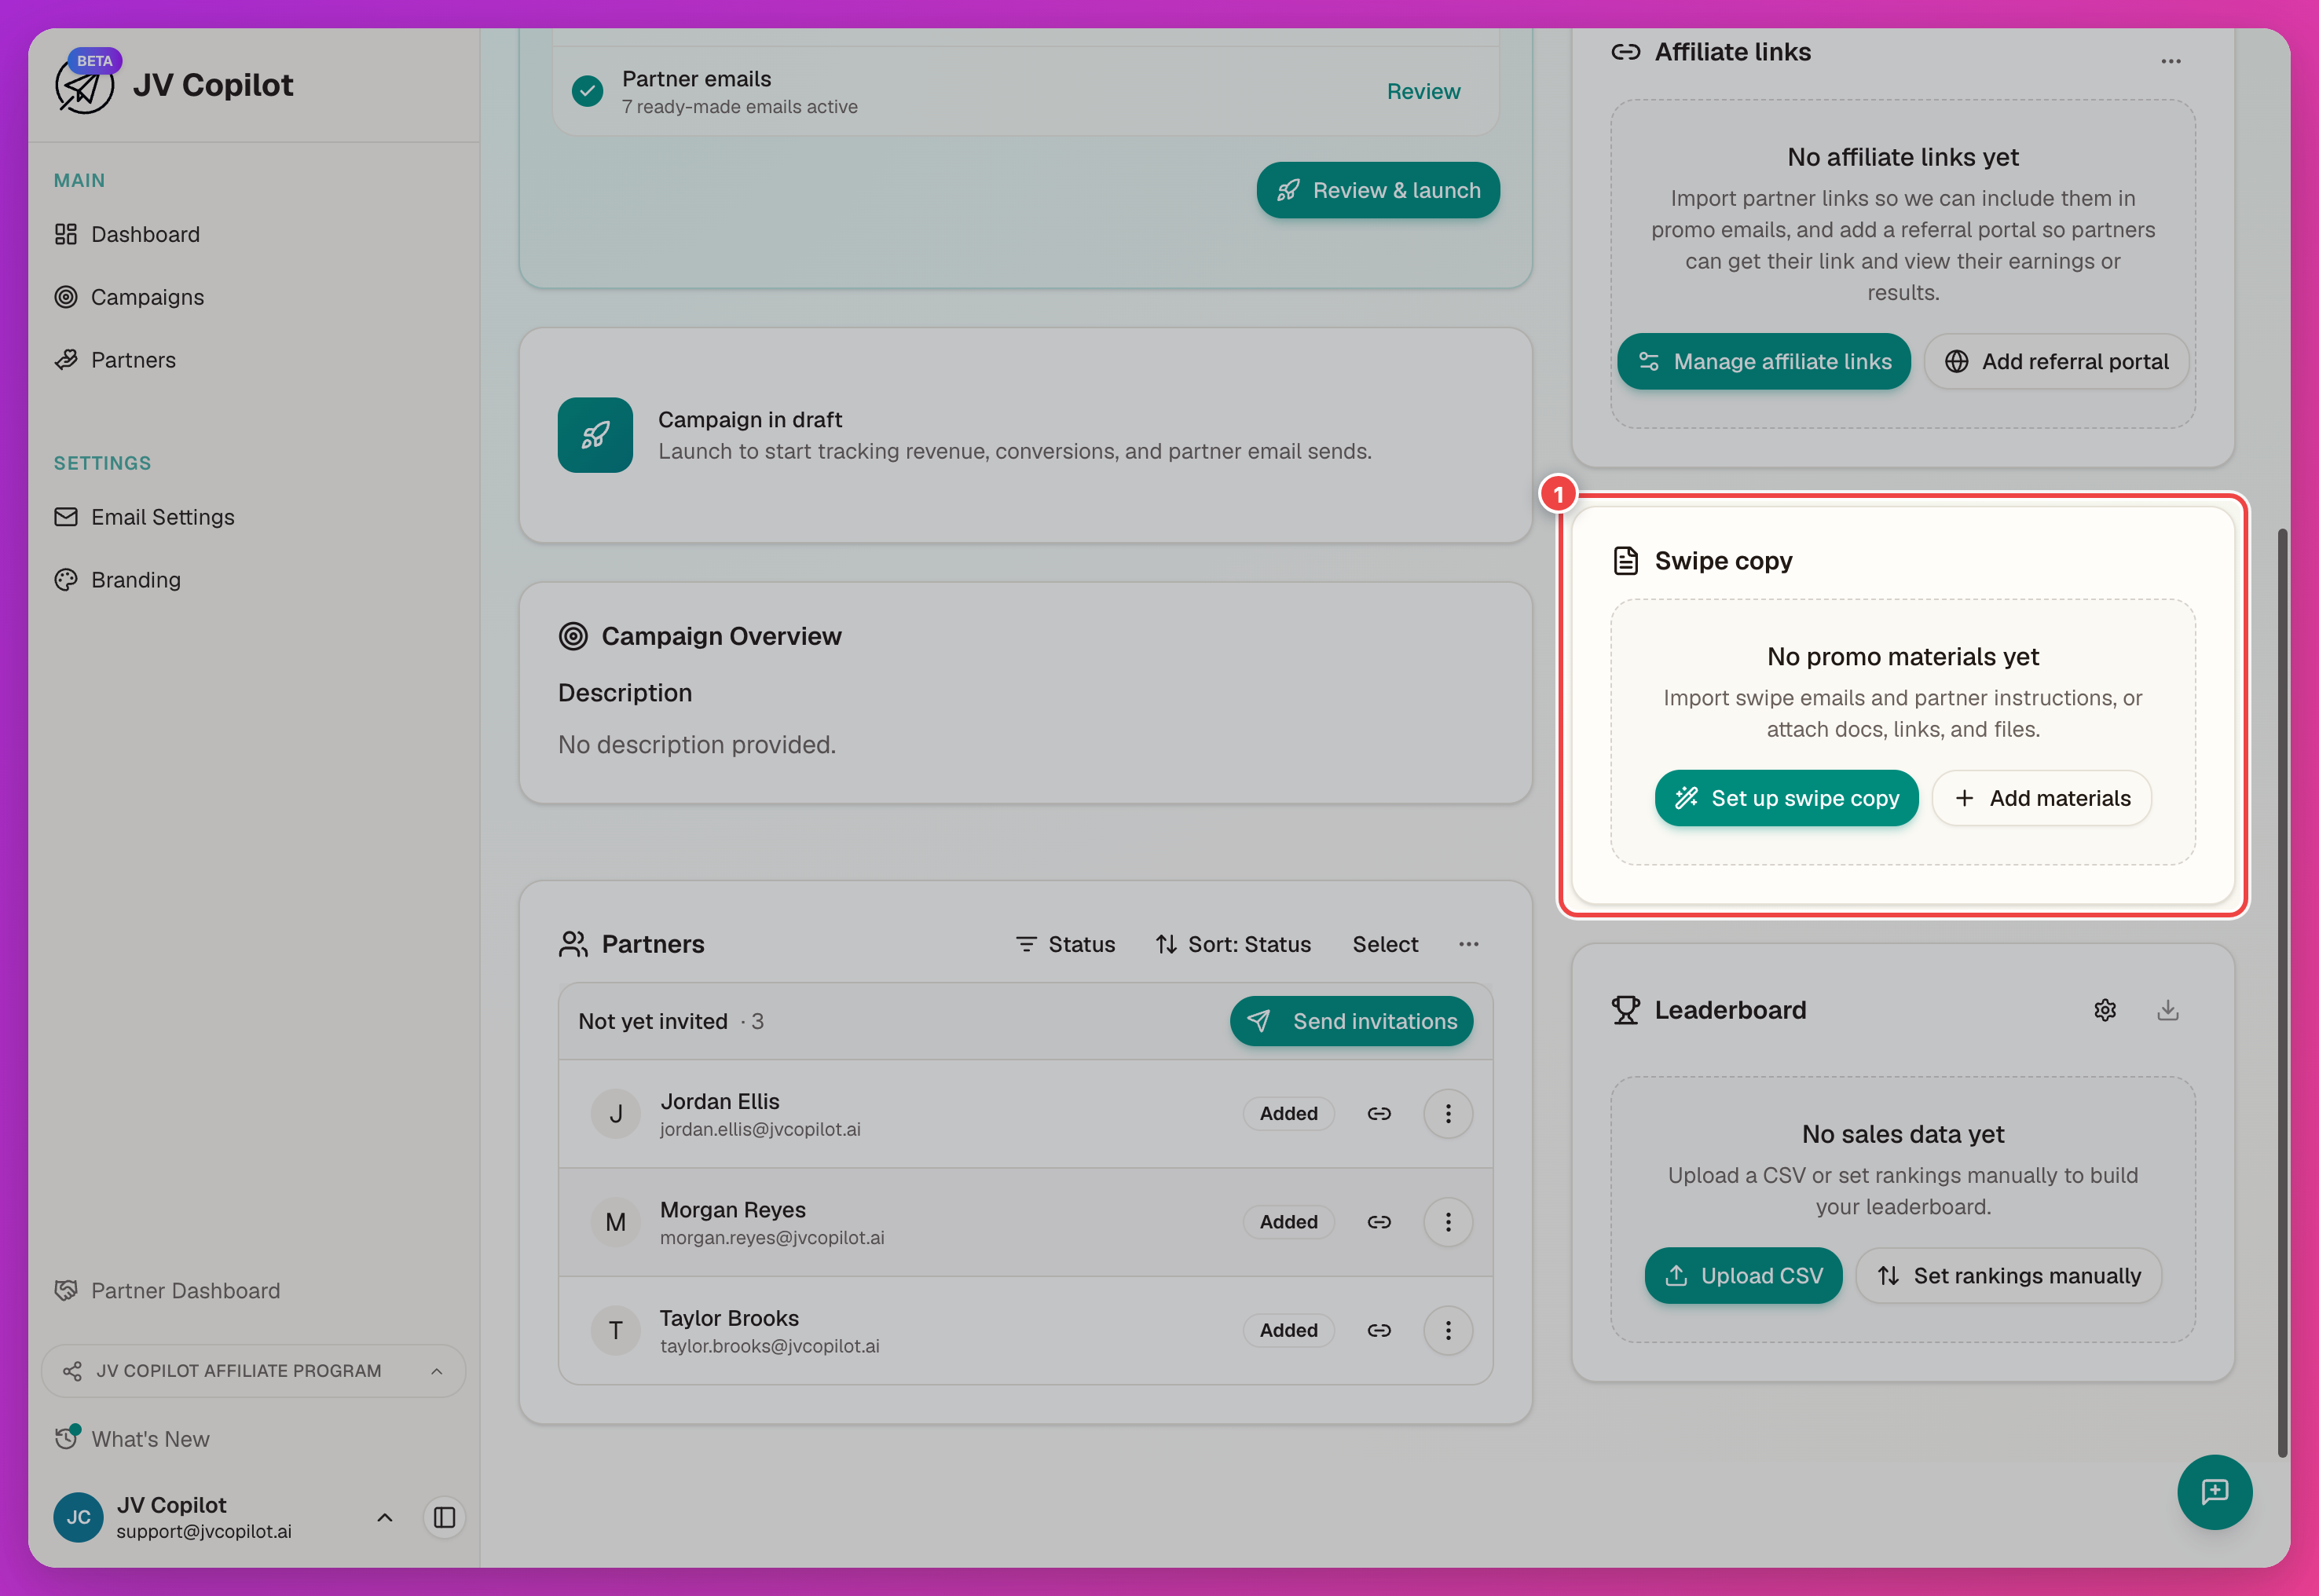
Import Swipe Copy
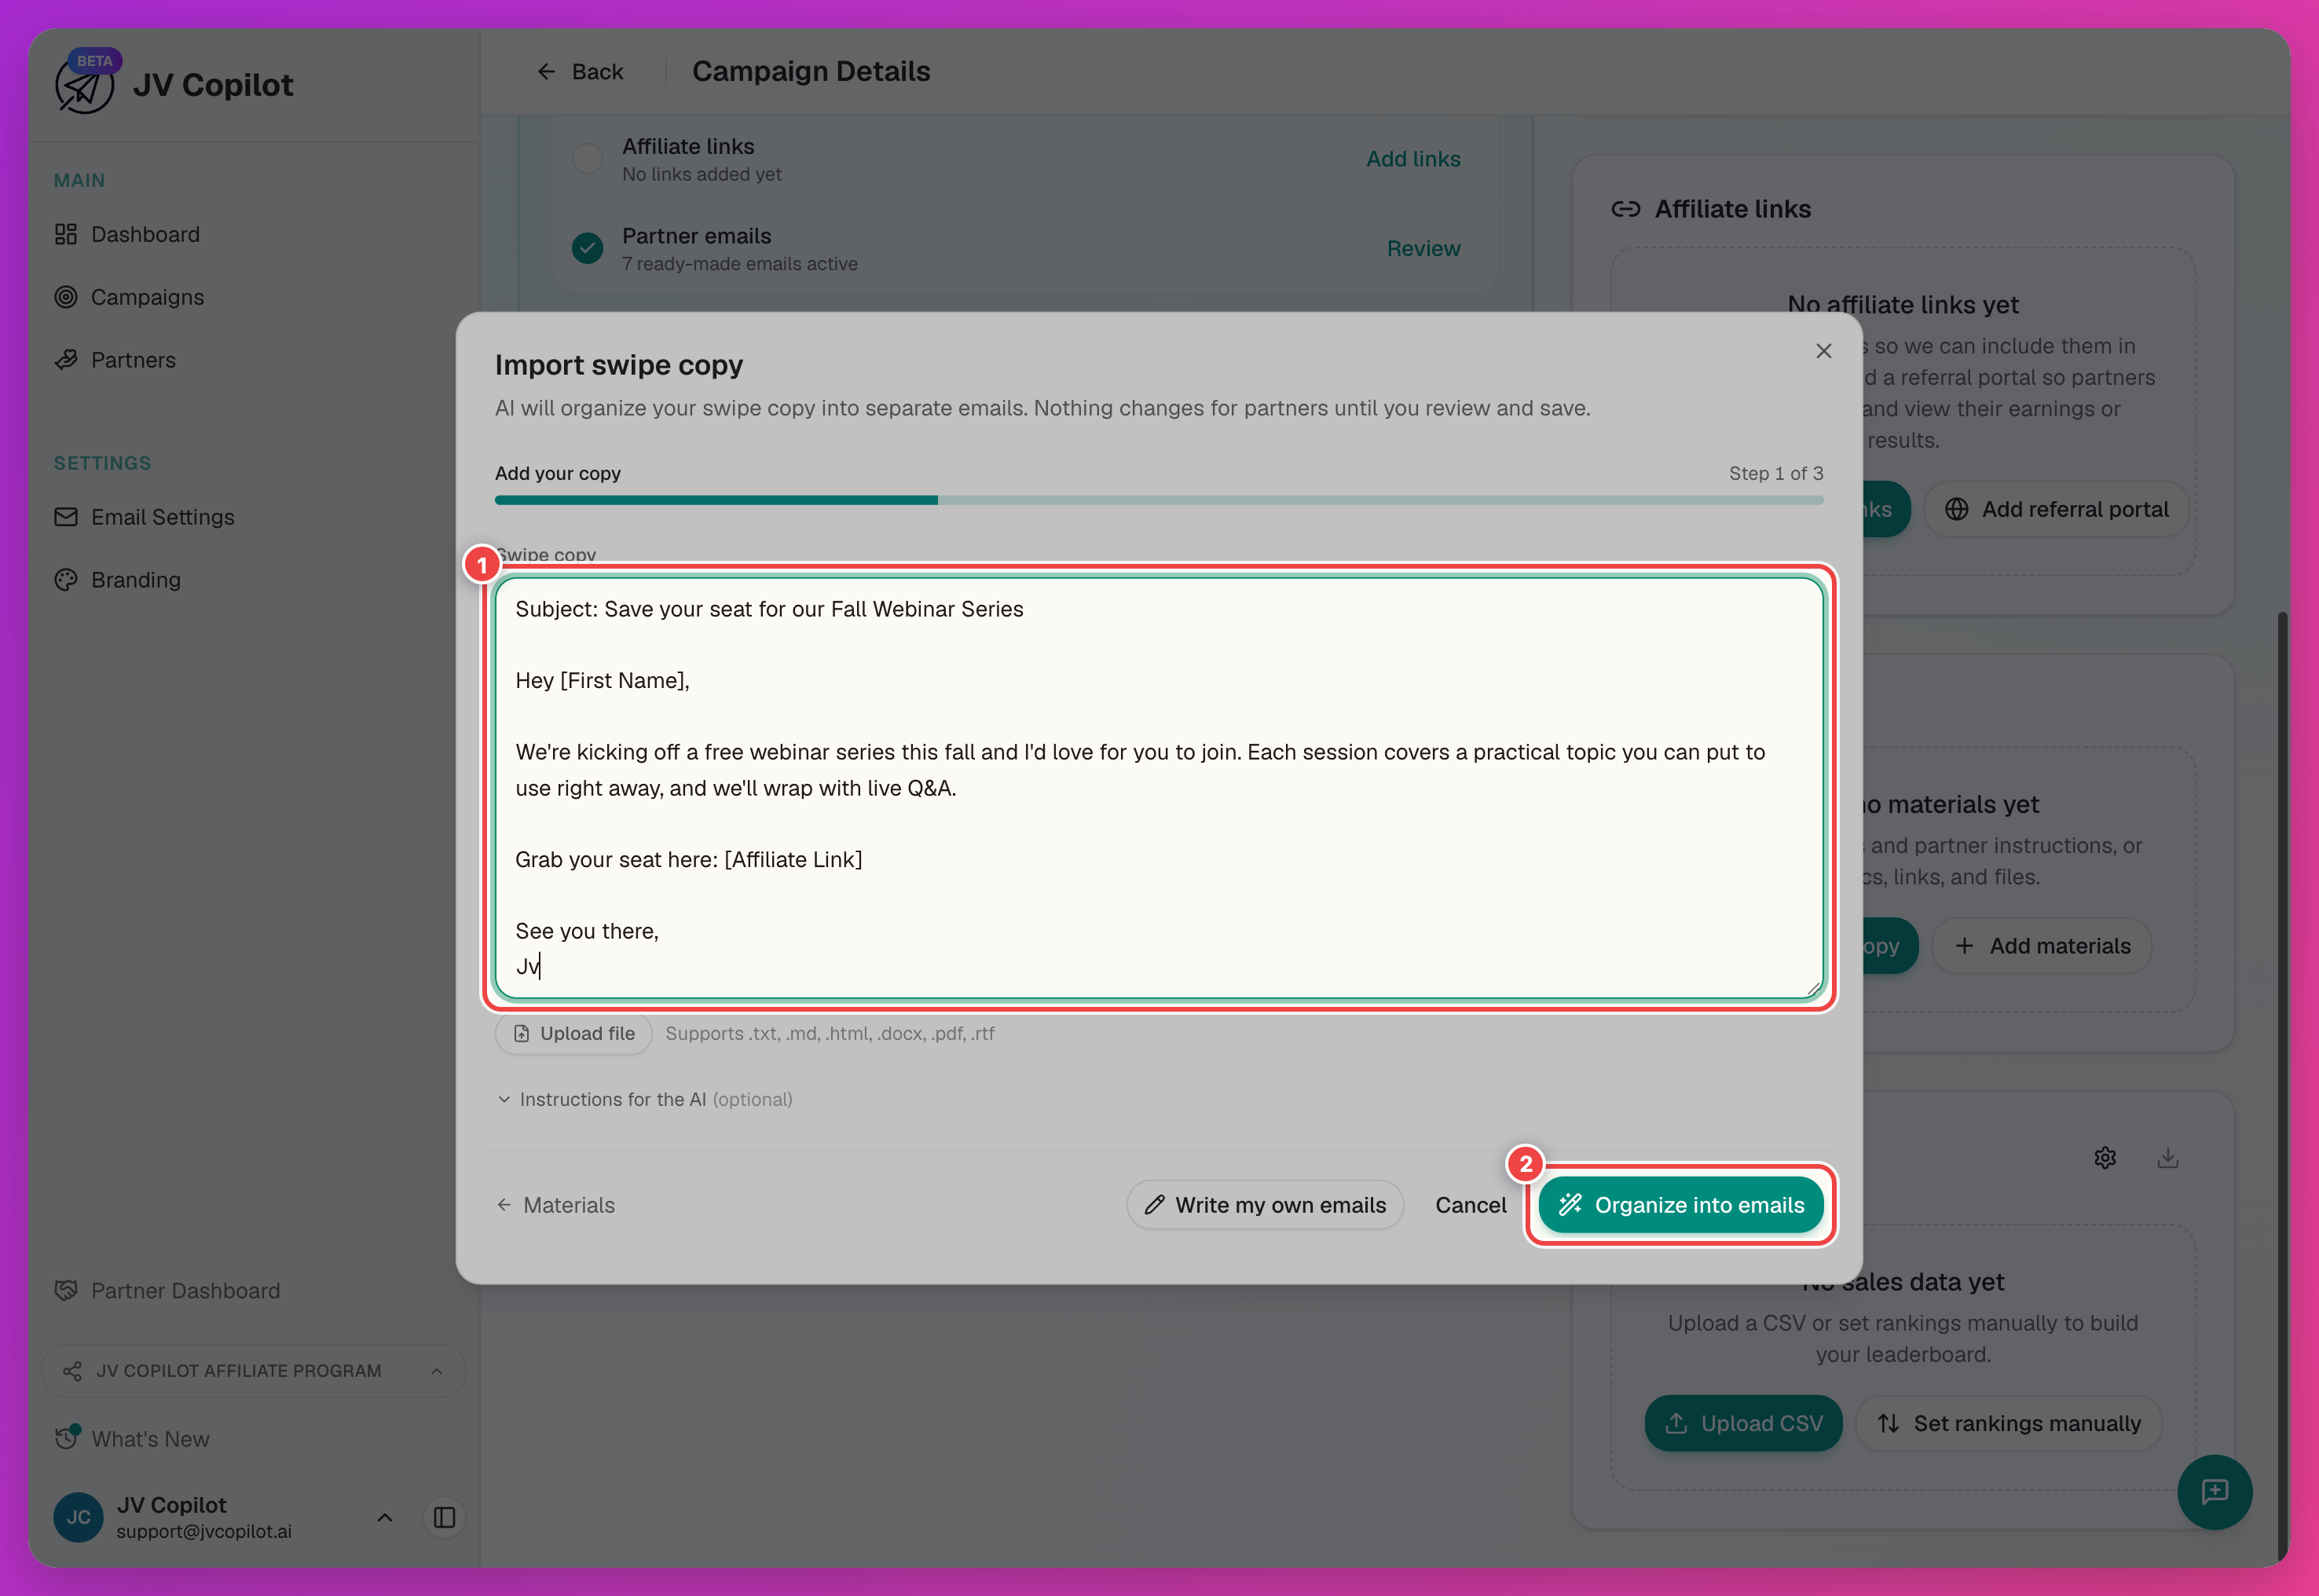
Clicking Set up swipe copy opens a three-step import:
Paste your promo copy into the Swipe copy field as-is — emails, subject lines, instructions and all — or upload a file. If the AI needs context (say, where one email ends and the next begins), add a note under Instructions for the AI.
Click Organize into emails. JV Copilot sorts the raw copy into individual, partner-ready emails.
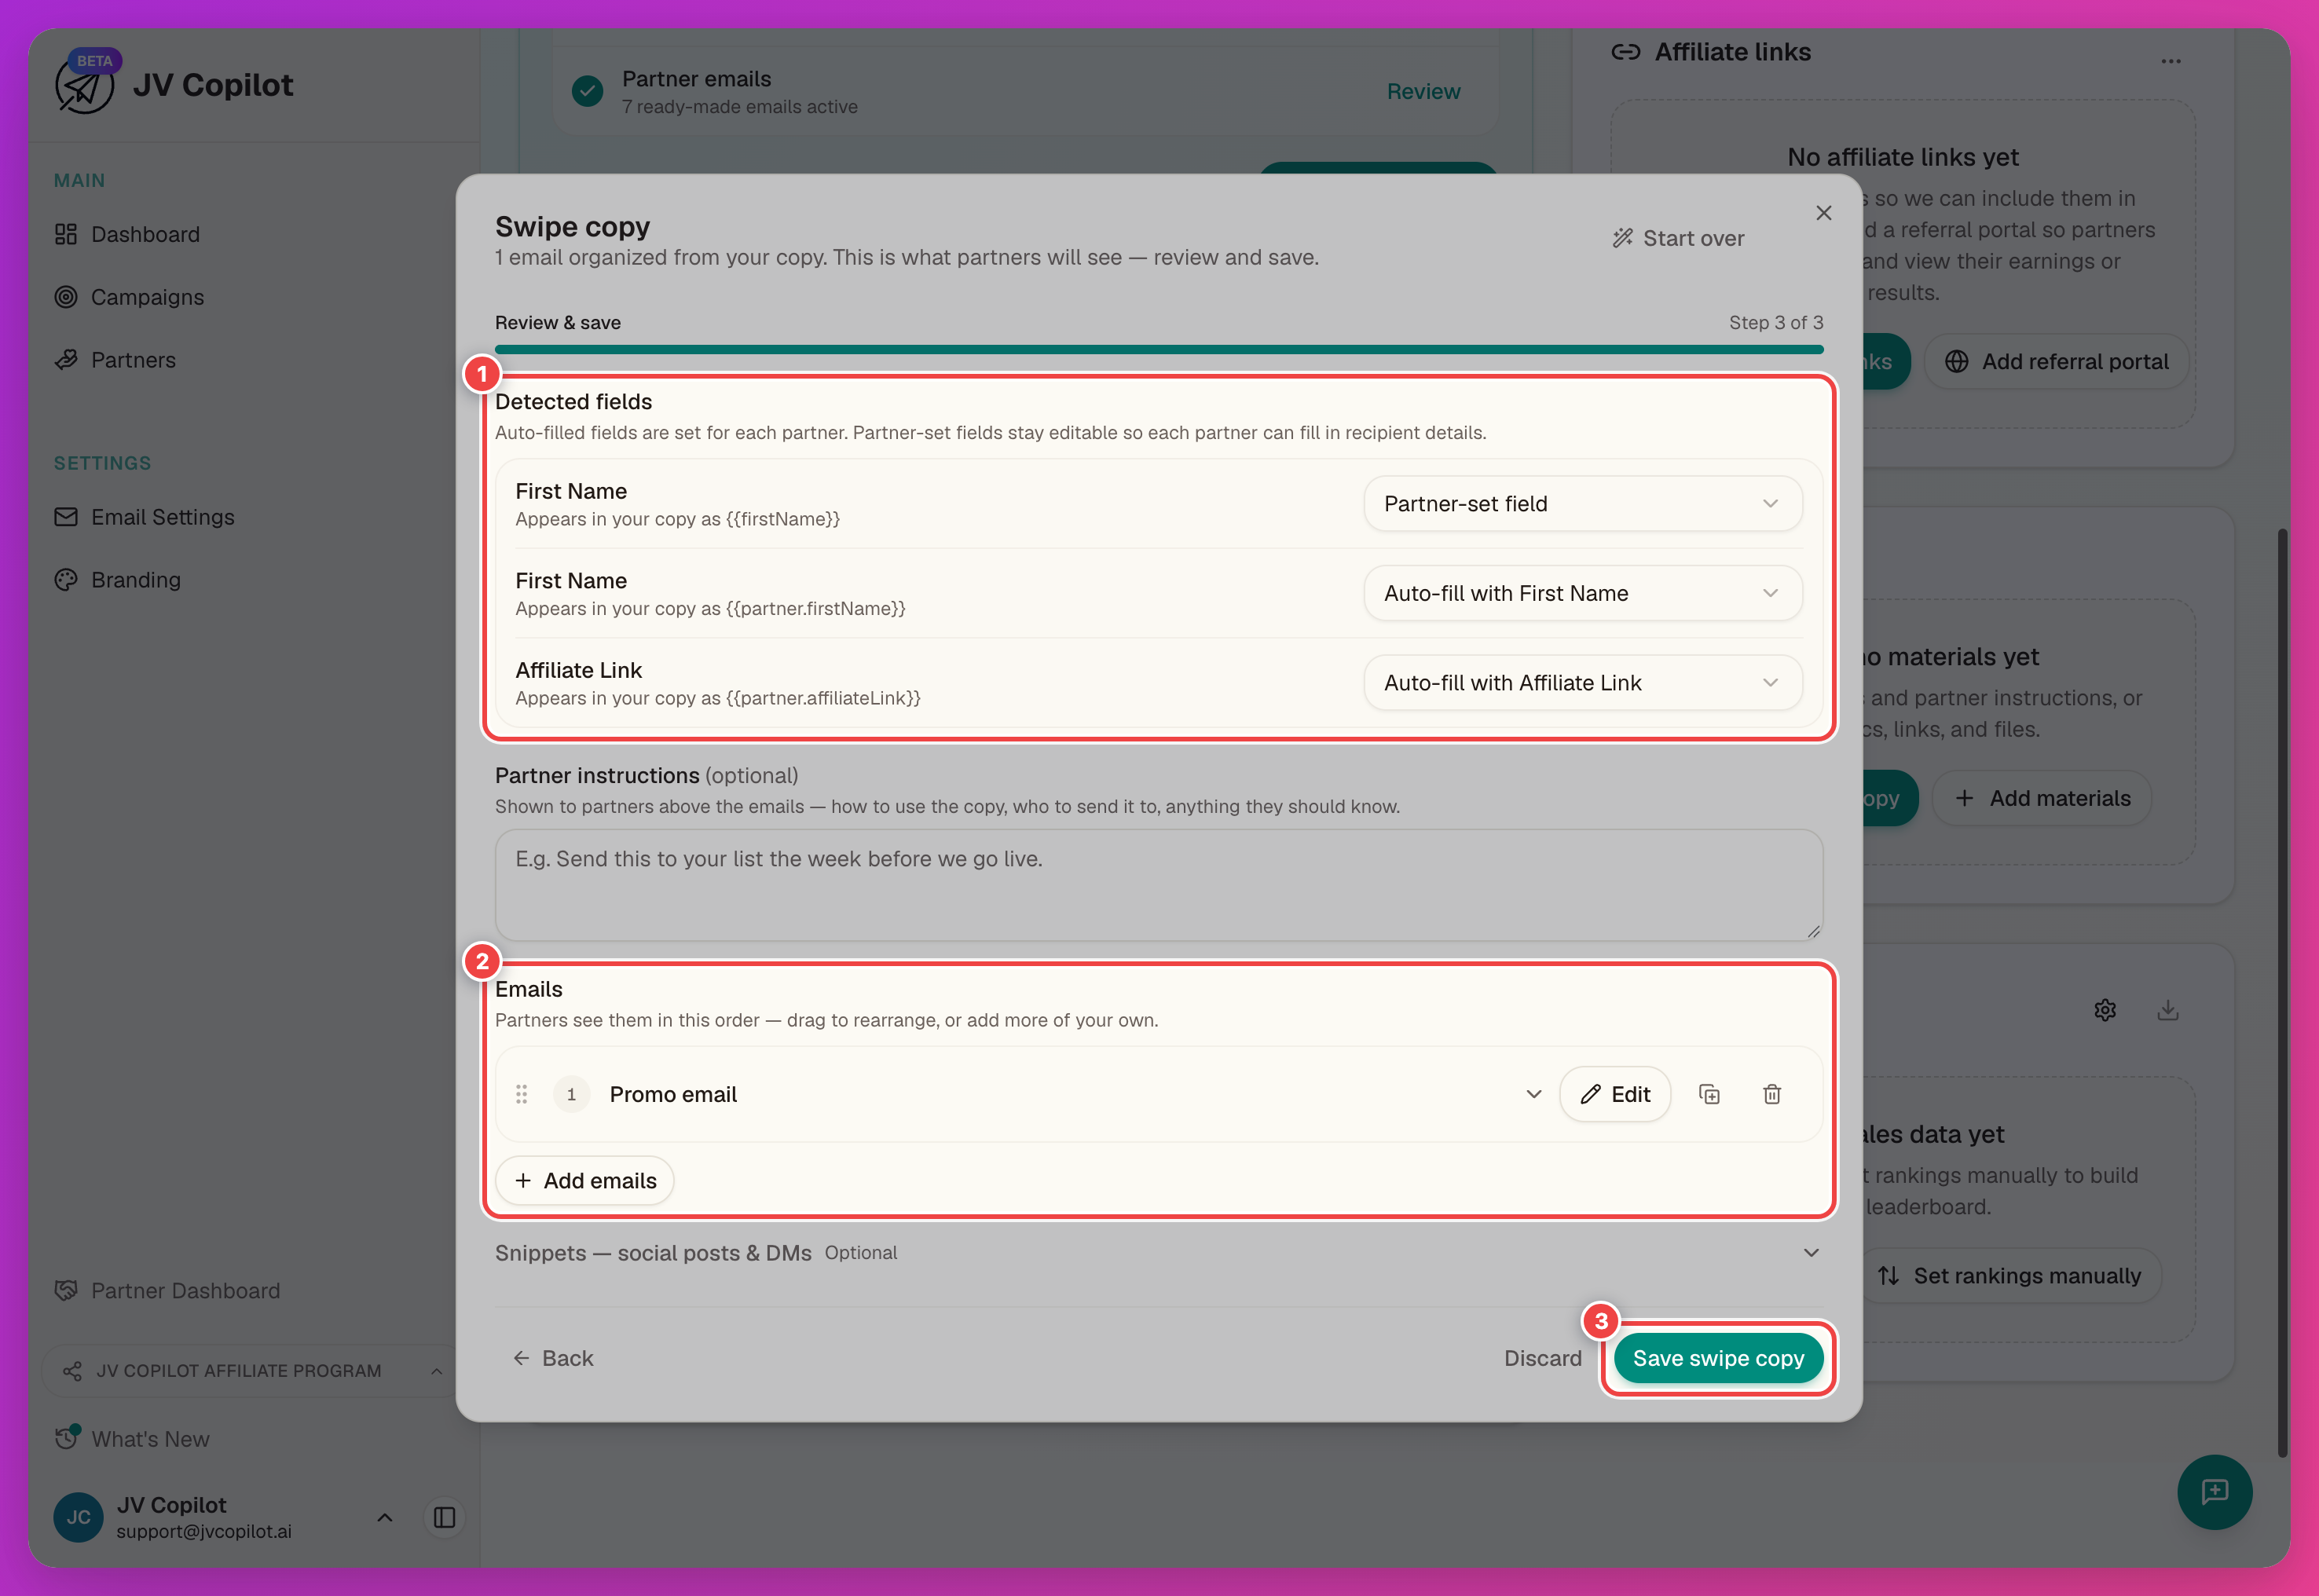
Review the result before saving — check the detected fields and the emails, then click Save swipe copy.
Don't want AI touching your copy at all? Click Write my own emails at the bottom of this screen instead of pasting anything — it skips the import entirely and drops you straight into a blank email you write by hand.
On the review step:
- Detected fields — variables the AI found in your copy, like the partner's first name and affiliate link. JV Copilot fills these in automatically for each partner: auto-filled fields (like the affiliate link) come from the system, while partner-set fields (like the reader's first name) stay editable so each partner can personalize them. Change a field's dropdown if it's mapped wrong.
- Emails — expand or Edit any email to fix wording before it goes live.
- Save swipe copy when everything looks right.
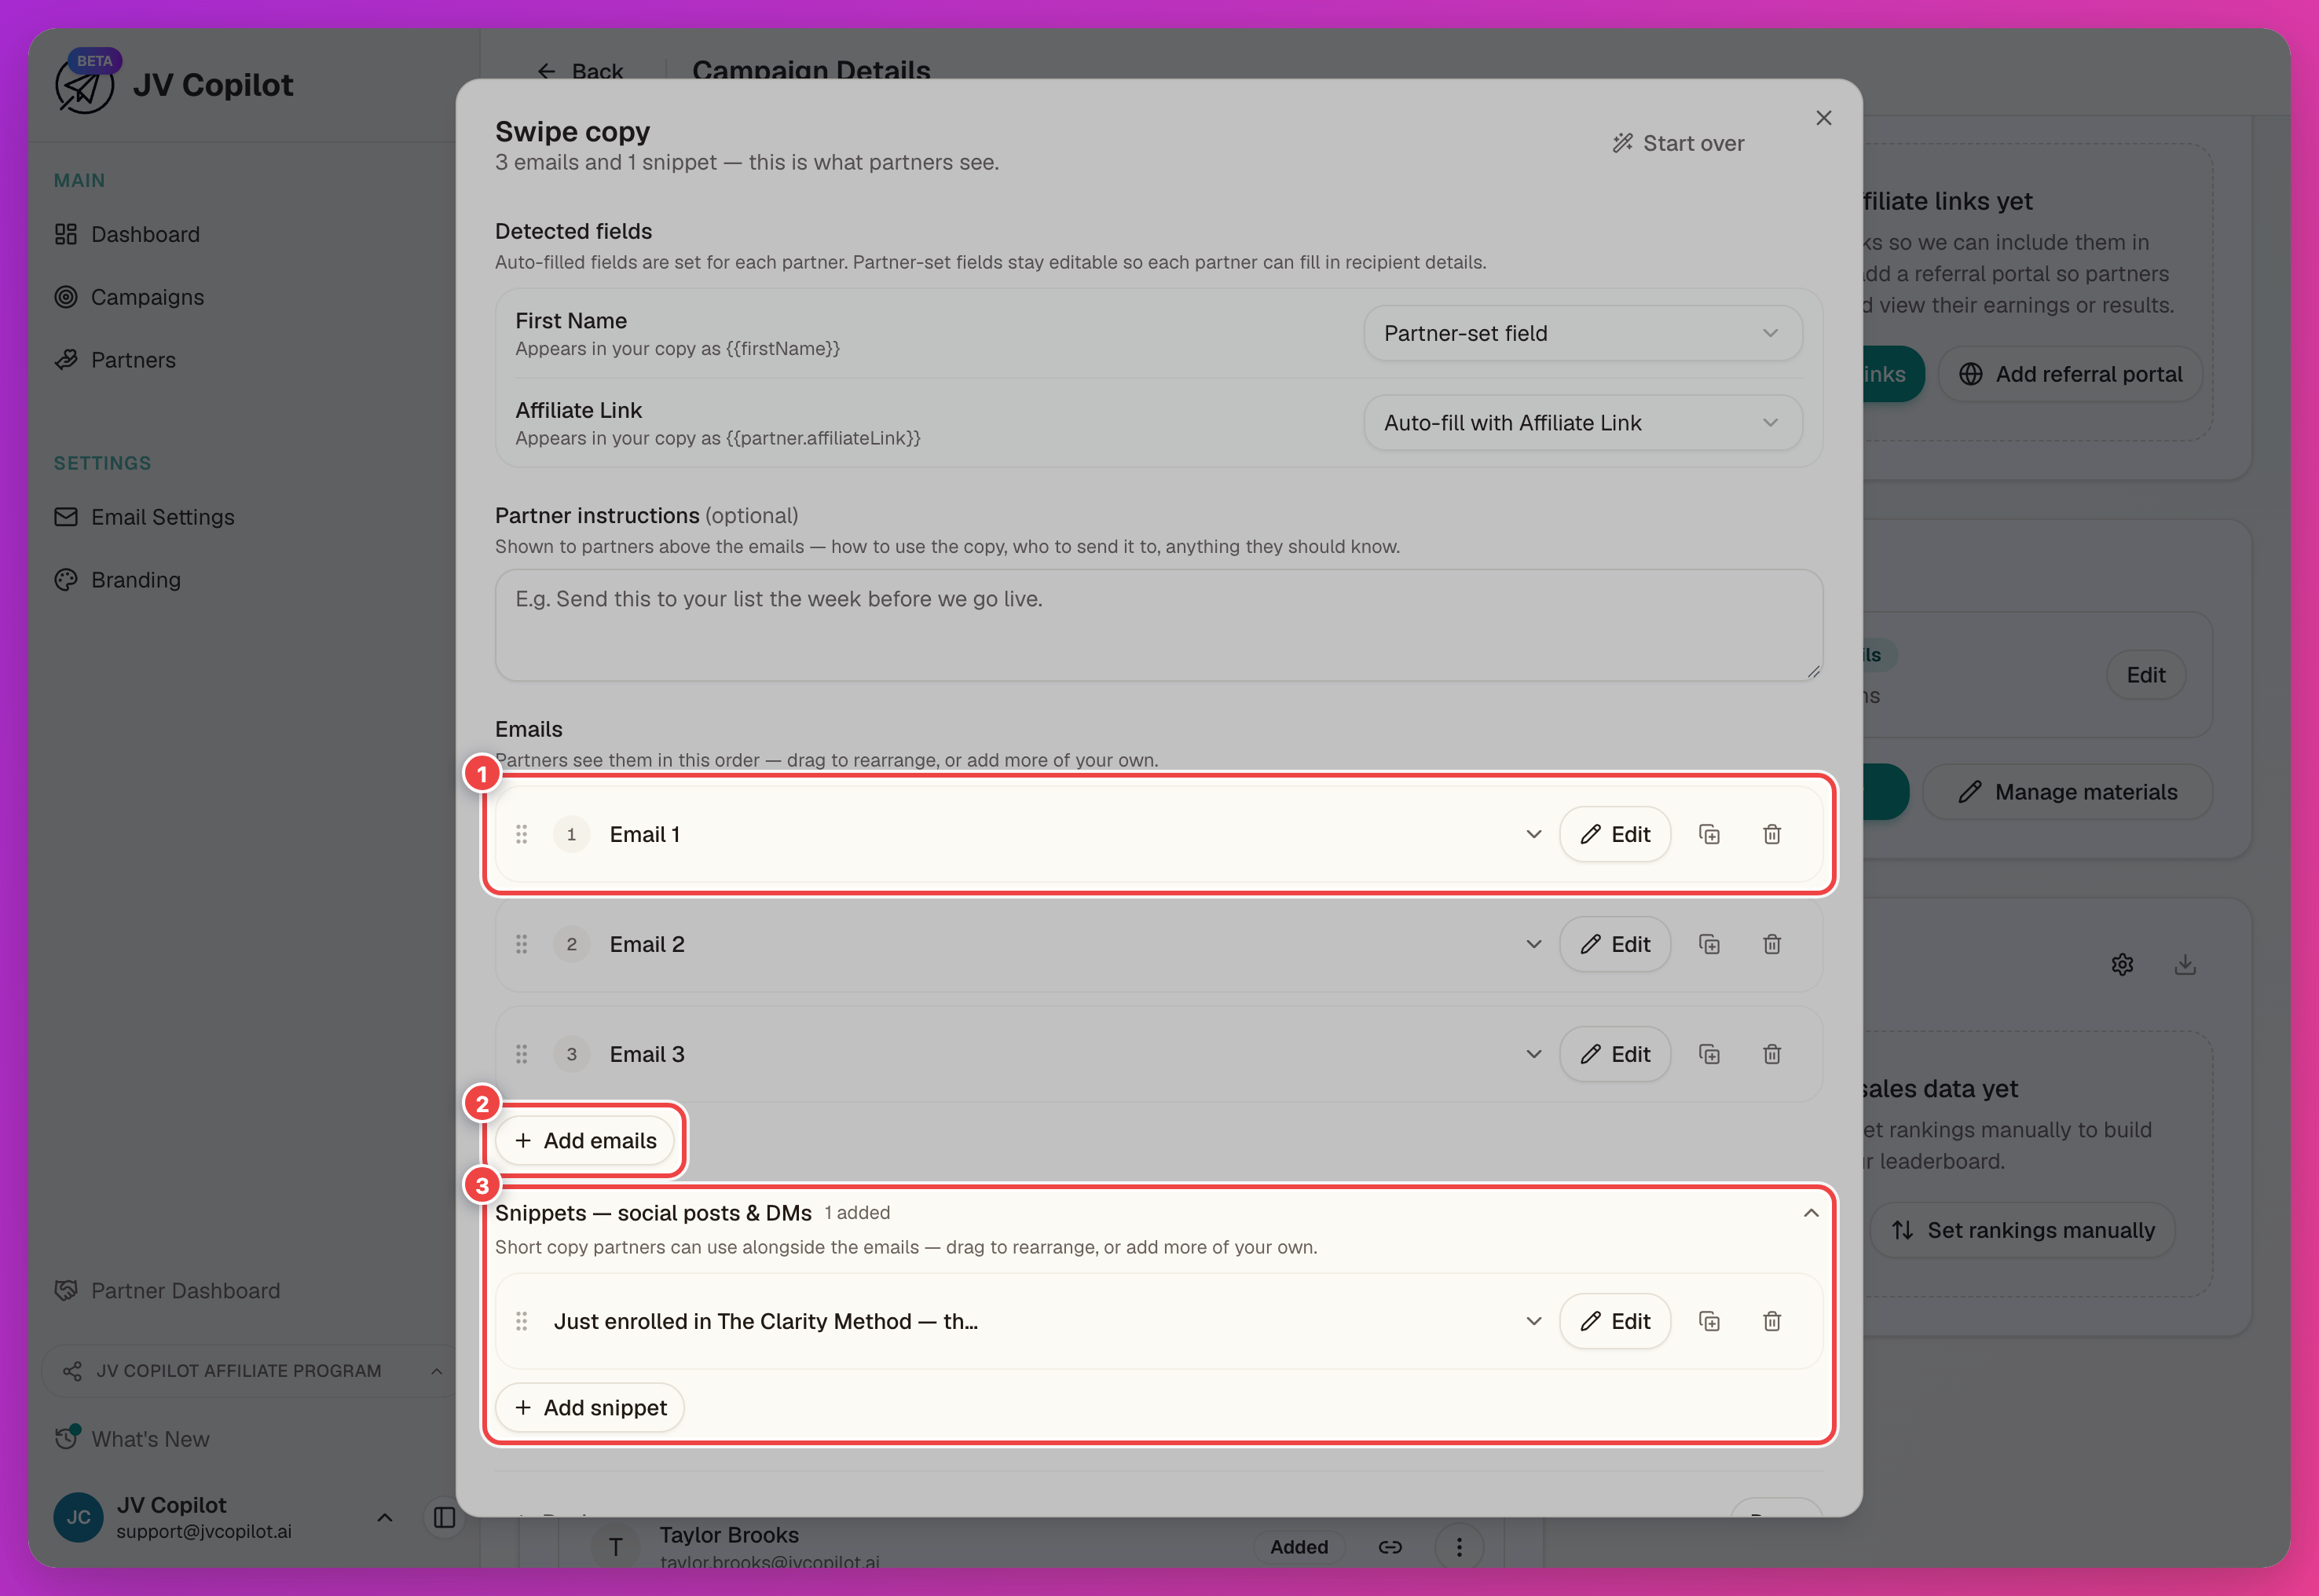
Editing Swipe Copy Later
Swipe copy isn't locked in once you save it. Reopen the card and click Edit swipe copy to keep working the sequence:
- Add emails — paste more copy, upload another document, or click Write my own email to add one by hand. Each new email drops in as its own row.
- Drag a row's handle to reorder emails — partners send them in the order shown.
- Use a row's Duplicate action to copy an existing email as a starting point, or Remove to drop one you don't need.
- Expand Snippets — social posts & DMs to write short social posts and DMs by hand alongside your emails, not just the ones AI found in your copy.
Save with Save changes when you're done.
For extra materials, Add materials takes a title plus a link, file, or note. Use labels that make each resource's purpose obvious. Drag and drop materials to reorder them — partners see them in the order you set. Click the pencil on an existing material to edit its title, URL, or note in place — no need to delete and re-add it; a file material shows its original filename while you edit, since only the title can change.
4. Add Affiliate Links
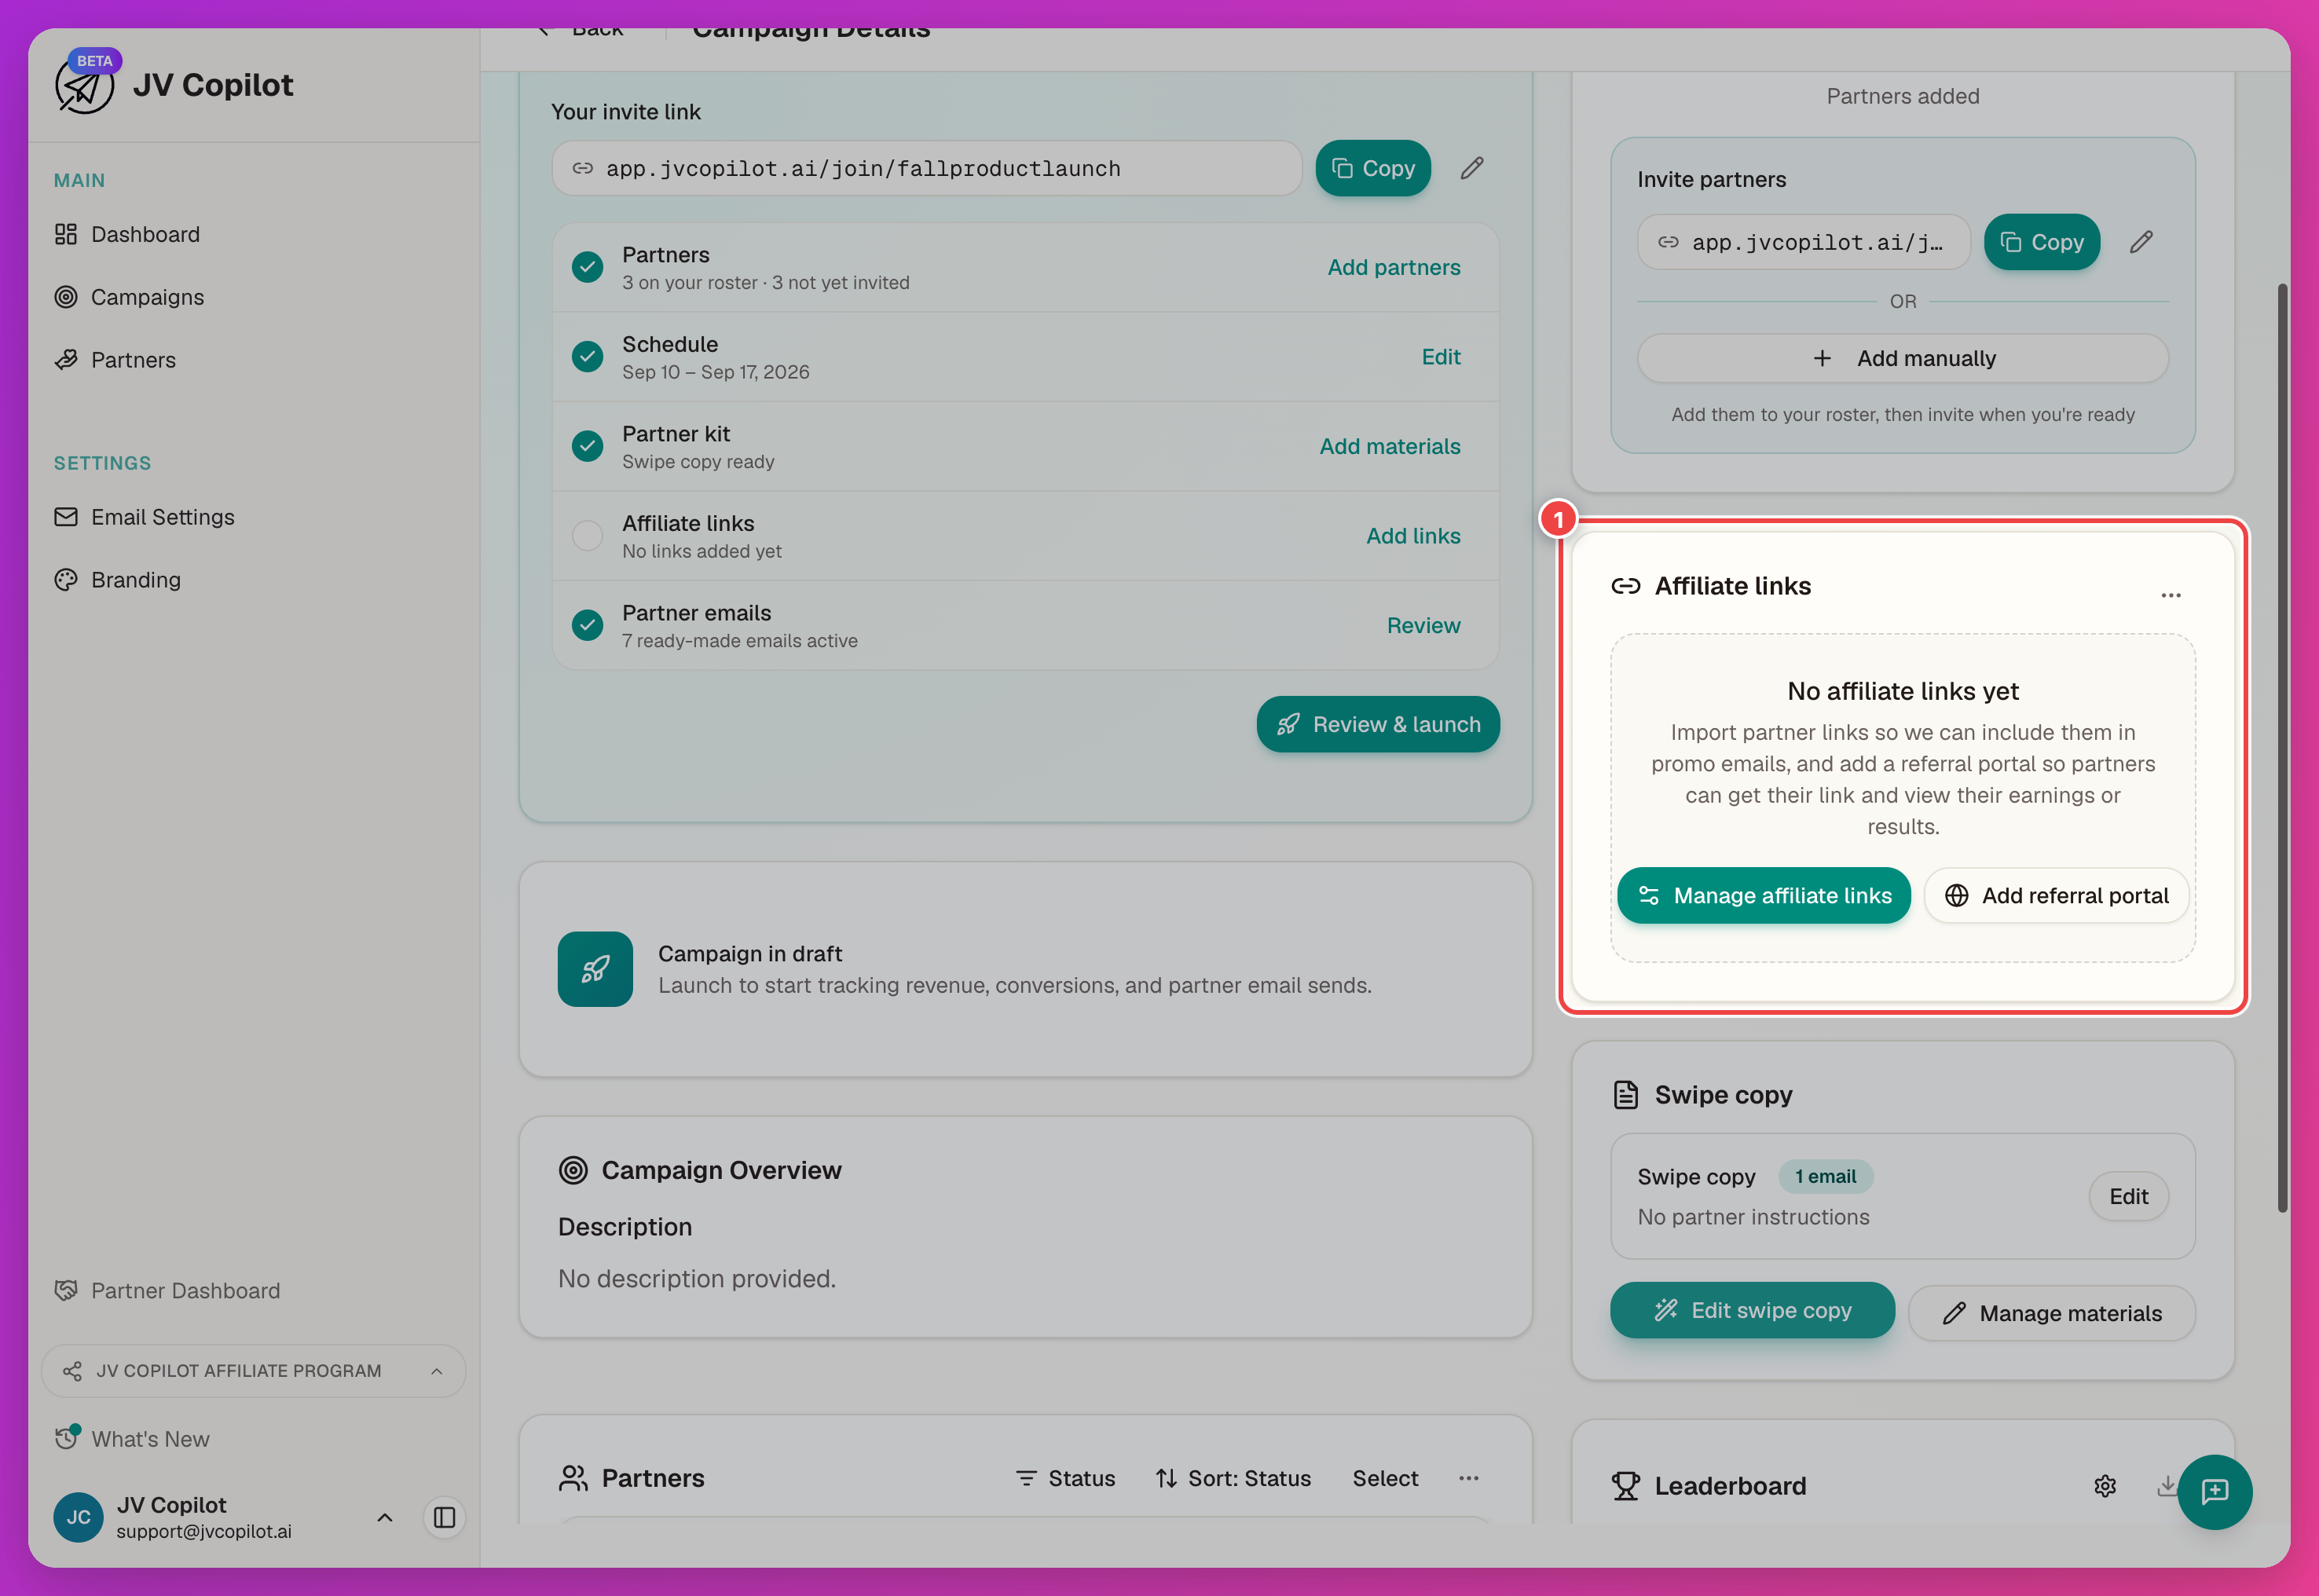
If partners need unique tracking links, set them up from the Affiliate links card. It has two entry points, depending on where the links come from:
- Manage affiliate links — you already have each partner's link and supply it yourself.
- Add referral portal — your platform (affiliate network, cart, course host) gives partners a portal where they grab their own link and view their stats. Add the portal URL and partners handle the rest.
Supplying Links Yourself
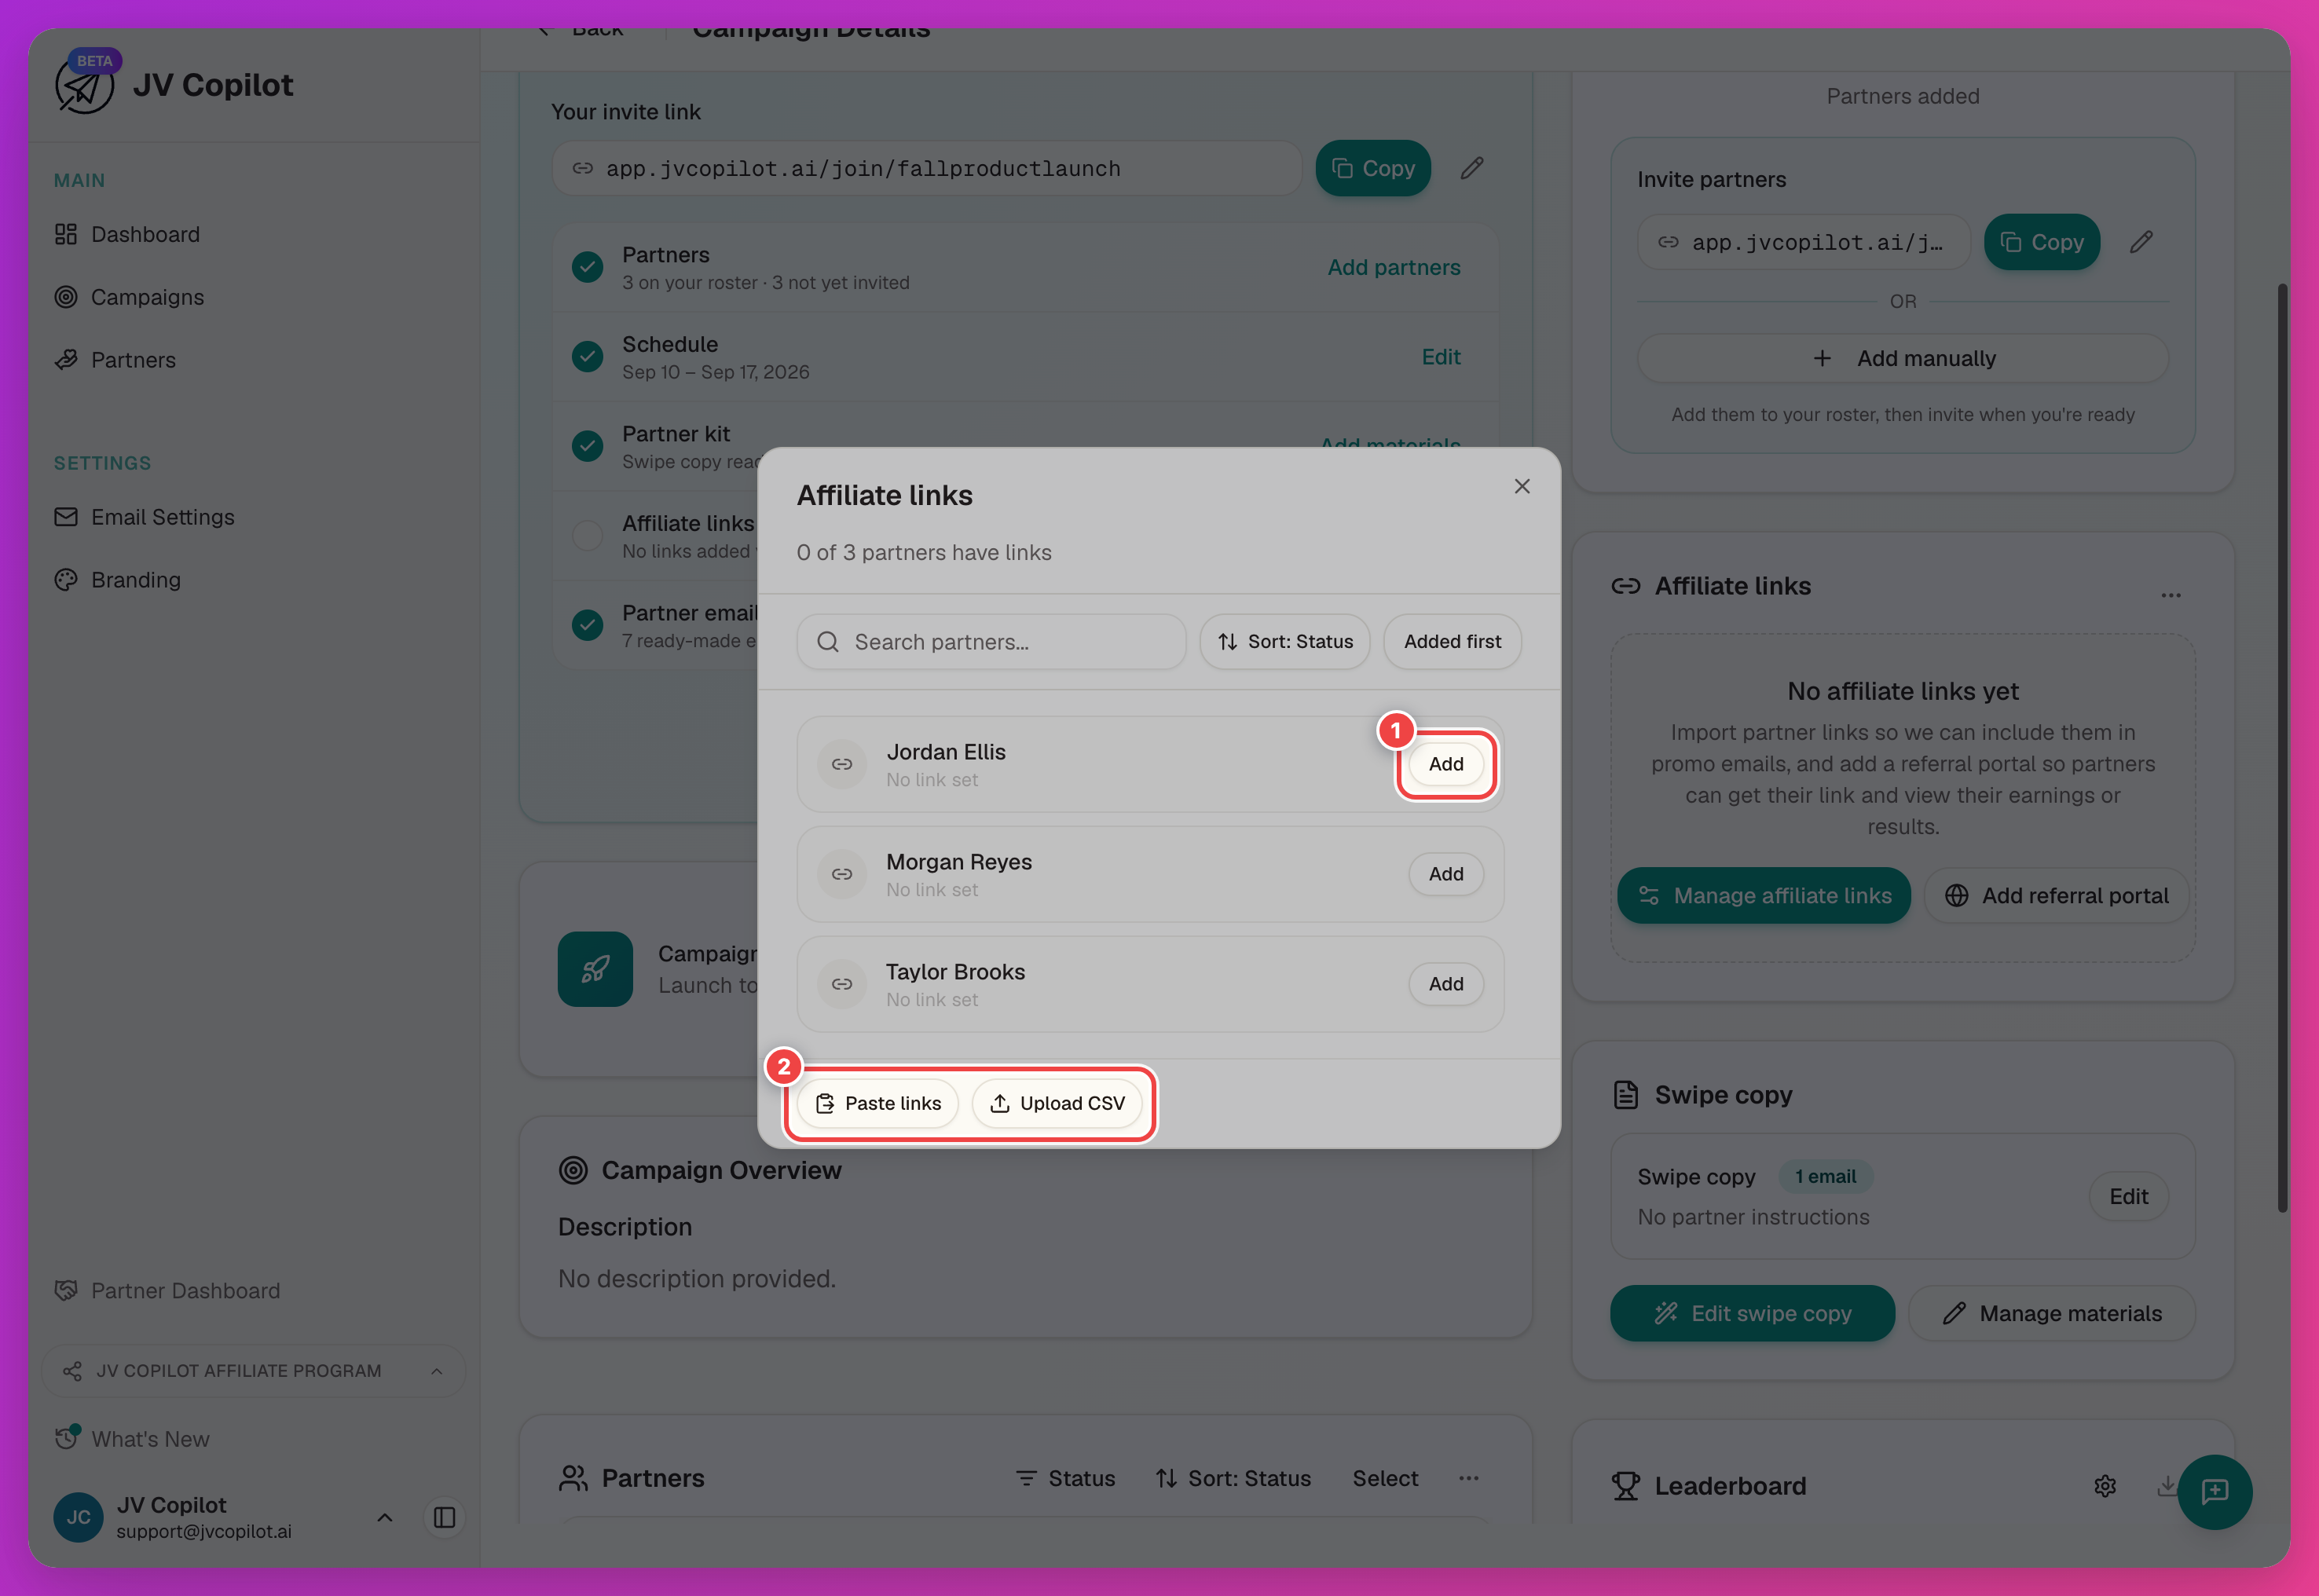
Give each partner their link — one at a time or in bulk.
Close the dialog when every partner has a link — changes save as you go.
The two ways of giving partners their links:
- Add on a partner's row to paste their link individually.
- Paste links or Upload CSV to bulk-import the whole list — paste partner emails with their links, or upload a spreadsheet, and JV Copilot matches each link to its partner by email.
More detail on both paths in Campaign Partners.
5. Launch
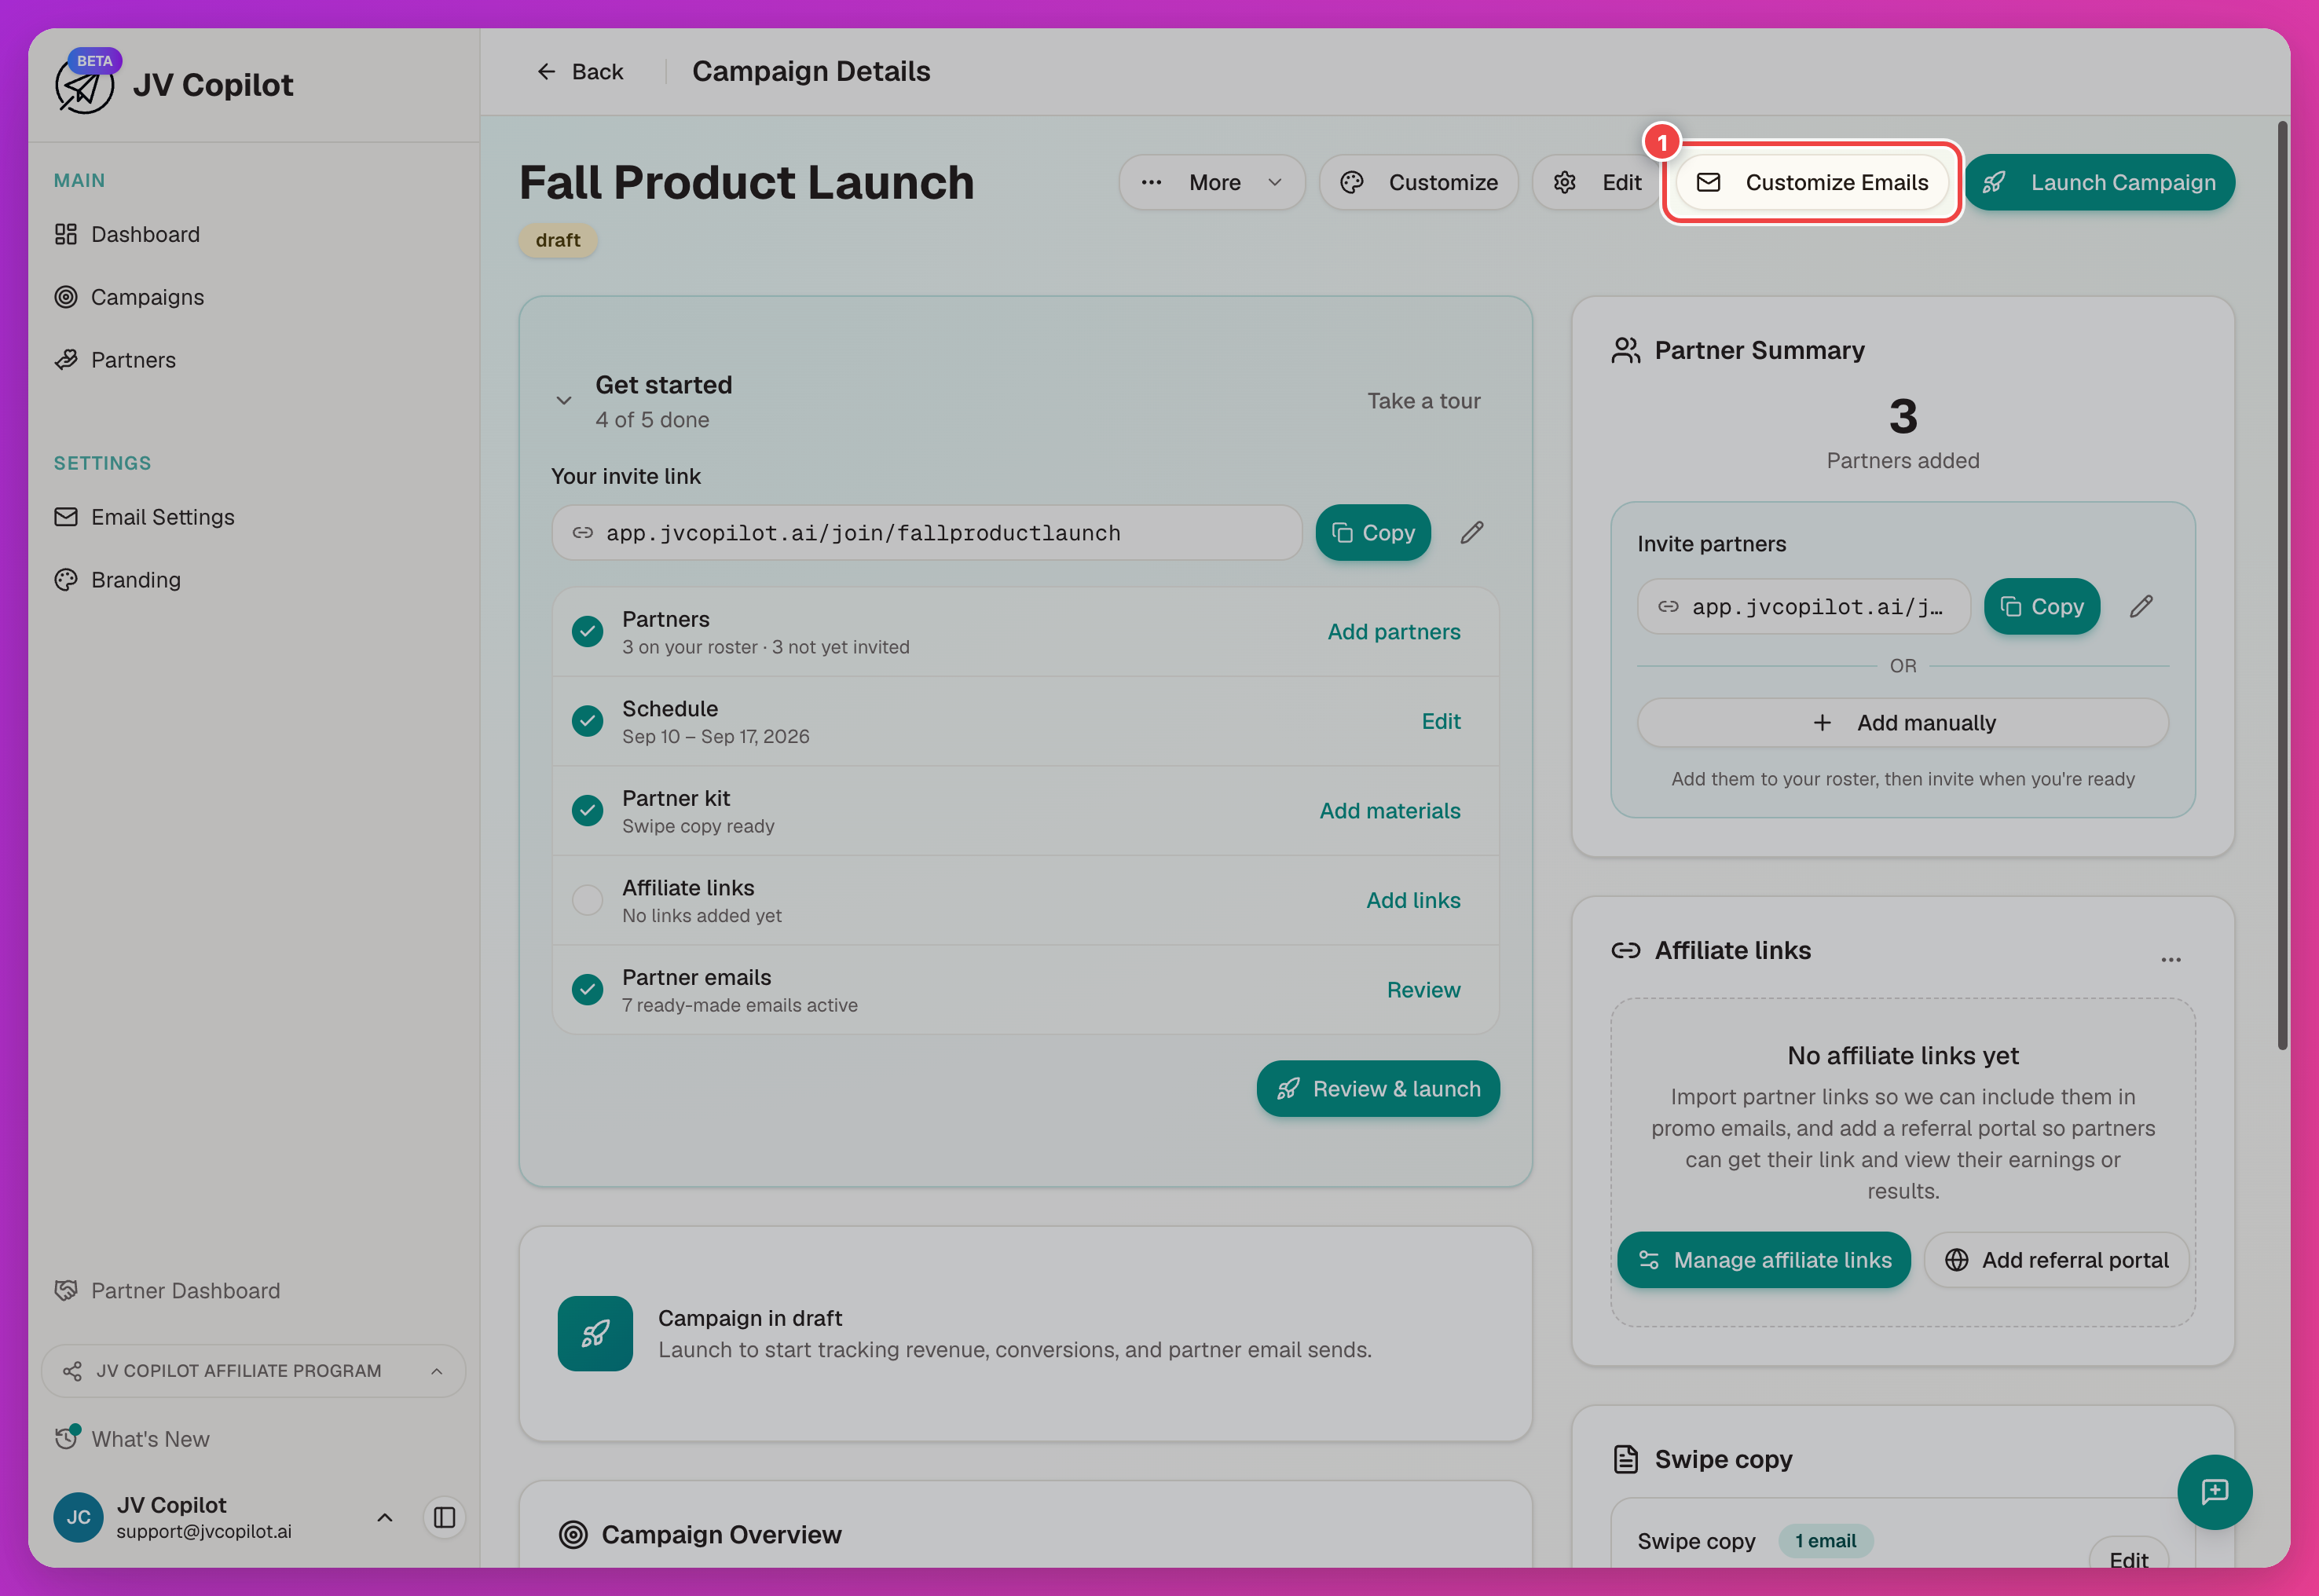
JV Copilot handles the partner emails for you — sensible defaults go out at each stage of the campaign. If you want to review or reword them first, Customize Emails on the campaign page opens the editor; see Set Up Campaign Emails.
When the campaign is ready:
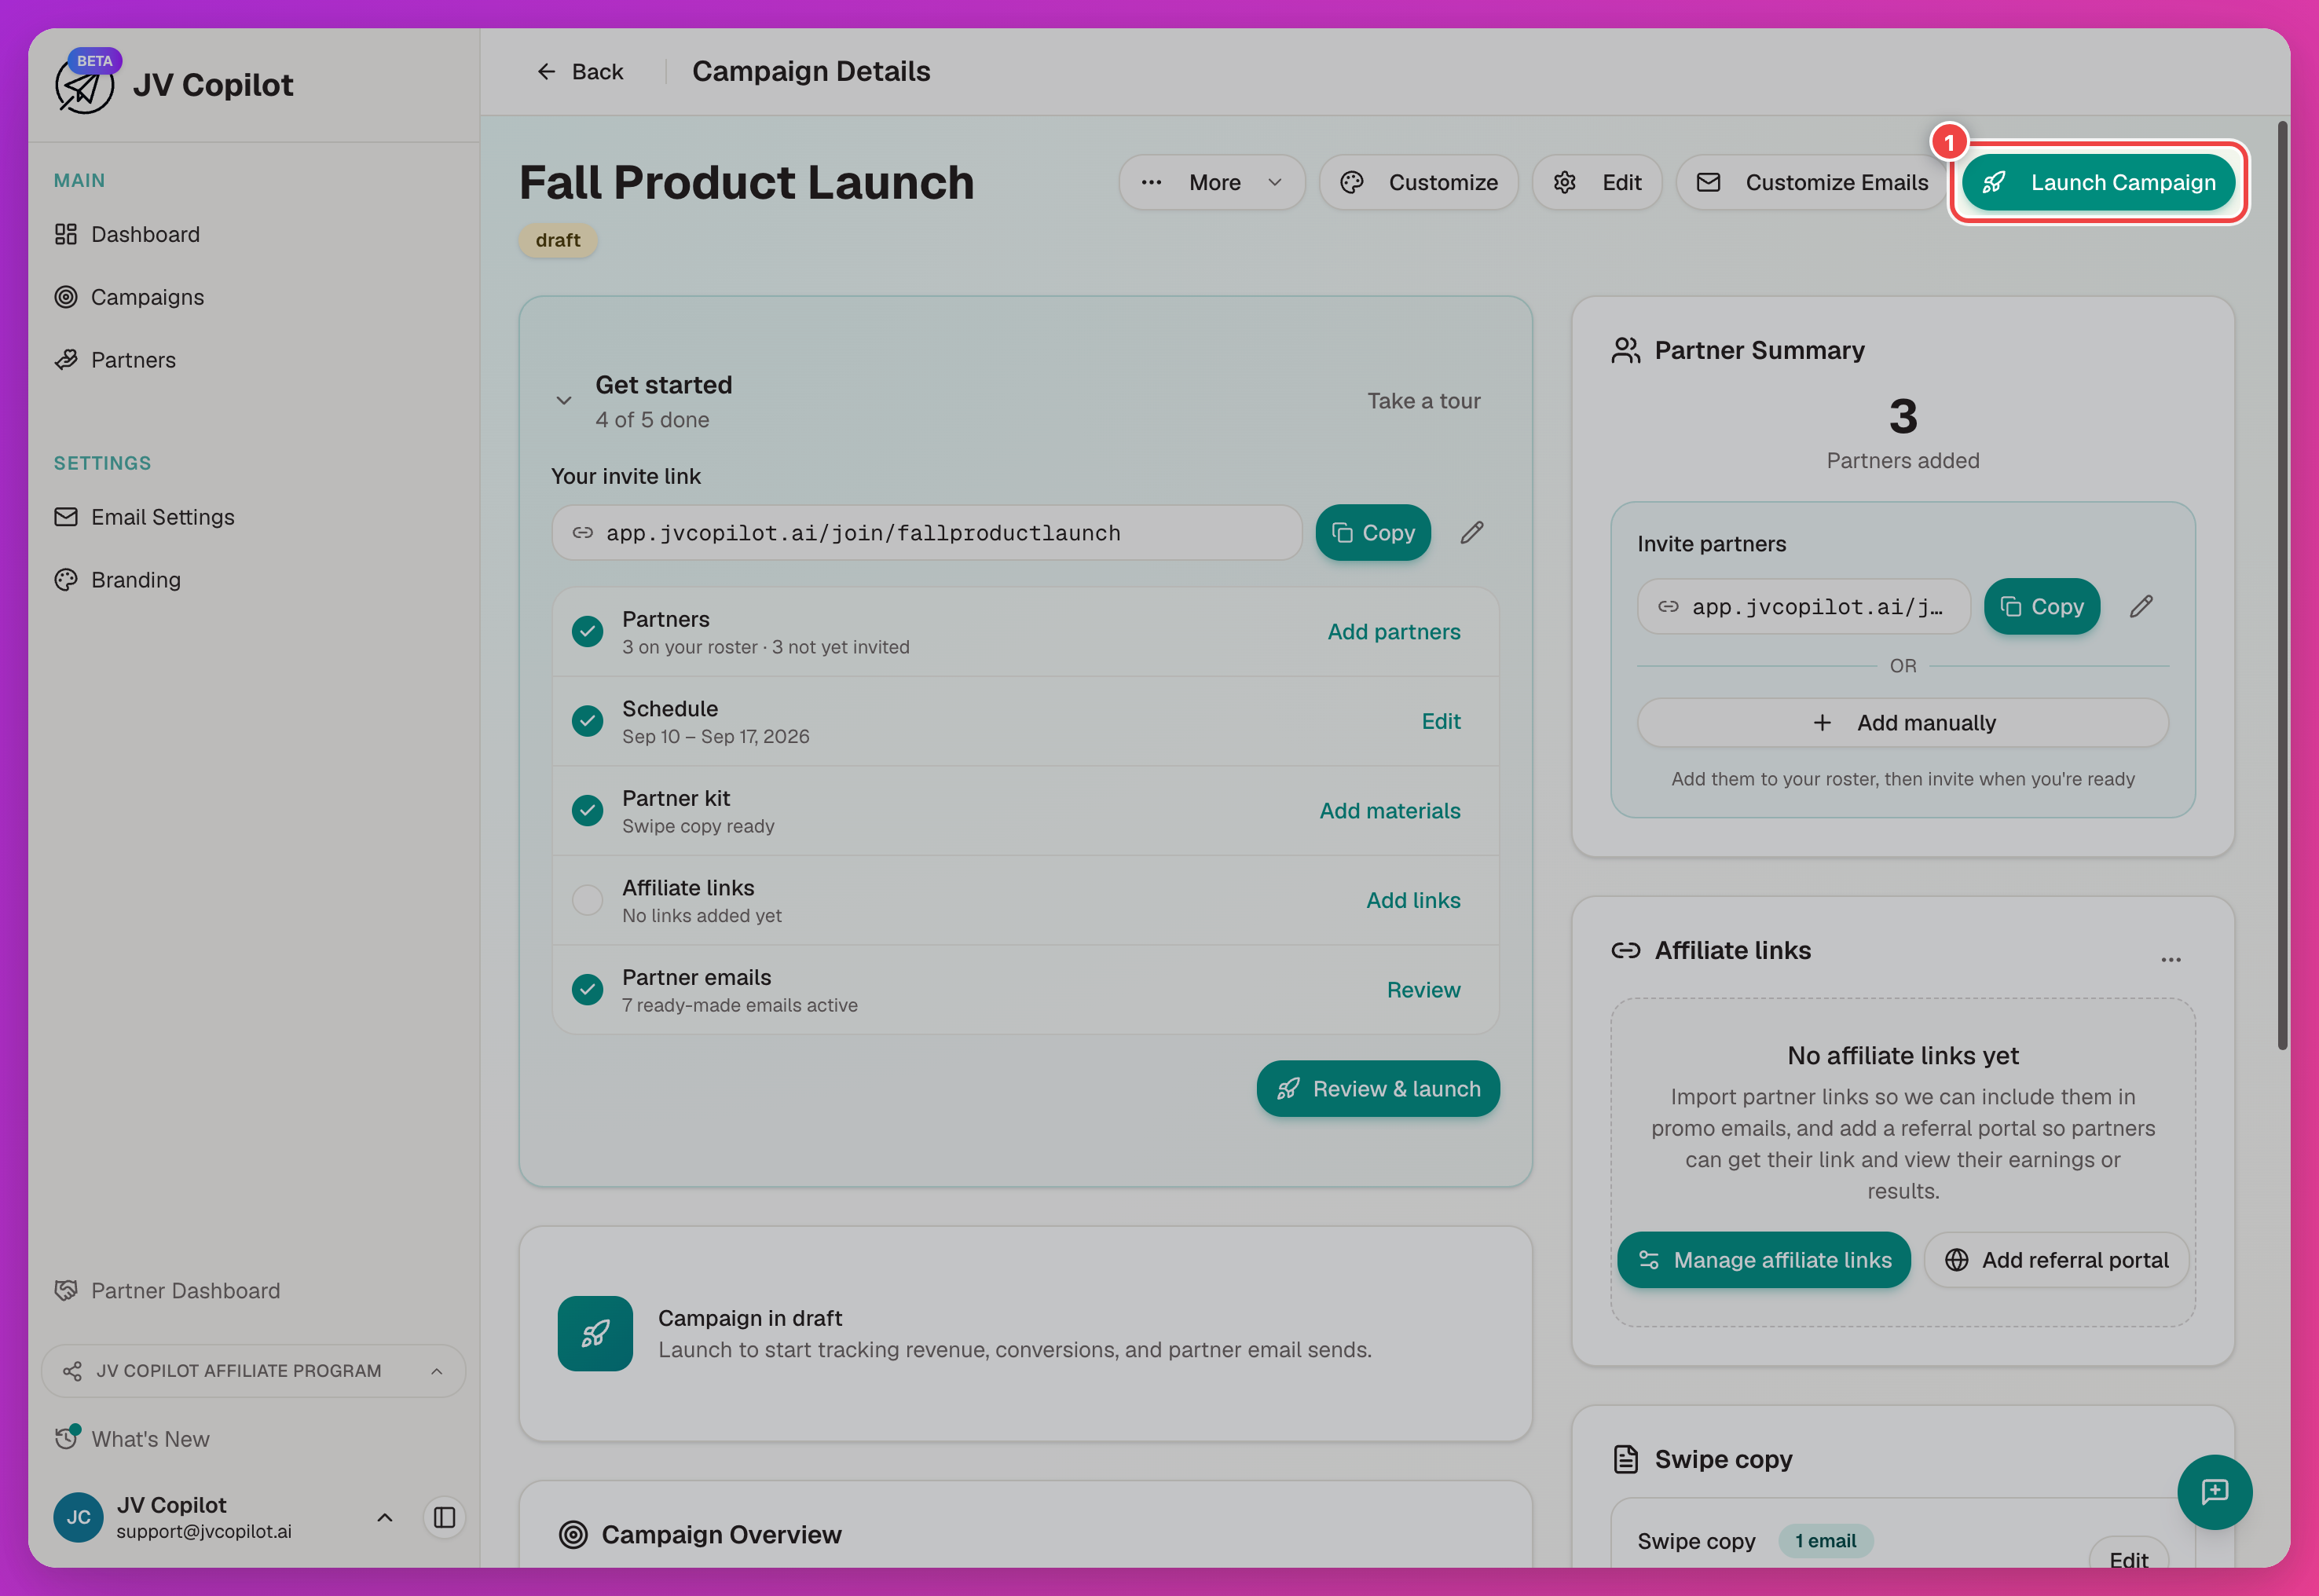
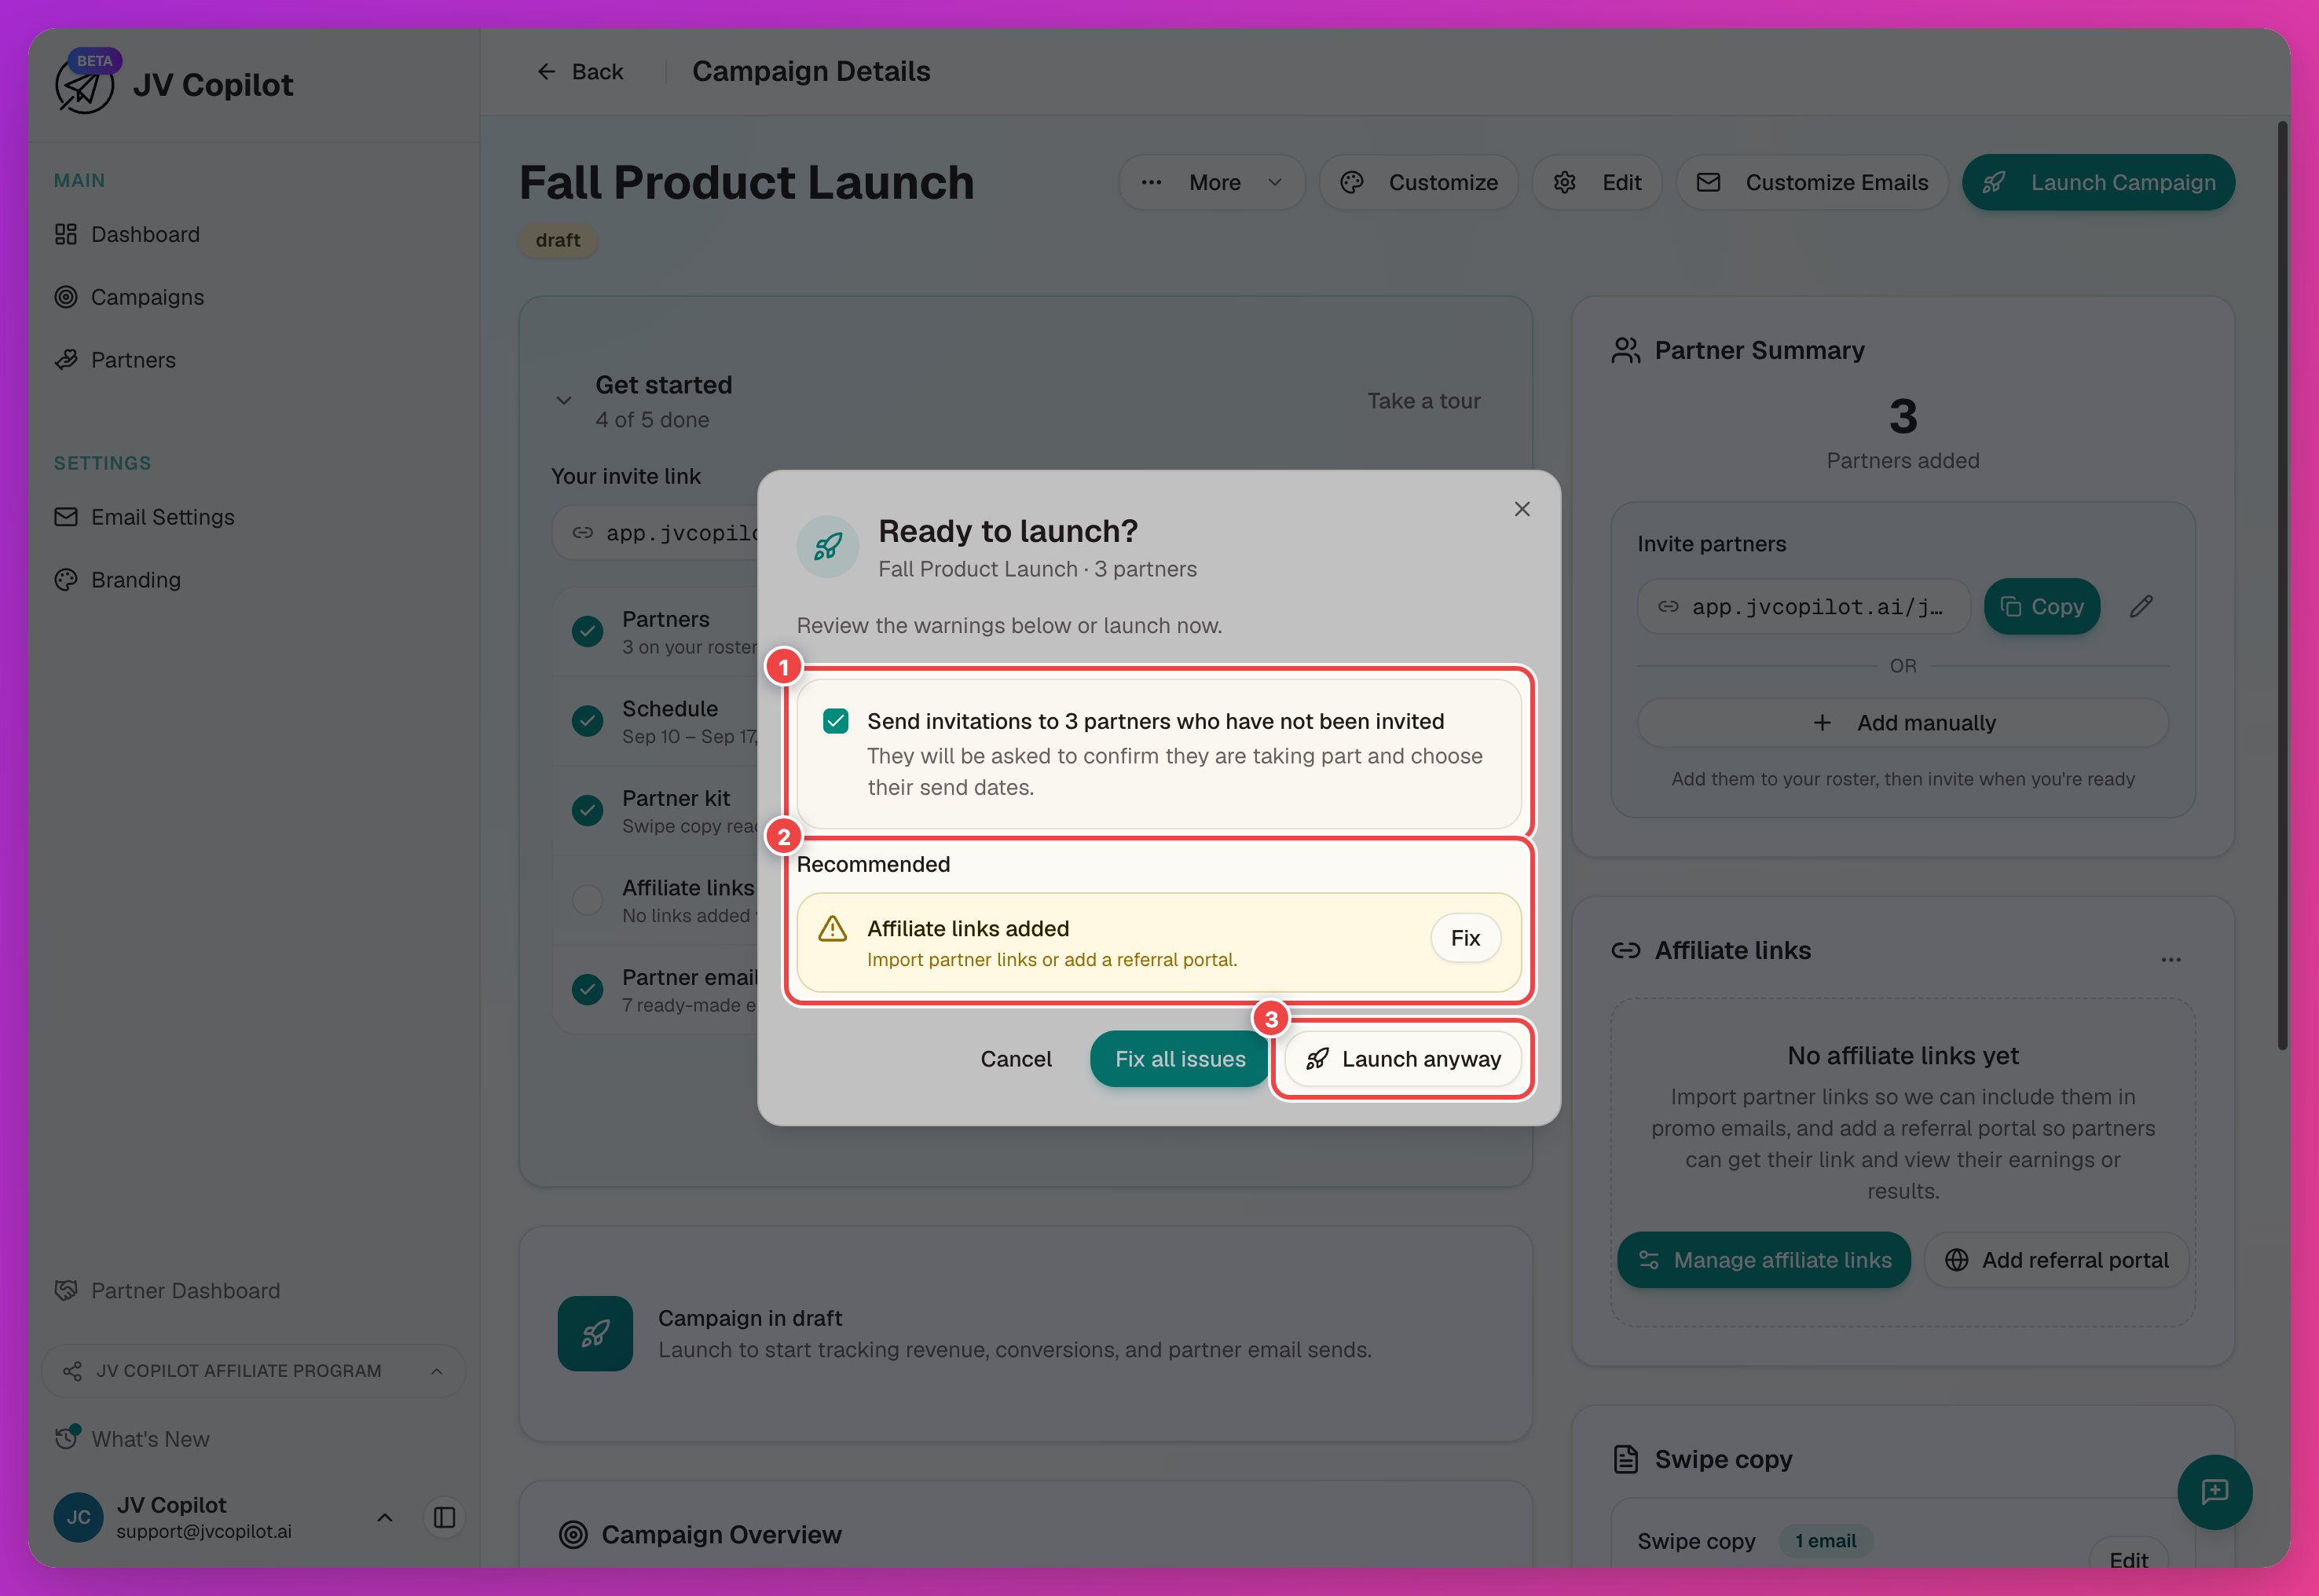
Launch can send partner emails
The launch checklist pre-checks a box to invite everyone you haven't invited yet — anyone already invited or confirmed isn't re-emailed. Double-check the partner list and intro email before confirming.
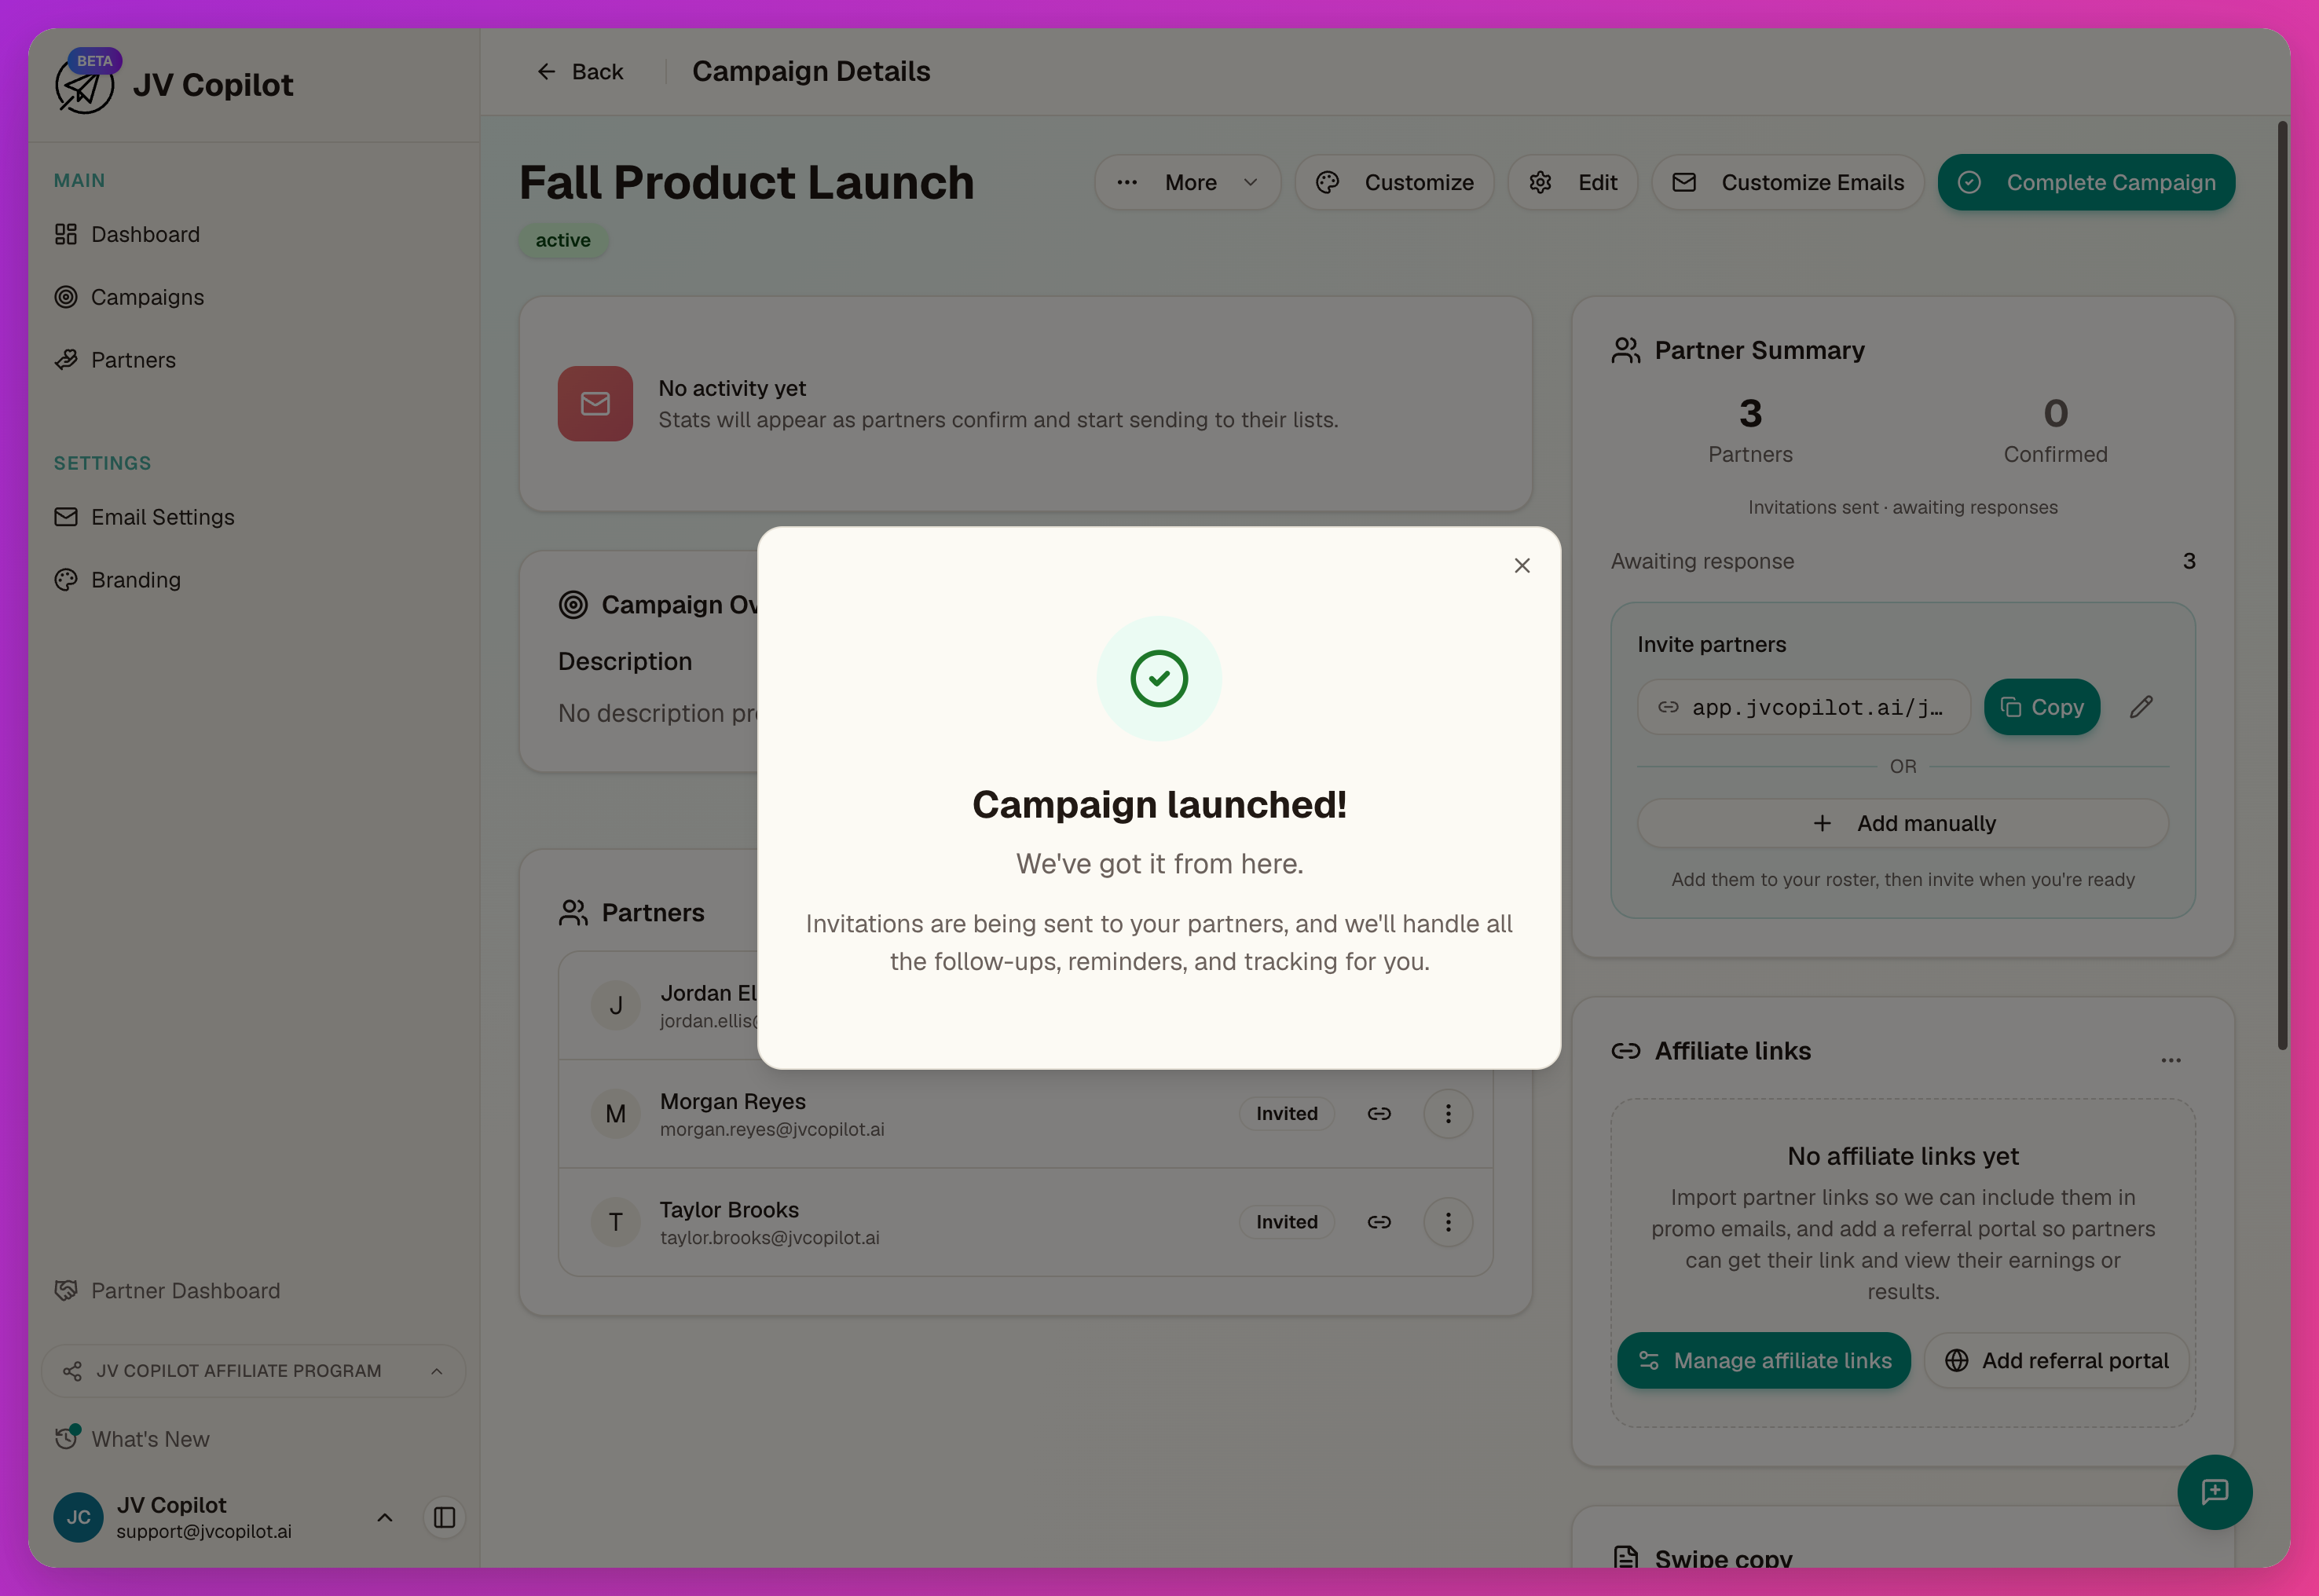
Once confirmed, JV Copilot takes over the invitations, follow-ups, reminders, and tracking.
6. Track Progress
After launch, the campaign page shows who has been invited, who confirmed, and who needs a nudge. See Track a Live Campaign for statuses, resends, the promo calendar, and importing results.
Next Guides
Last updated on