
Partner-Facing Experience
What partners see and do after launch — the confirmation form, email-tied links, and their dashboard.
Partners receive the intro email once you launch a campaign. This guide covers what they see from there.
Partner asking how something works?
Send them to For Partners — a doc set written for partners, with its own getting-started guide and FAQ.
The Confirmation Form
The confirmation form is three steps:
When will you send? — pick send dates from a calendar, inside the campaign's promo window.
Headshot upload — optional and skippable; used for leaderboards.
Notes — optional notes, then Confirm & Continue.
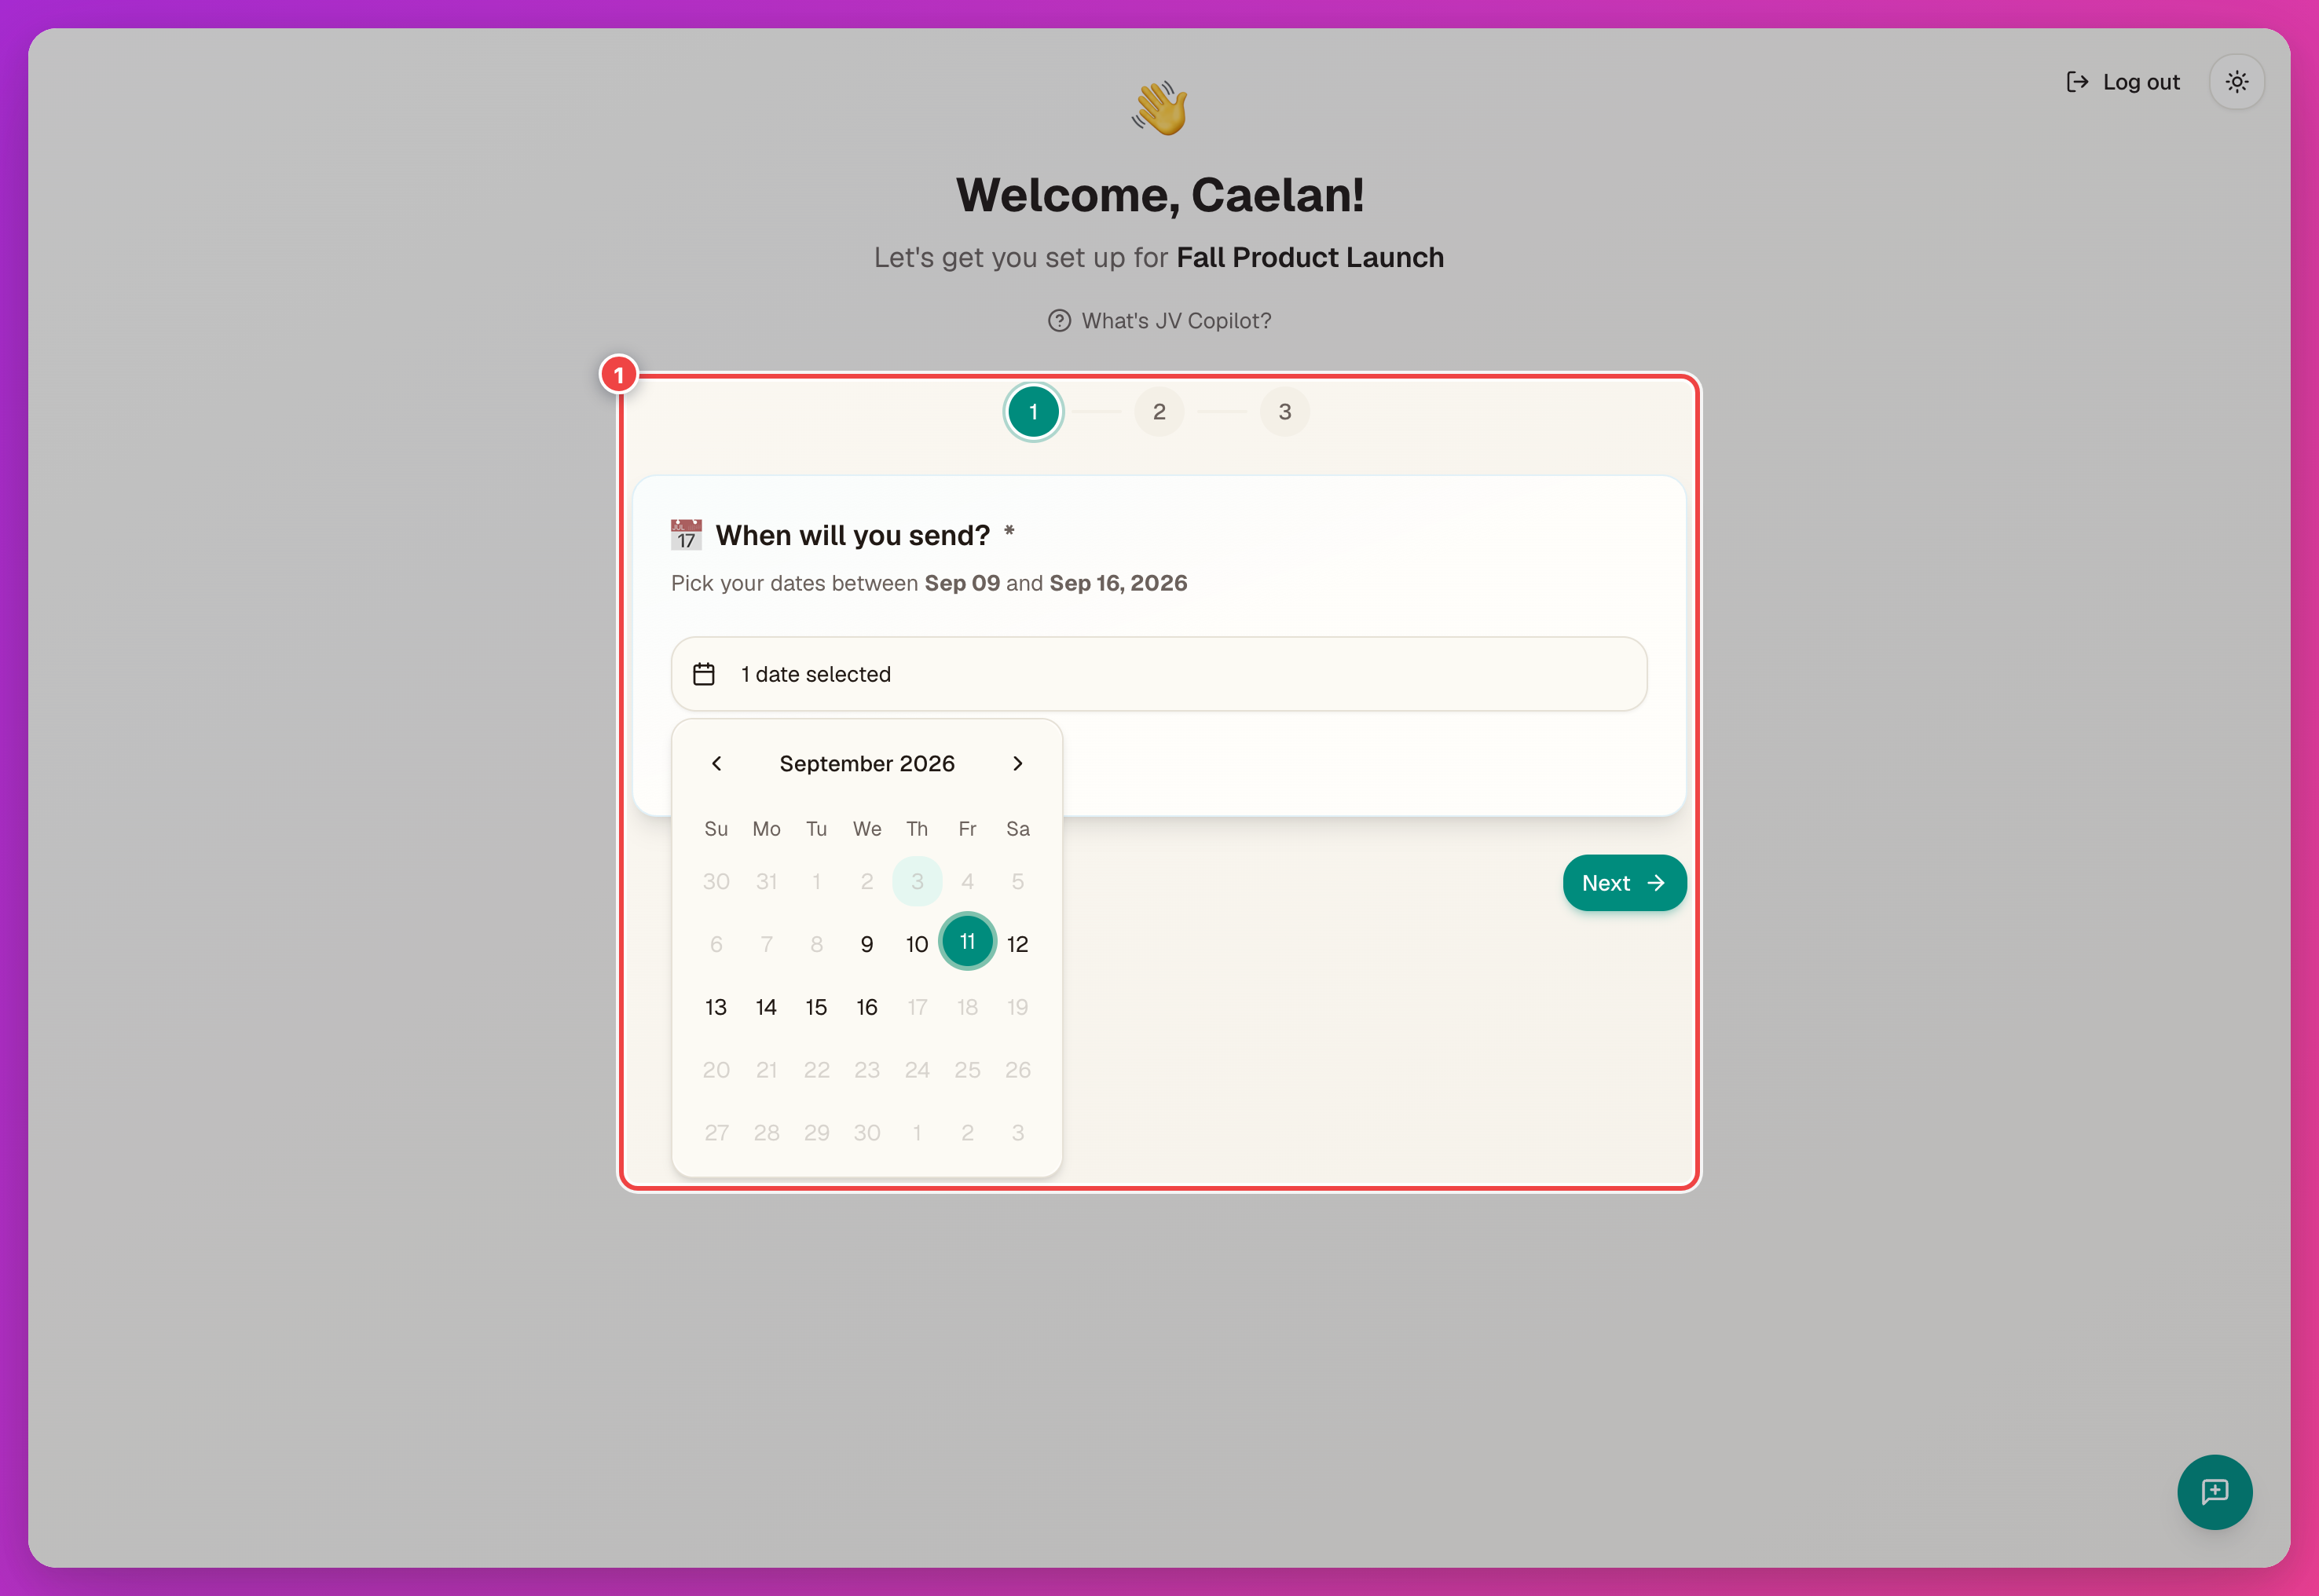
After a partner submits, their status updates and their send dates appear on the campaign — see Campaign Partners.
Confirmation Links Are Tied To Email
Each confirmation link is tied to the email address the invite was sent to — but it also works if the partner is signed in with any other verified email on that same account. If it's opened from a genuinely different account, the partner sees "This invite was sent to a different email" instead of the form.
Partner Dashboard
Once confirmed, a partner gets a dashboard showing their send dates, stats, and promo materials.
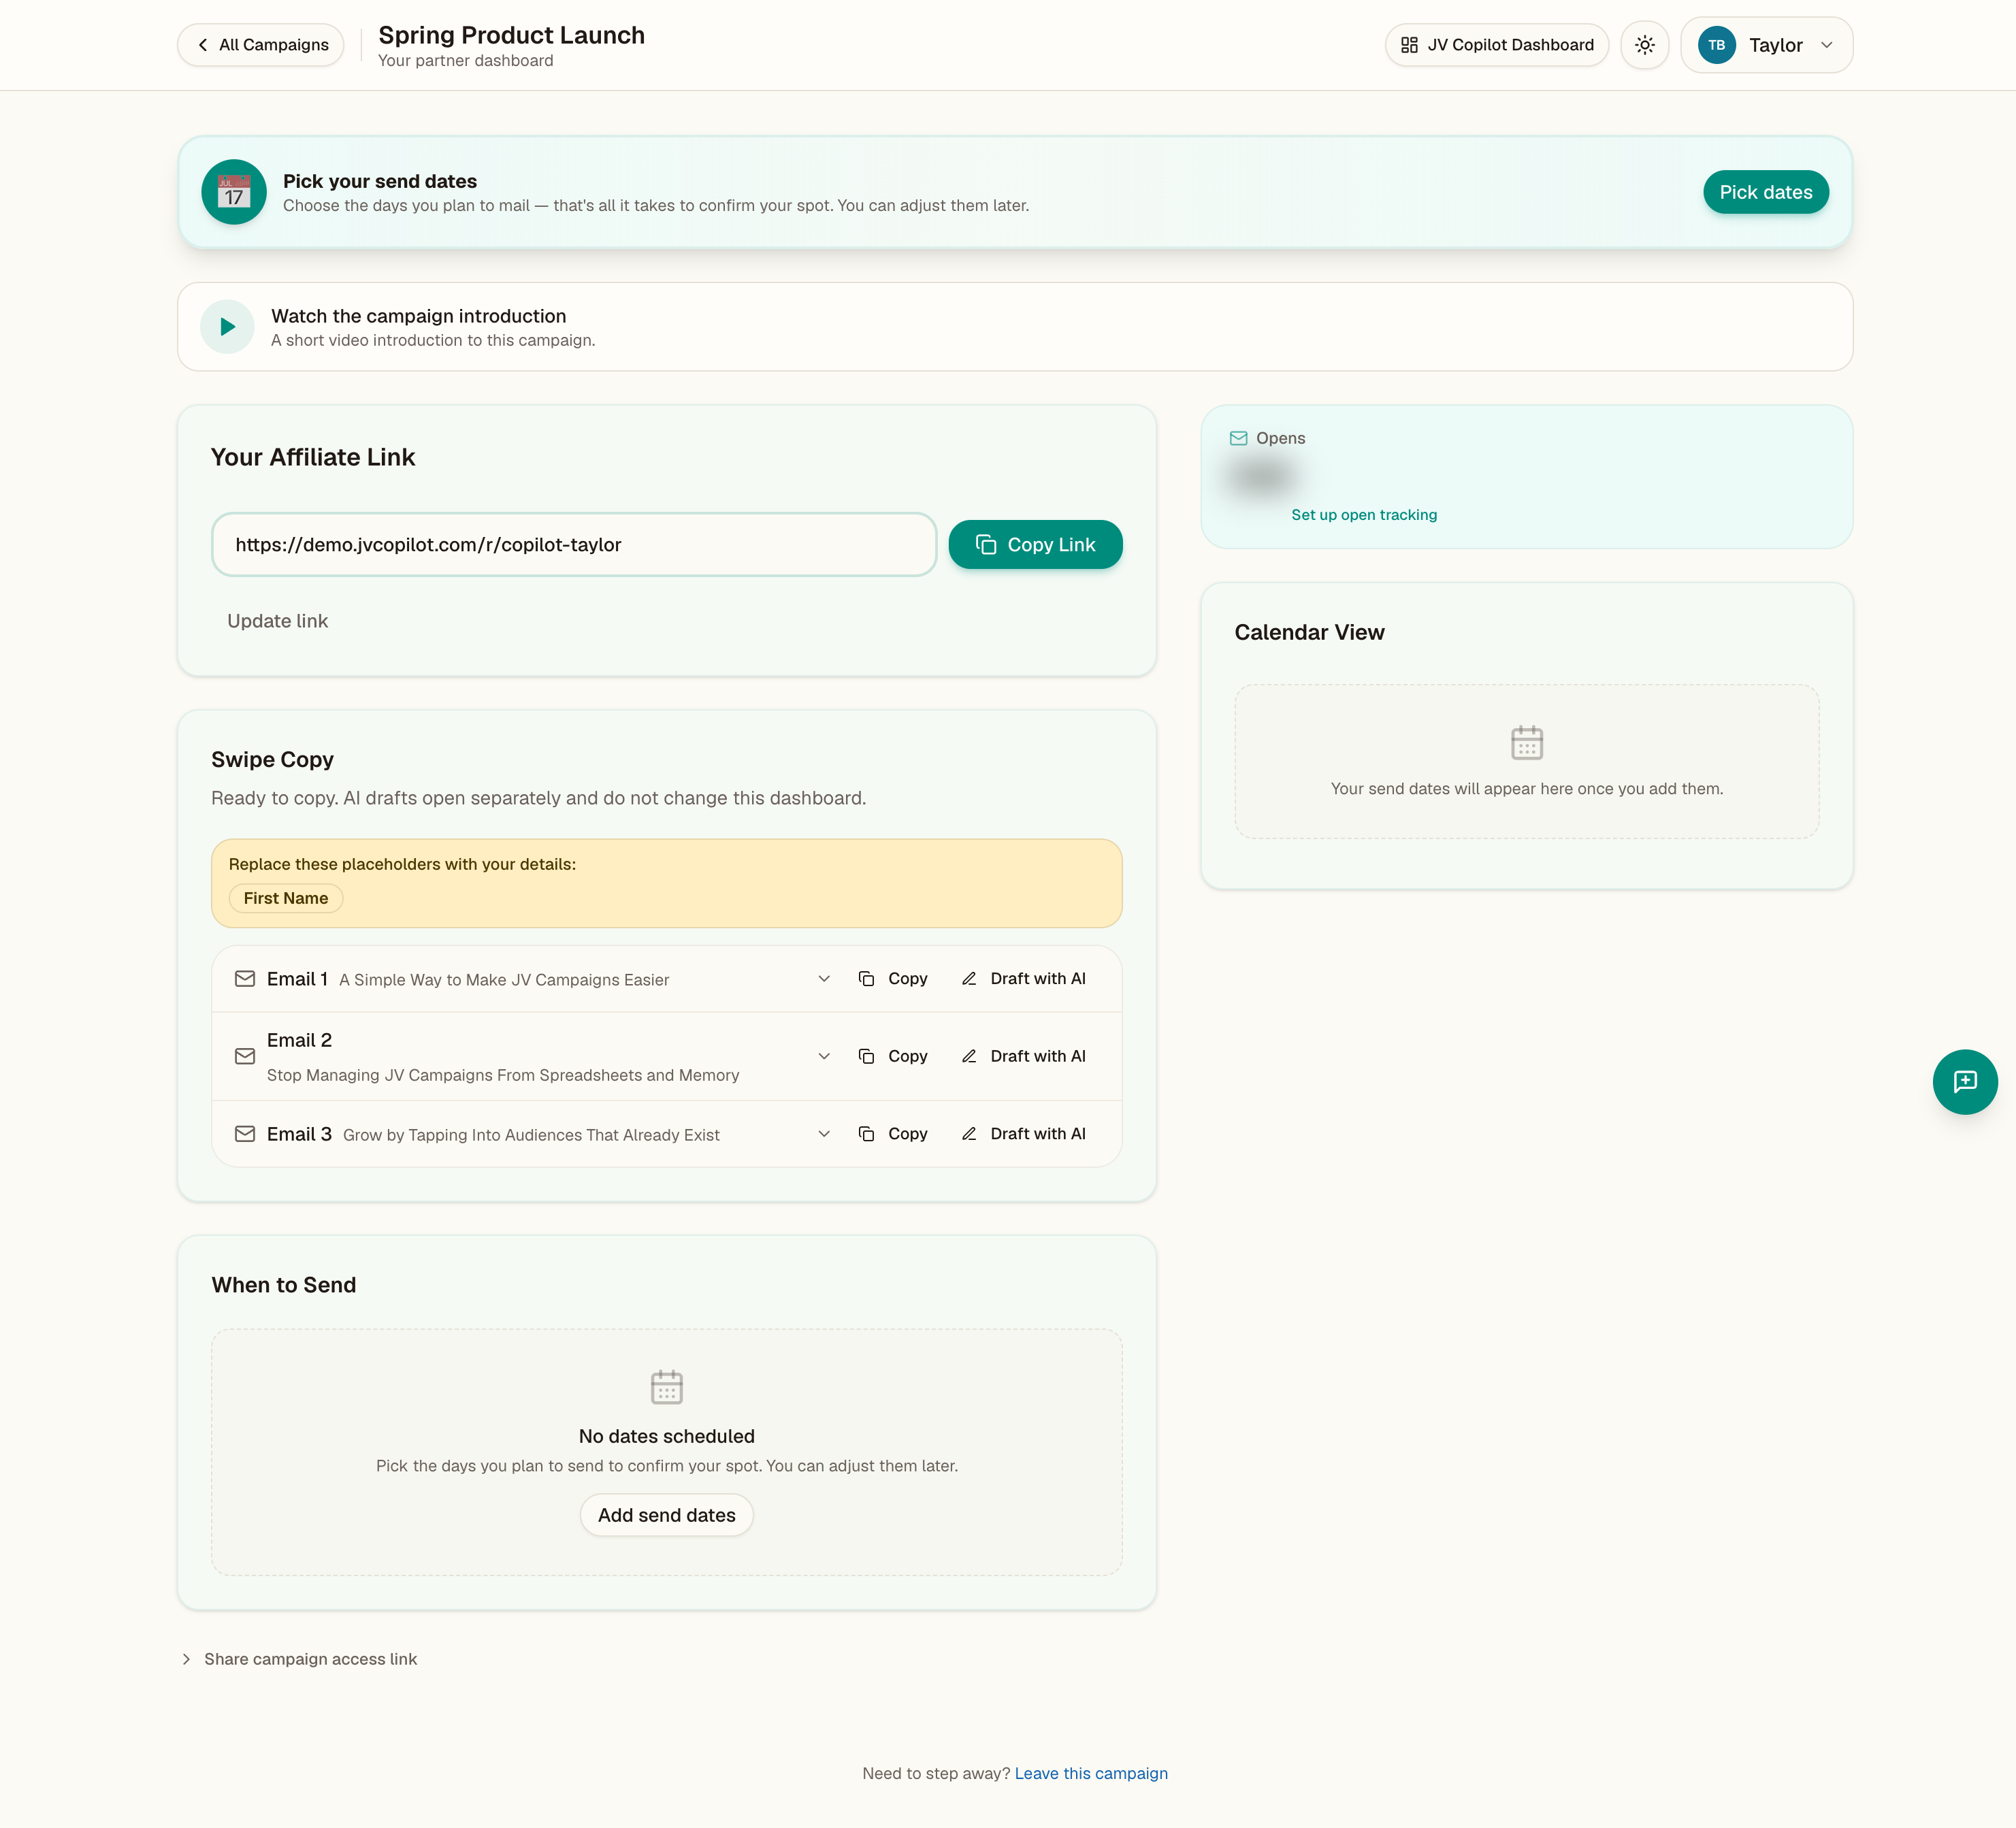
Swipe emails on the dashboard can include placeholders (like a partner's name or affiliate link) that a partner fills in once and reuses everywhere — see Promo Emails for how partners handle these.
Customize The Partner Experience
Customize in the campaign header opens Customize Partner Experience — the join form and dashboard branding (color, logo, and banner), the messages partners see after joining and confirming, a booking link, and a campaign video. Partner stat visibility is controlled separately in the leaderboard settings — see Leaderboards § Display.
Add A Banner Image
A banner image shows at the top of the partner join form. Click Customize in the campaign header, then:
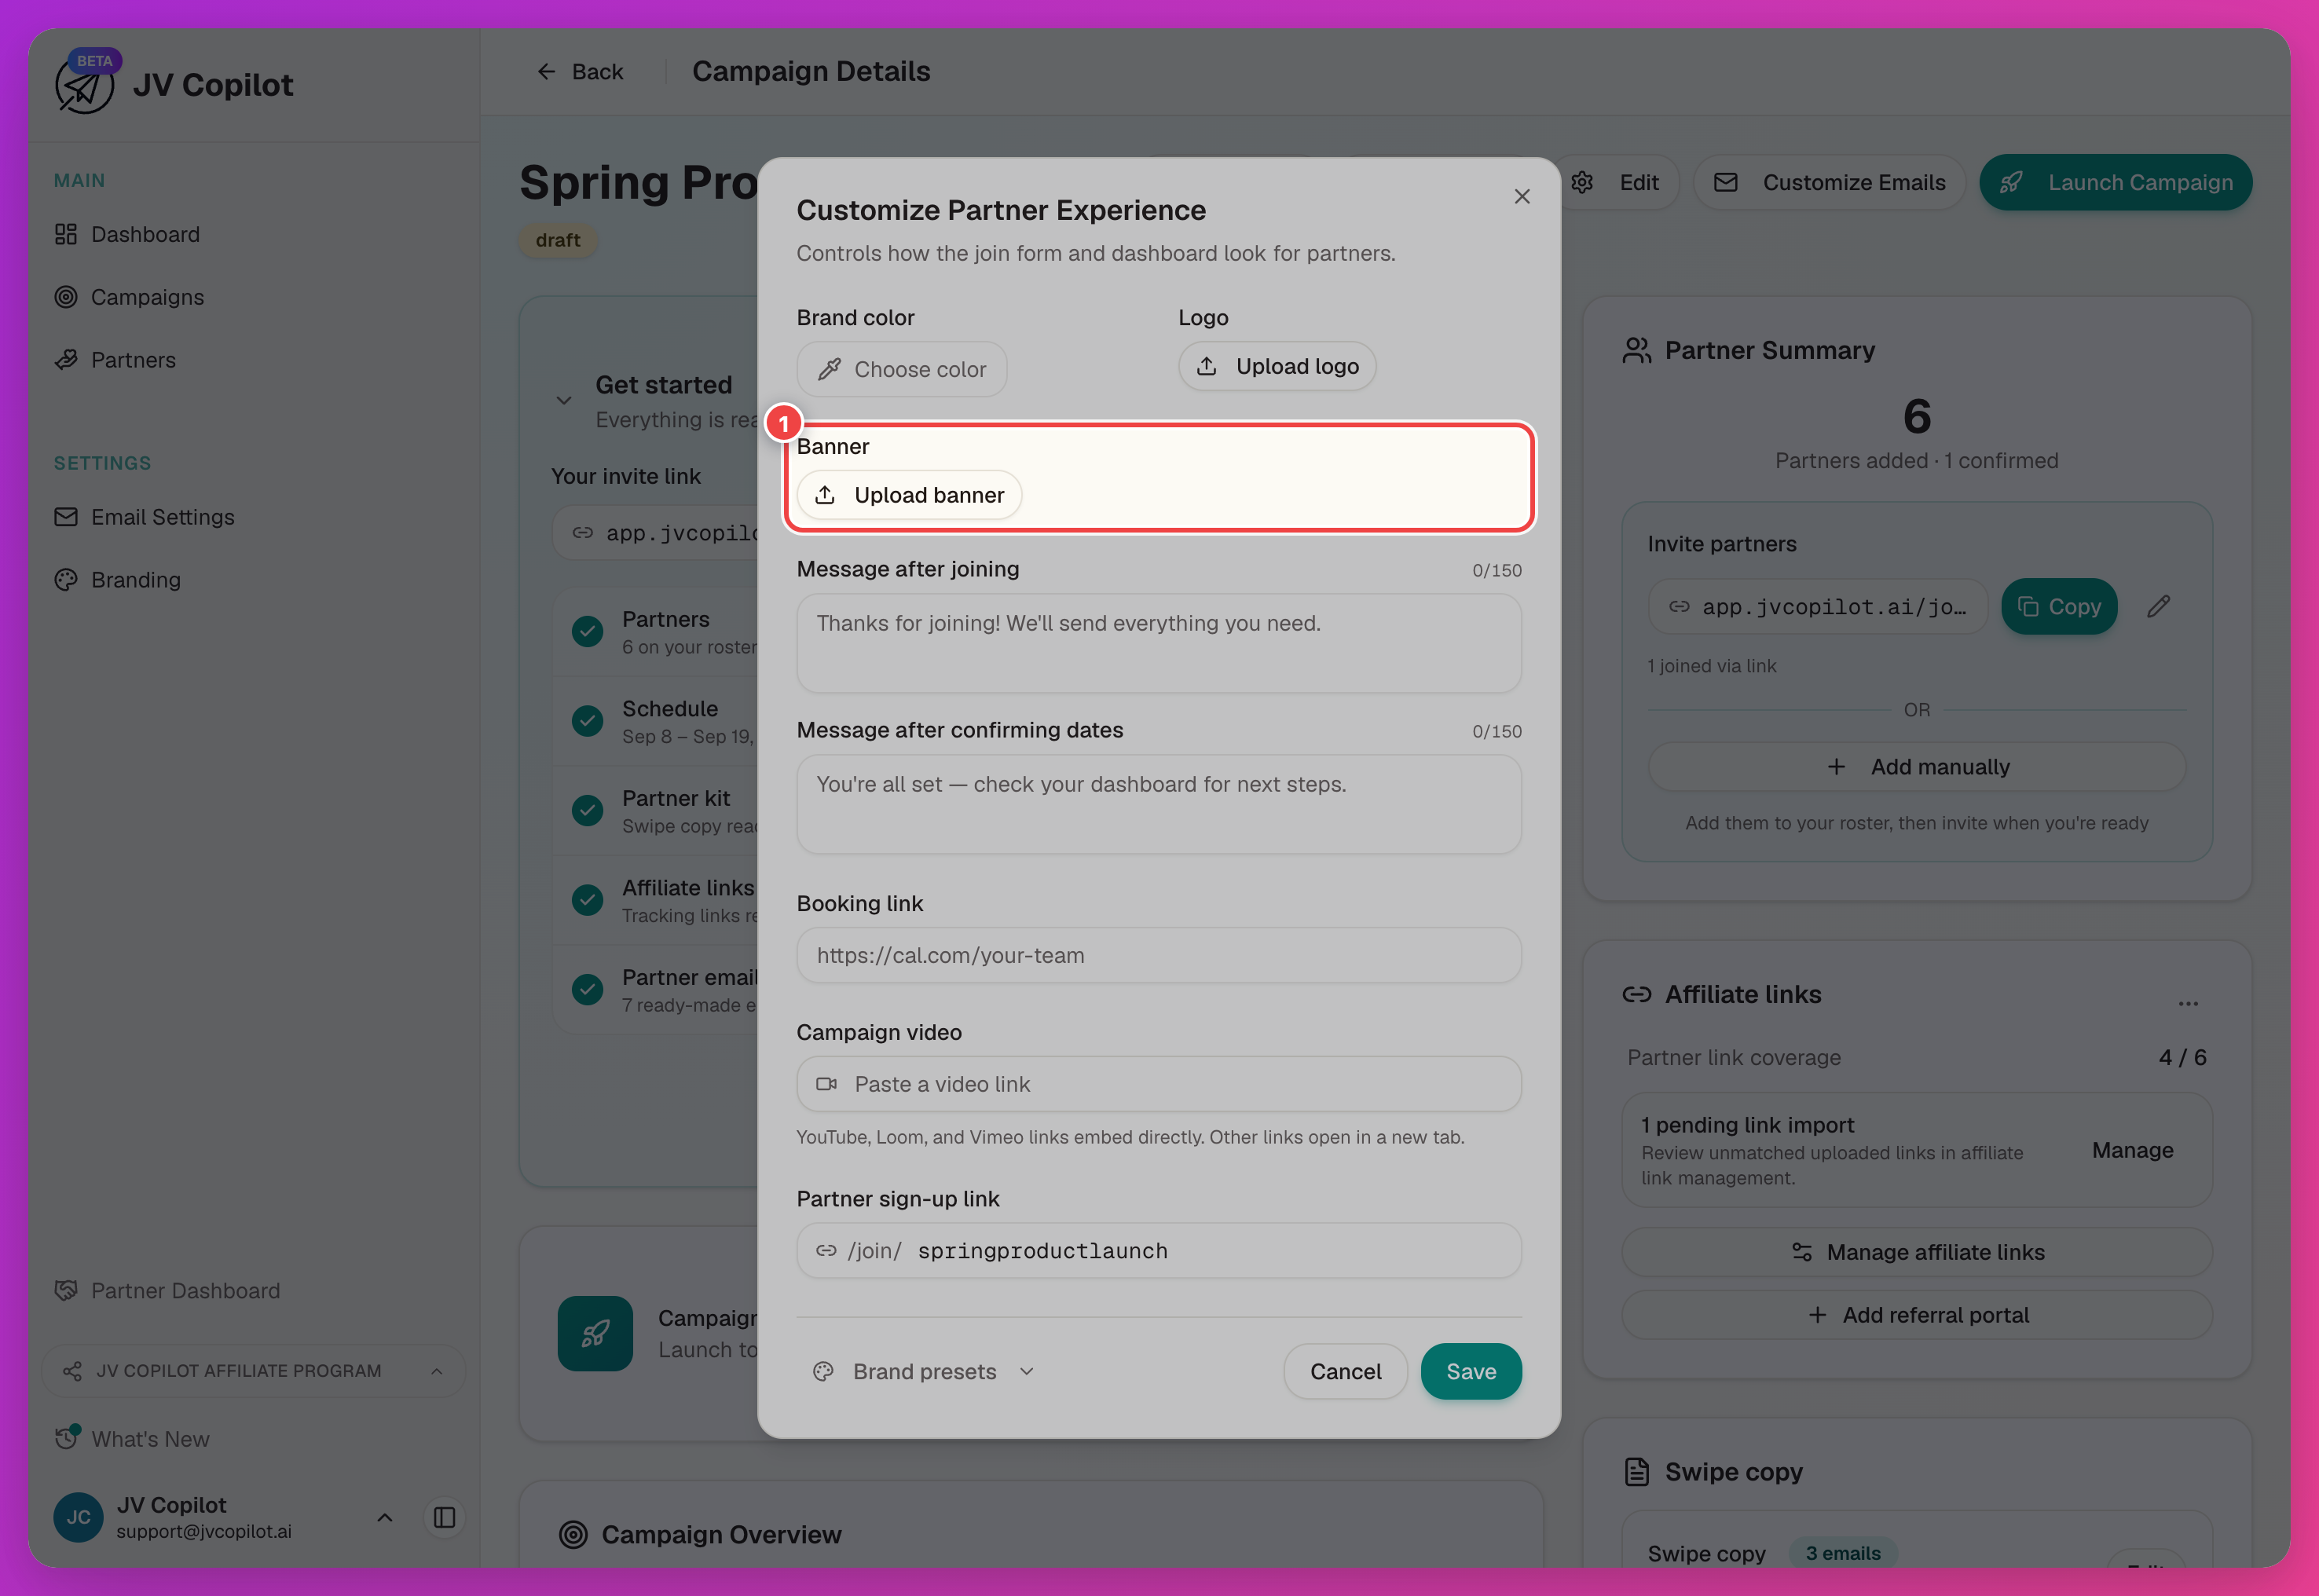
Logo works the same way. Both fields show a preview once uploaded — Replace swaps the image, the small X clears it.
Apply Or Save A Brand Preset
The Brand presets dropdown at the bottom of the dialog reuses branding across campaigns without re-entering it:
- Pick a saved preset to apply its color, logo, banner, messages, and booking link to this campaign. If the dialog already has any branding set, you're asked to confirm first — applying a preset replaces it all.
- Save as new preset saves this campaign's current branding as a reusable preset. It's disabled while there are unsaved edits in the dialog, since it saves what's already stored on the campaign, not values you've typed but haven't saved yet.
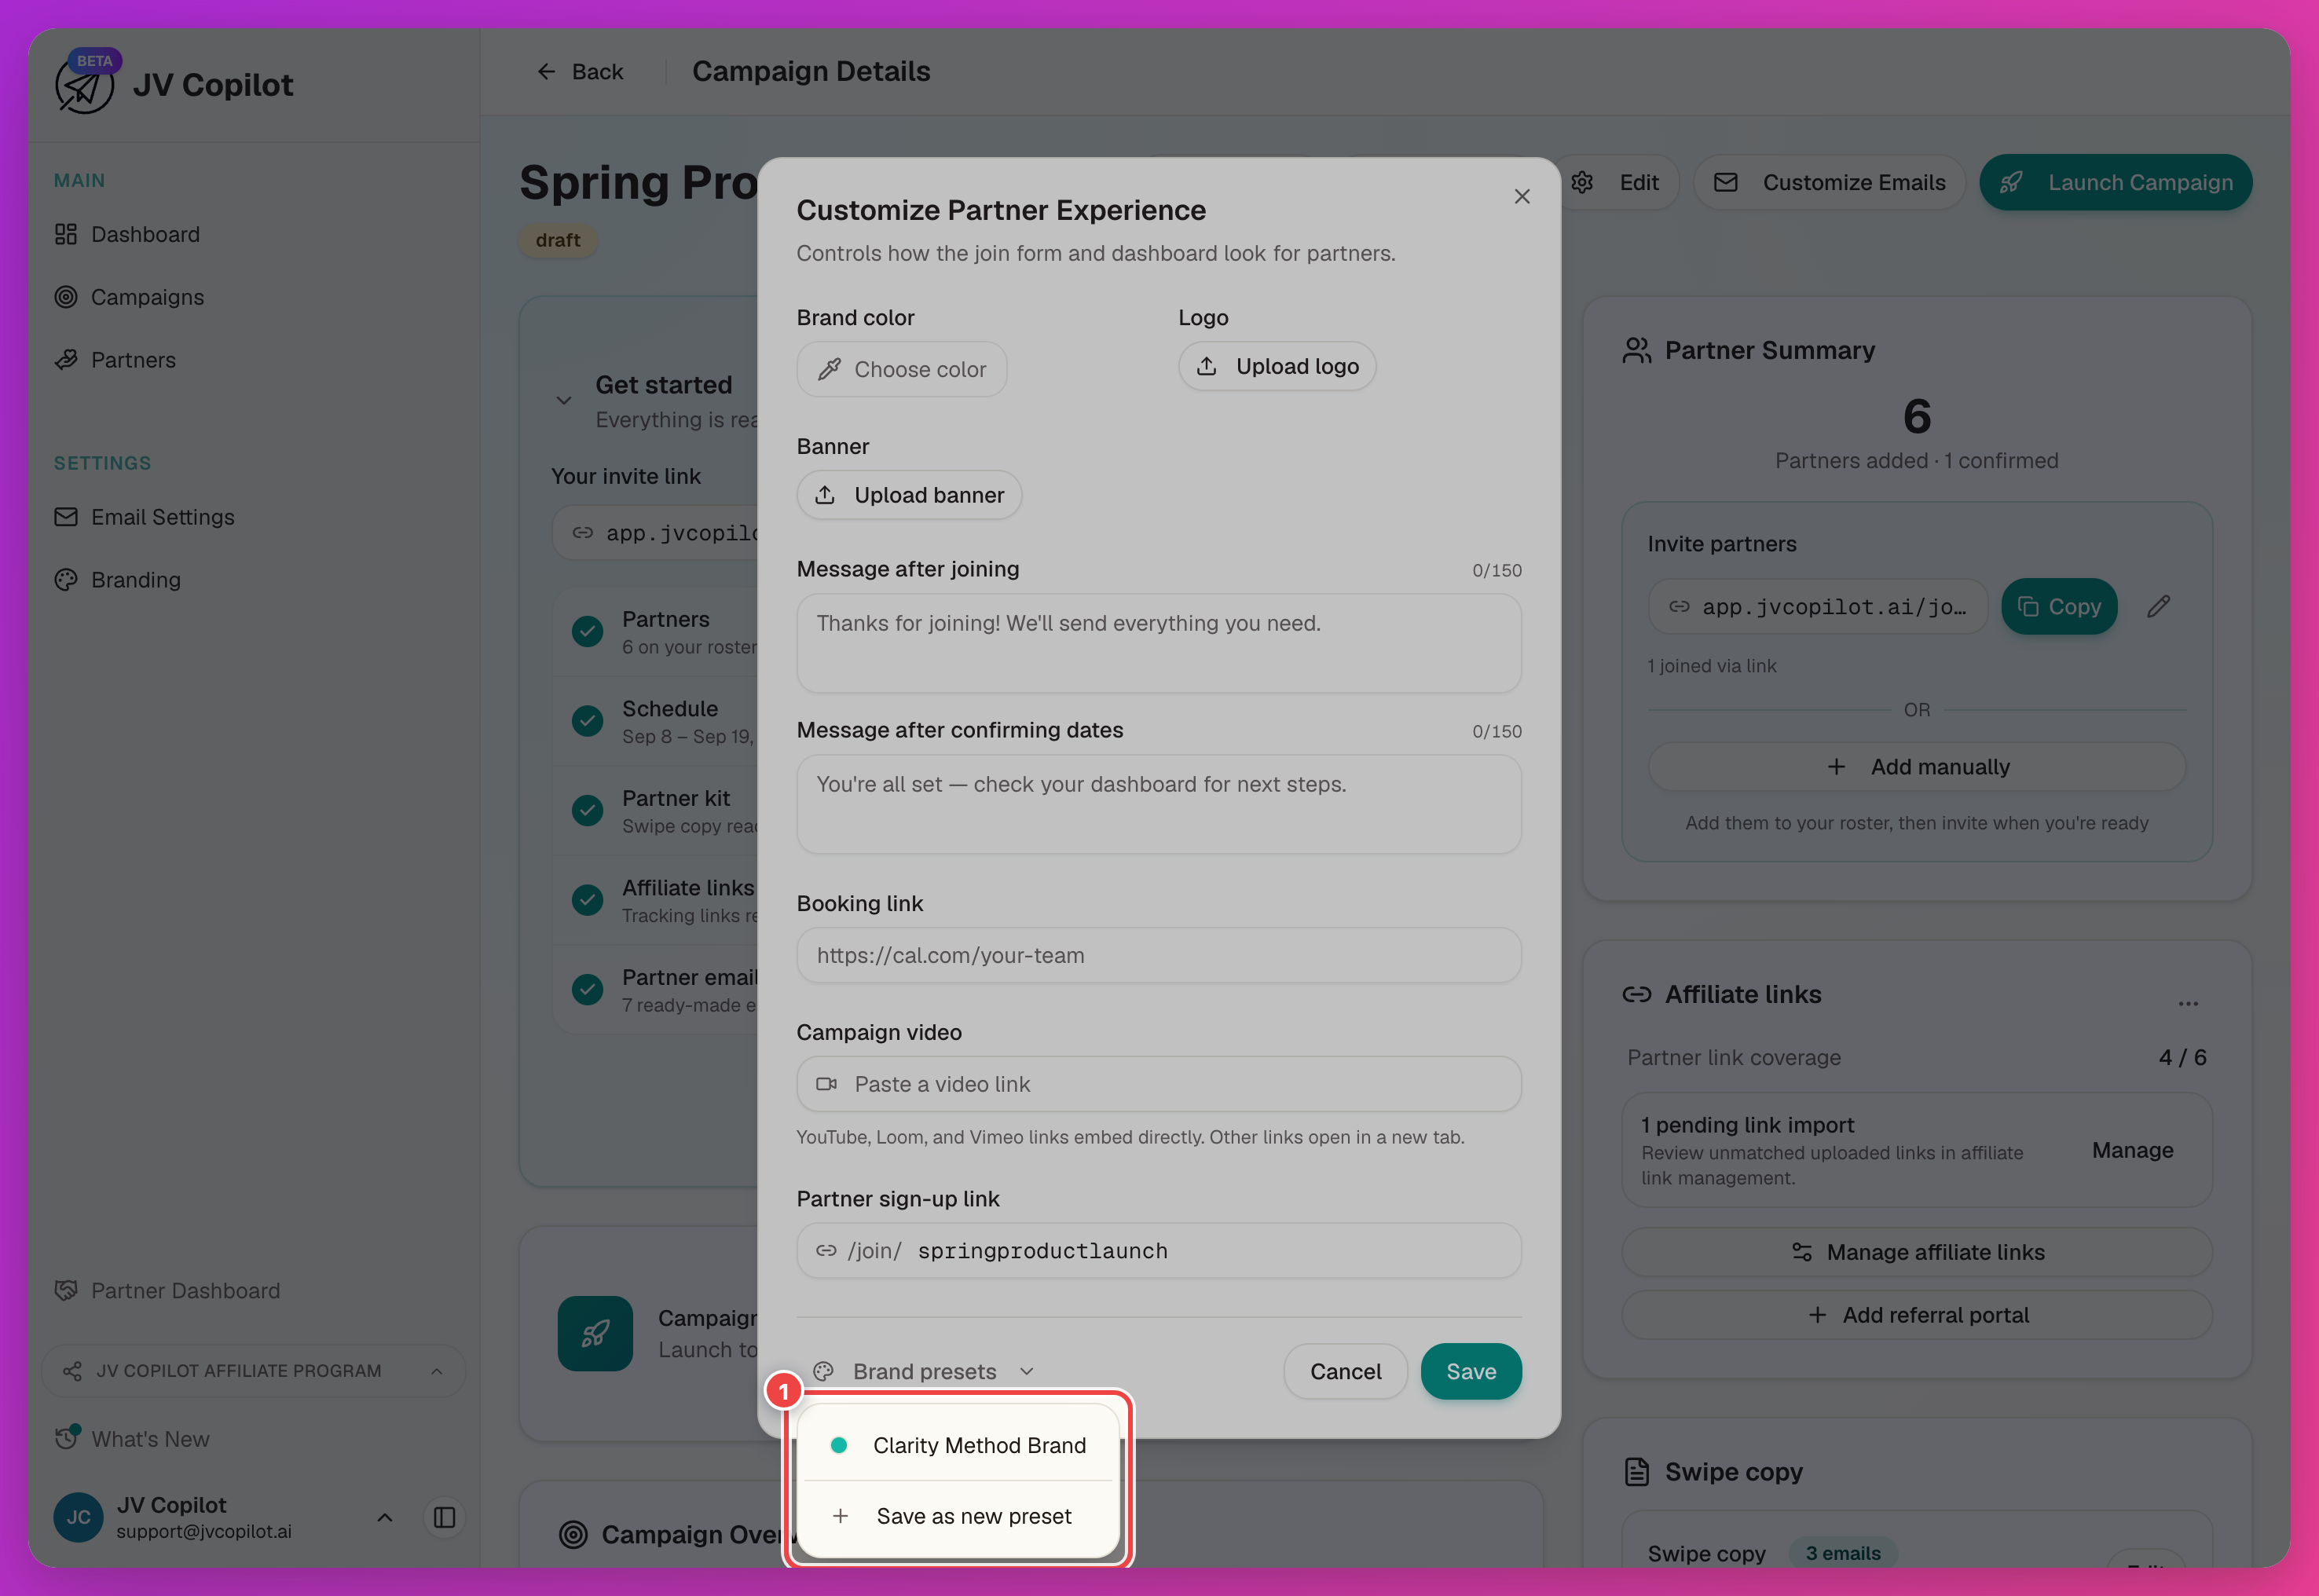
Creating, renaming, and deleting presets themselves happens on a dedicated settings page — see Brand Presets.
Add A Campaign Video
A campaign video shows on each partner's dashboard — a short intro is a good way to set expectations before they promote. Click Customize in the campaign header, then:
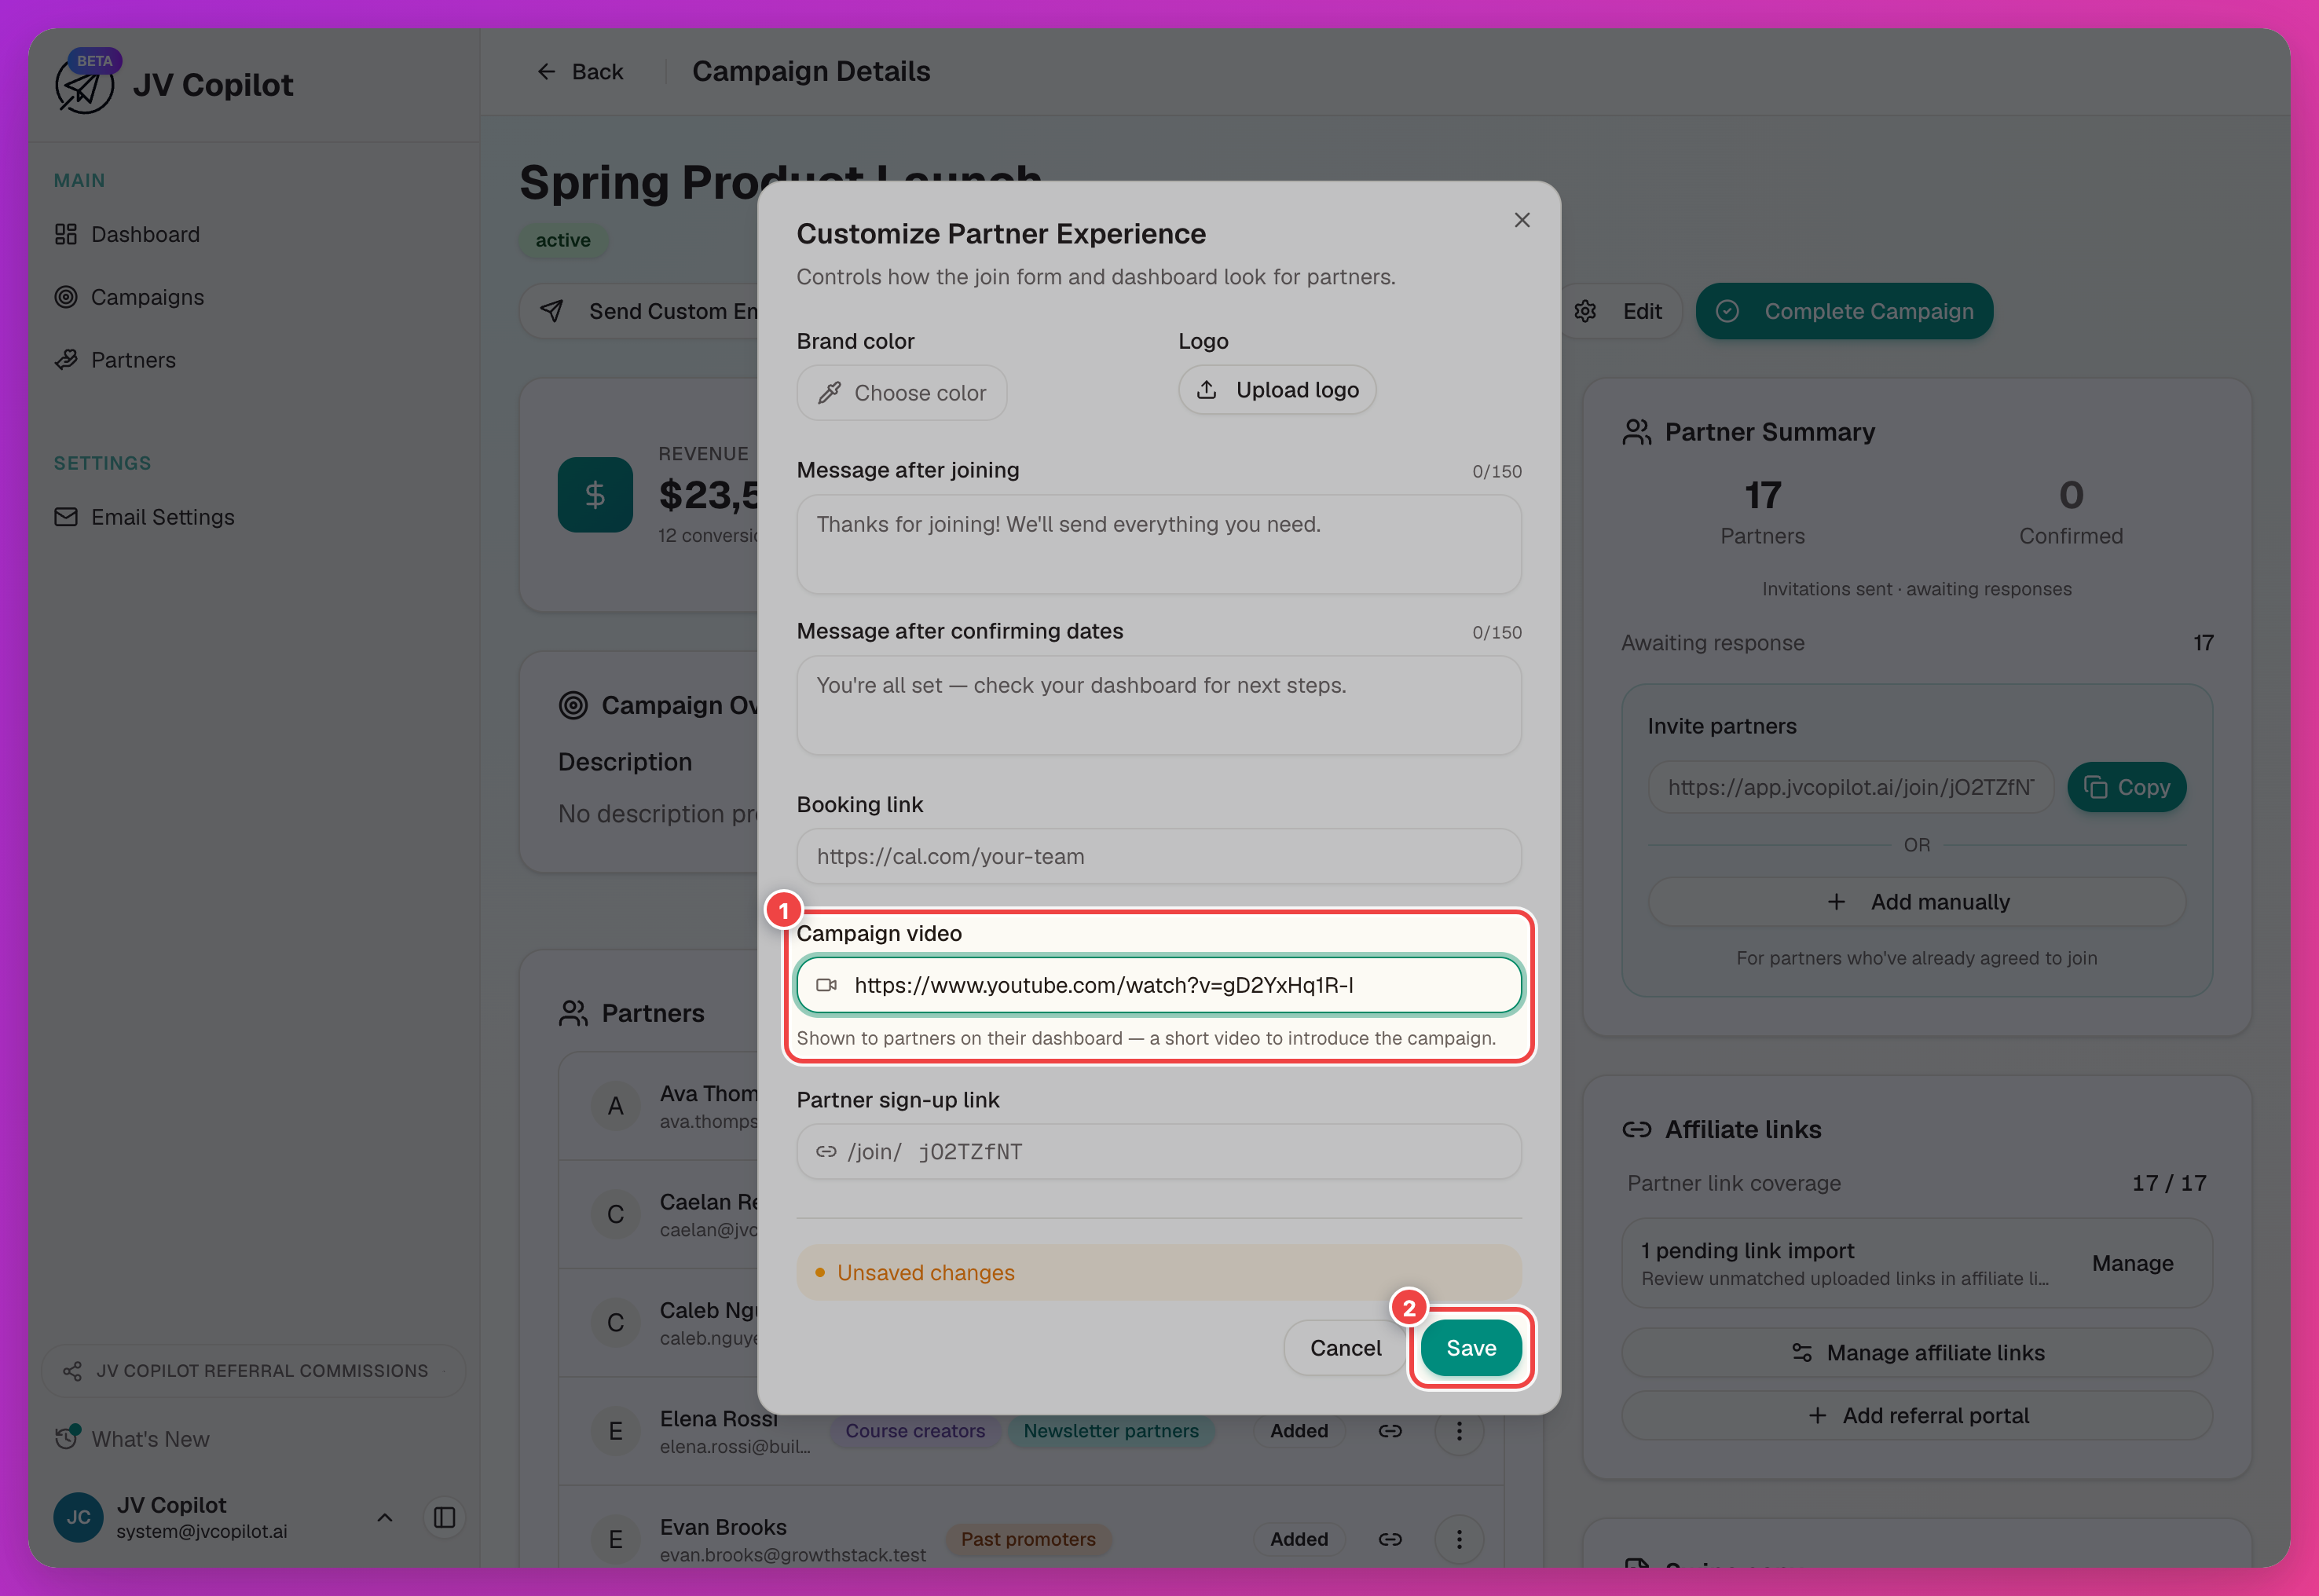
The video appears on the dashboard for every partner on the campaign — there's nothing partners need to do to see it.
Resending Links
If a partner needs their invite or dashboard link again, resend it from your side rather than asking them to dig up the original email — open their row's actions menu on the campaign page for Resend invitation and Email dashboard link. See Campaign Partners § Partner Row Actions for the full actions menu.
Last updated on