
Brand Presets
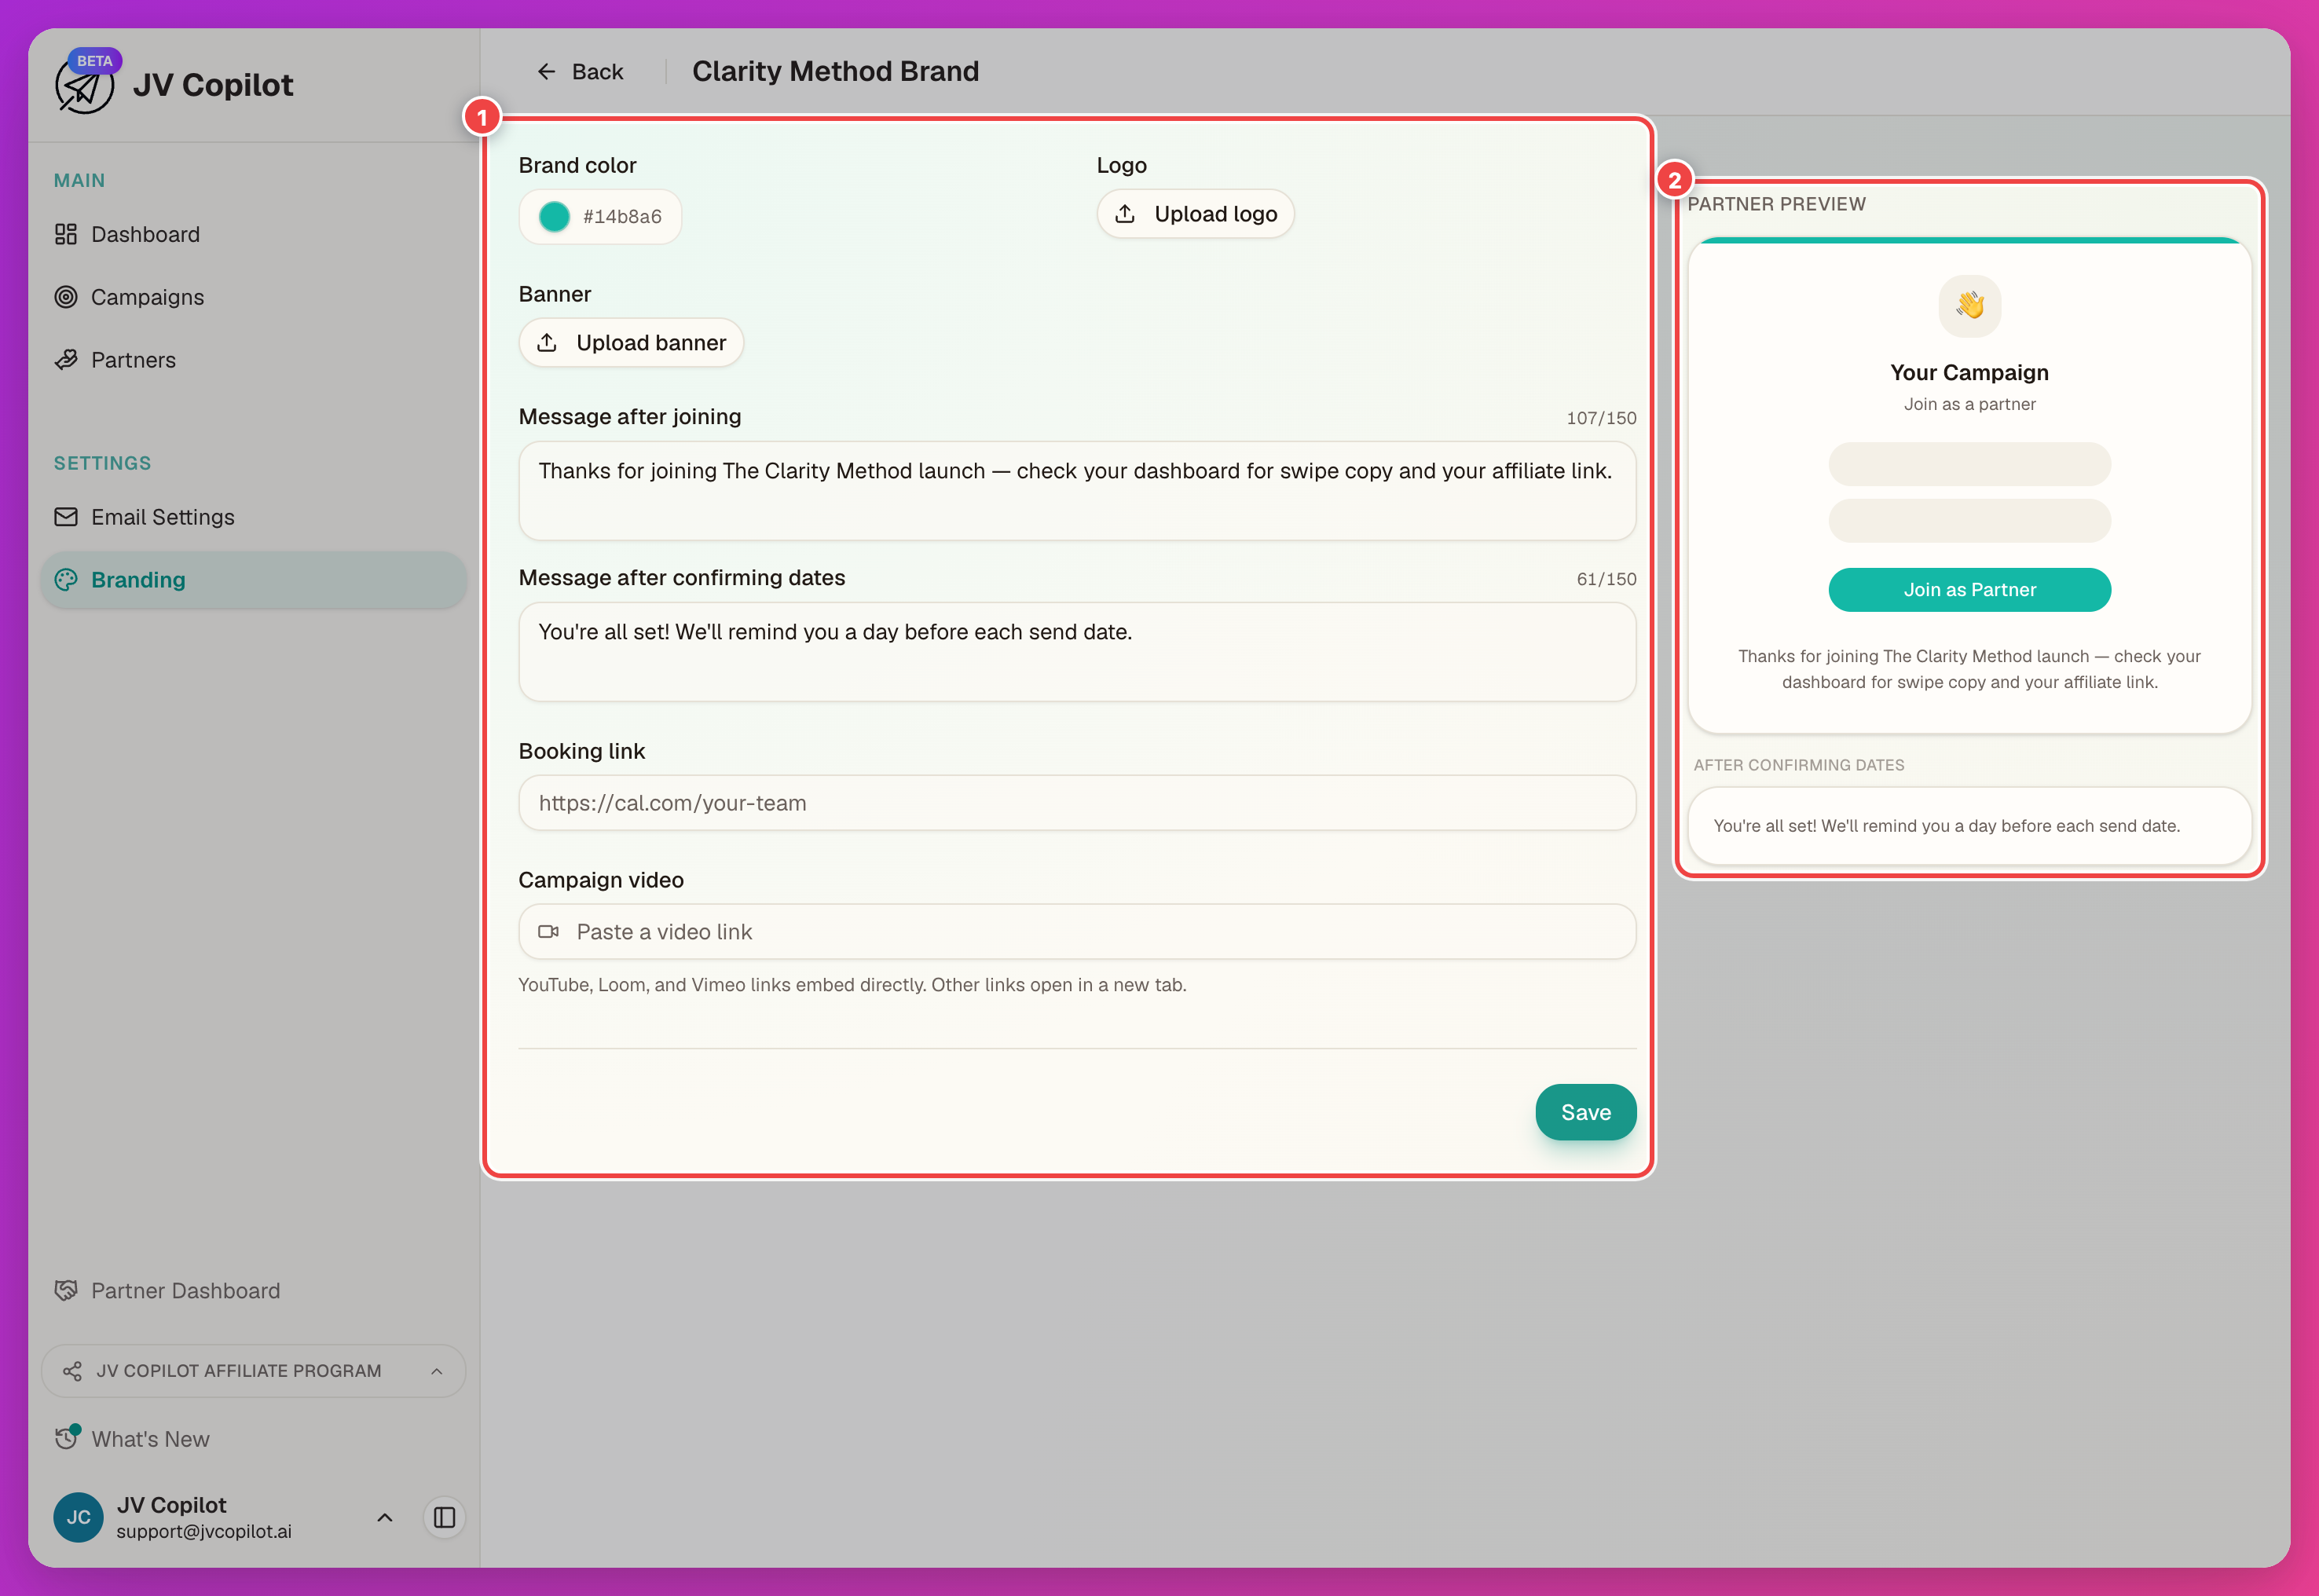
Save colors, logo, banner, messages, and a booking link as a reusable preset — then apply it to any campaign.
A brand preset bundles the partner-facing branding fields into one named, reusable set, so you don't rebuild the same look on every campaign. Manage presets in Settings → Branding, or apply one to a campaign right from its Customize Partner Experience dialog — see Partner-Facing Experience § Customize The Partner Experience.
What A Preset Captures
- Brand color
- Logo
- Banner
- Message after joining
- Message after confirming dates
- Booking link and booking message
- Campaign video
A preset name is 1–100 characters. Messages are capped at 150 characters. Brand color must be a hex value (#RRGGBB); logo and banner uploads must be images under 5MB.
Partner stat visibility and the campaign's custom sign-up link aren't part of a preset — those stay per-campaign. See Leaderboards § Display.
Managing Presets
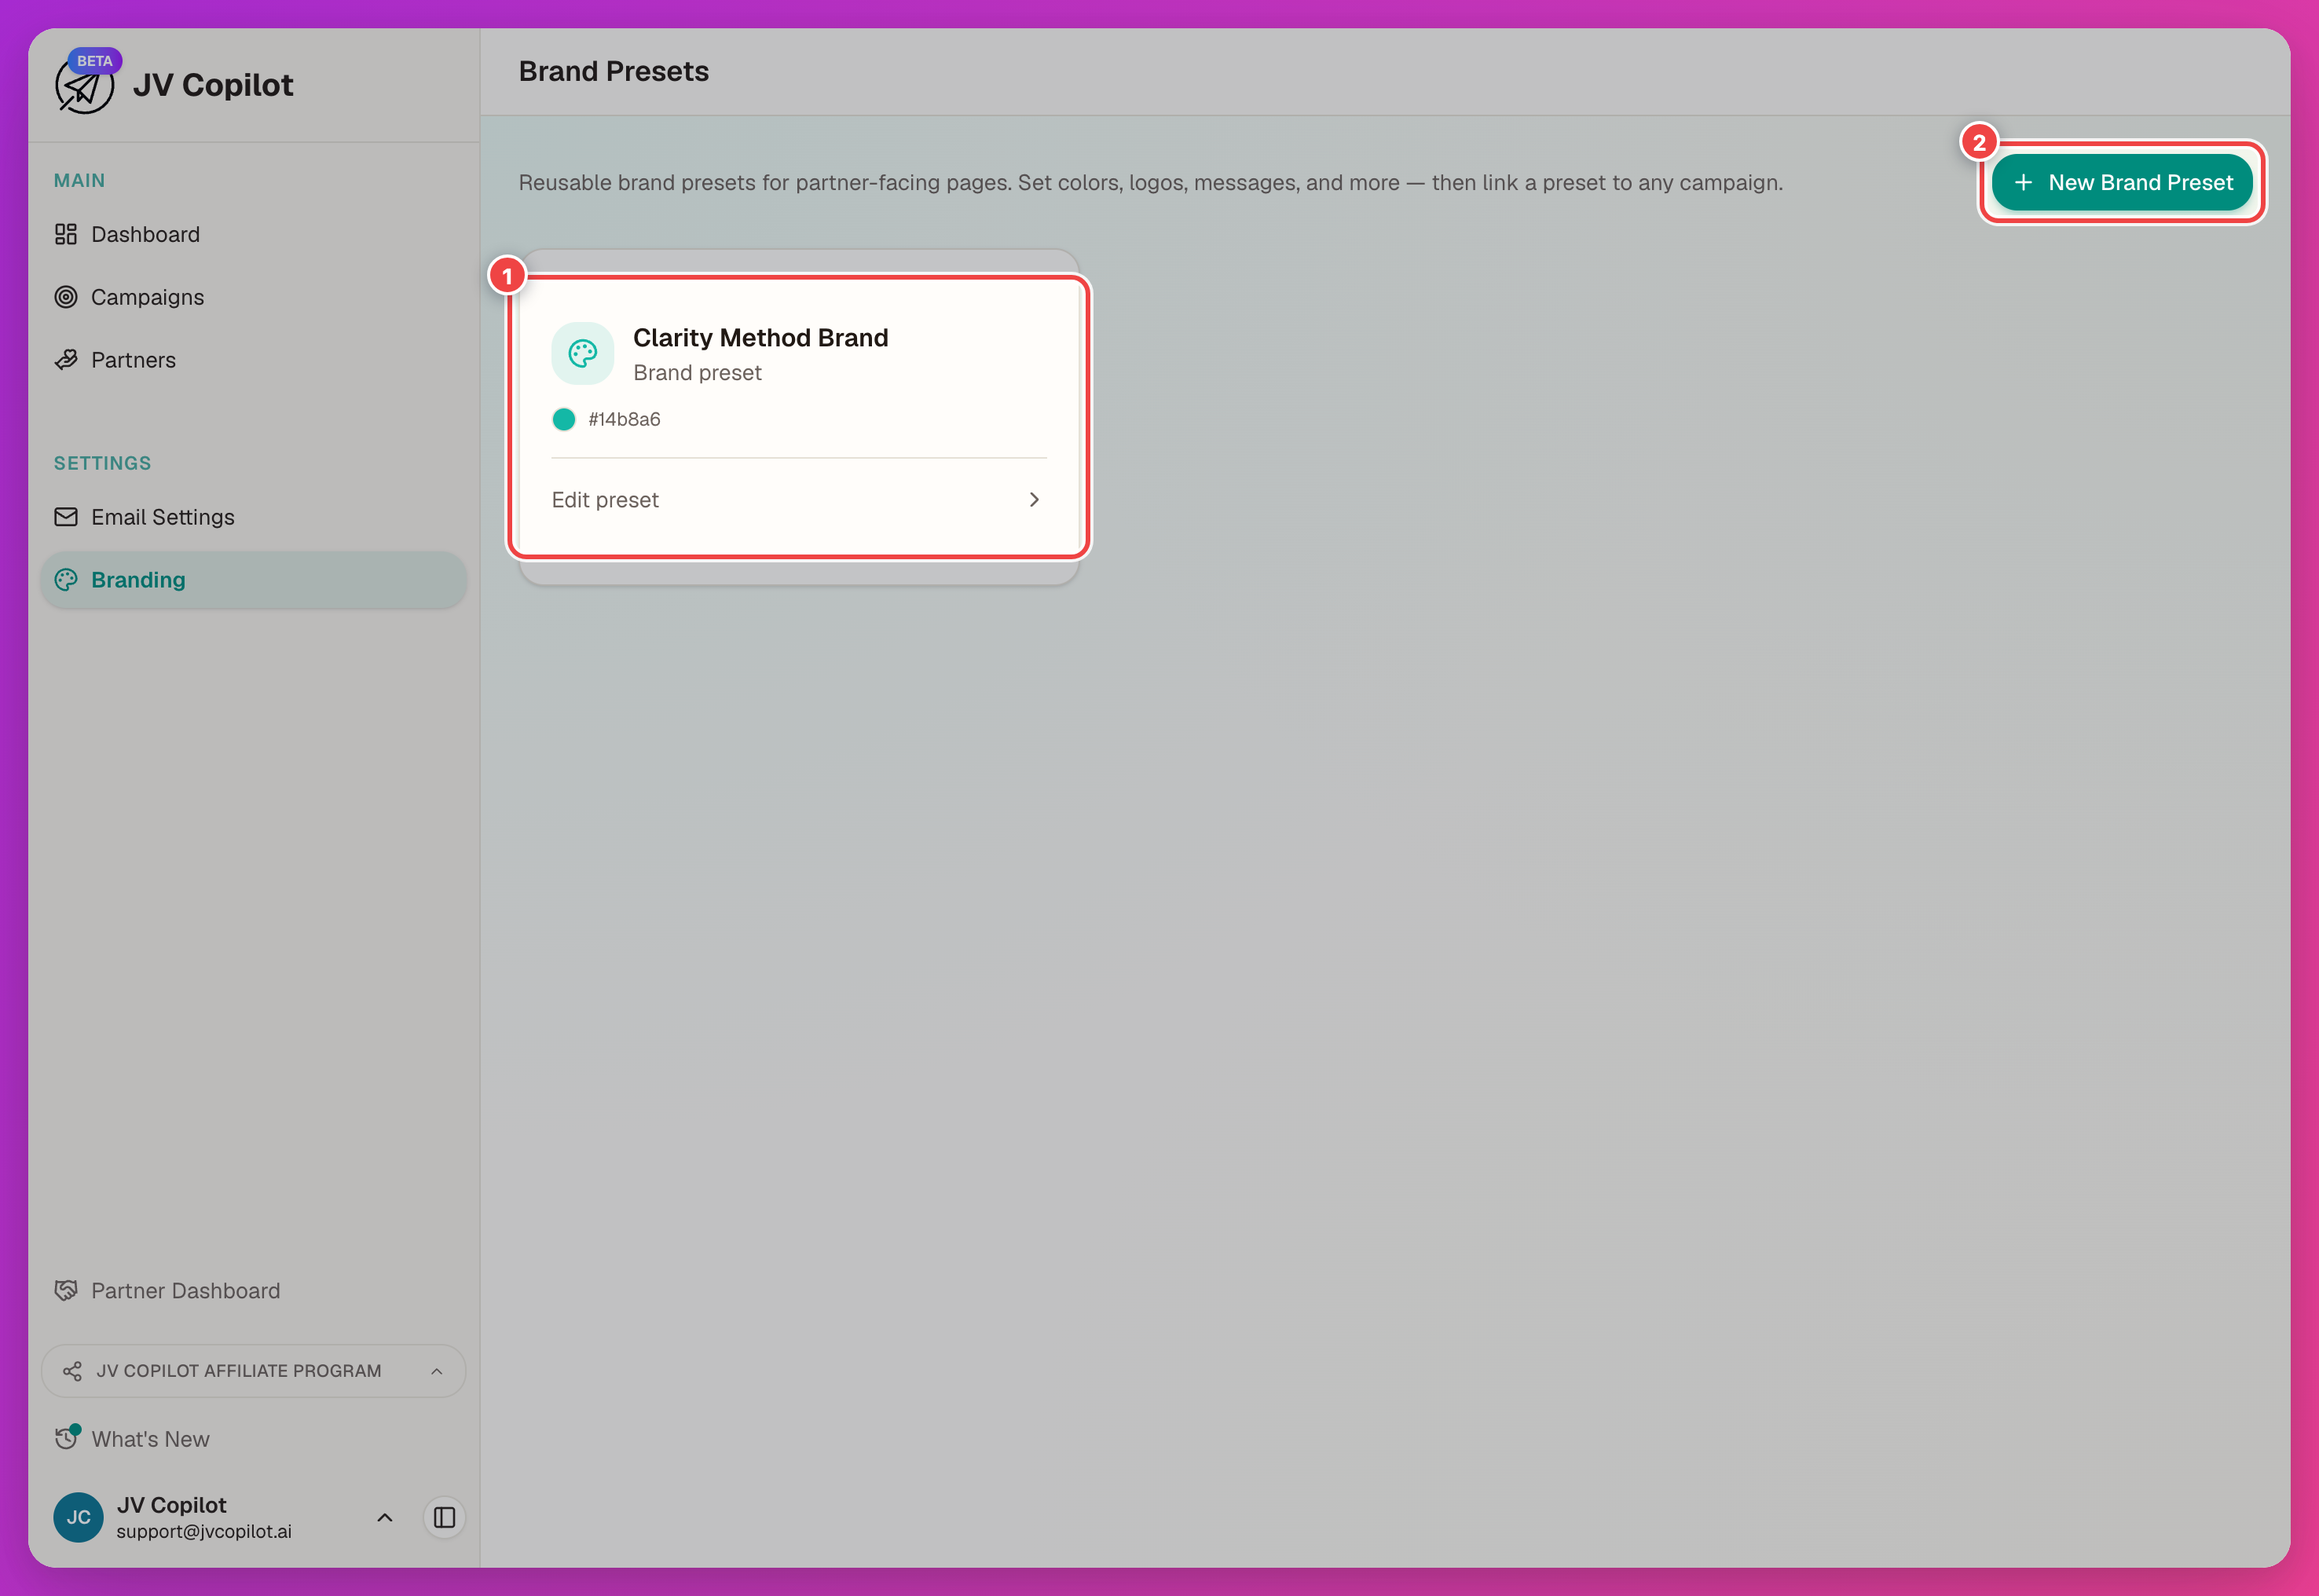
Open Branding in the sidebar (the page header reads Brand Presets). Each preset shows as a card with its color swatch and logo; click a card to open its editor — the same fields as above, plus a live partner-facing preview of the join page, confirmation step, and dashboard.
Creating A Preset
This opens the new preset's editor to fill in the rest.
Renaming Or Deleting
Use a card's ⋯ menu for Rename or Delete.
Deleting is permanent
If the preset isn't used by any campaign, deleting it is immediate and can't be undone. If it is in use, the confirmation tells you how many campaigns and lets you delete anyway — see what happens to those campaigns below.
Applying A Preset To A Campaign
There are two separate ways to bring a preset into a campaign, and they behave differently.
The Campaign's Brand Preset Dropdown
The campaign create form and a campaign's Edit modal both show a Brand preset dropdown once at least one preset exists. Selecting one links the campaign to that preset — no field values are copied.
A linked campaign's join form and dashboard show the preset's current values for any branding field the campaign hasn't set directly itself. This is a live link: if you edit the preset later (new color, new logo, a different message), every campaign still linked to it — and not overriding that specific field — picks up the change immediately.
The Customize Partner Experience Dialog's Brand Presets Menu
Open Customize on a campaign, then the Brand presets dropdown at the bottom of the dialog:
- Selecting a preset fills the dialog's fields with its values — if the campaign already has any custom branding set, you're asked to confirm the overwrite first. This only fills the form; click Save to actually apply it to the campaign.
- Save as new preset snapshots the campaign's currently-saved branding into a new preset. It reflects what's already saved, not unsaved edits sitting in the dialog — the option is disabled while there are unsaved changes, so save those first, then reopen the dialog to snapshot them.
Applying a preset this way copies its values into the campaign once. The campaign is not linked to the preset afterward — later edits to the preset won't touch this campaign.
Two ways to apply, two behaviors
The Brand preset dropdown on create/edit links the campaign live — preset edits keep applying. The Brand presets menu inside Customize Partner Experience copies values once — the campaign is independent afterward.
Editing Or Deleting An In-Use Preset
Editing a preset used via the Brand preset dropdown changes what those linked campaigns show, for any field they haven't overridden — see above.
Deleting a preset that's linked to campaigns unlinks each of them instead of blocking the delete. Those campaigns aren't affected otherwise — any branding fields they'd set directly stay as-is. Only fields they were inheriting live from the deleted preset revert to blank/default.
Last updated on